B
ACDEFGSERVICE
37
E11 Operating the Appliance
Turn on the fire by pressing the “ ” power button the remote and within a few seconds the
appliance will begin its startup sequence, with a 15 second purge of the flue fan. After purge
it will arc. It may take a few attempts to light the first time due to air in the gas line. You may
wish to purge the gas line at the valve by bleeding the first test point. This requires a small blade
screwdriver.
Once the fire has lit the pilot and main burner you will be able to measure the operating pressure.
Set the remote temperature to 30deg by pressing the “+” button. This will allow maximum gas
flow into the appliance.
Press the “ ” power button again to shut down the fire.
Once the fire is cool, re-insert the 14 engine screws and ensure that the burners and fuelbed tray
are back in position. If removed, put the inspection panel back on as well.
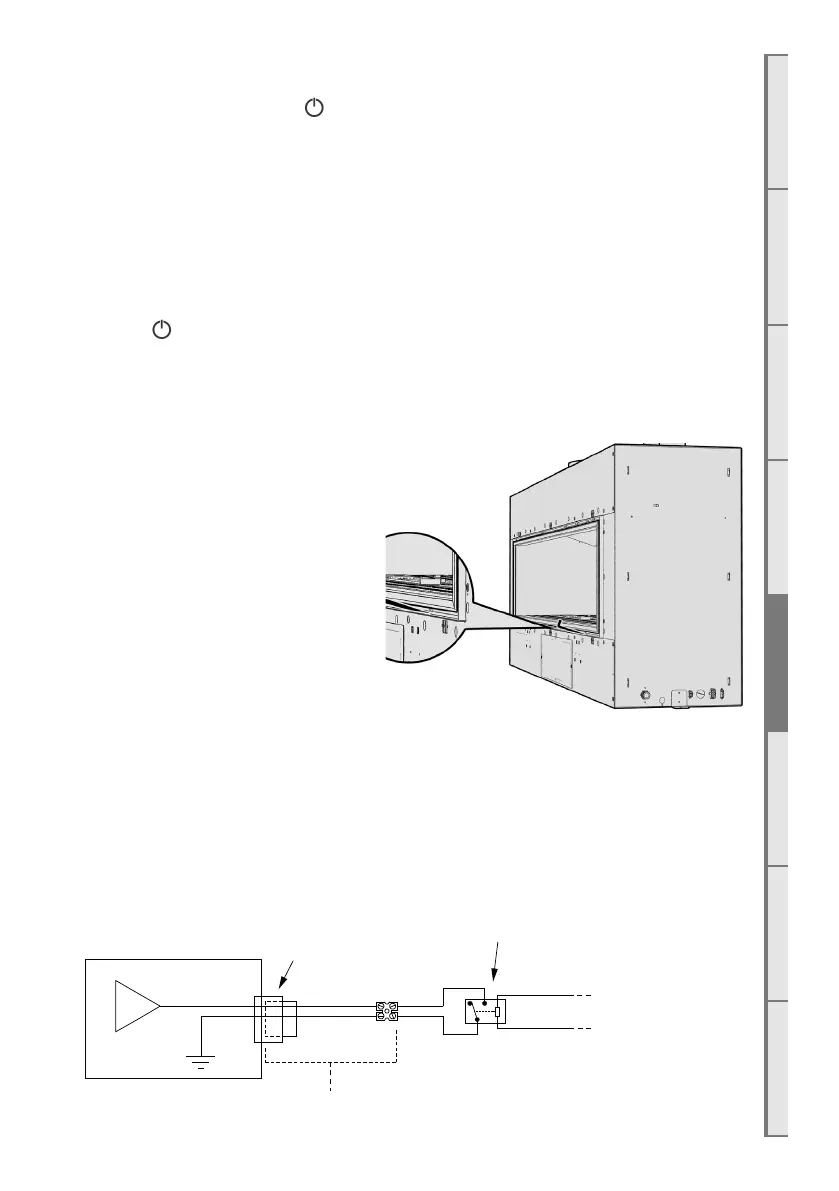
E12 Auxillary On/O button
The auxillary on/o button is used to
turn the fireplace on without the remote
control, and also used for “teaching” the
fireplace to listen for new remote controls.
For information on teaching a new remote
control, see section S5 on page 51 of the
service manual at the end of this document.
The auxillary On/O button is accessed by
using an allen-key or thin object to poke
through in the location shown to the right.
E13 Home Automation Setup
Escea D-Series fireplaces have a simple interface for connection to a home automation system.
This allows the fireplace to be woken up, started, and then shut down. The “Close to Wake”
connection (shown below) is essentially taking one of the 3.3 volt DC pins on the fireplace
microcontroller and shorting it to ground.
In order to isolate the fireplace from the automation system, a relay needs to be used (as shown).
This allows you to keep the fireplace’s 3.3V supply isolated.
µ
Terminal block
Connector
on fireplace
Fireplace
Connector and terminal
+3.3VDC
From
Automation system
Required relay