B
A C D E F G SERVICE
40
NOTE: Improper positioning of any fuelbed media may create carbon build-up and will alter the
unit’s performance. Malfunctioning due to improper fuel media placement will not be covered under
warranty.
F3 Replace the Glass
Reinstall the glass and retainer frame, being careful that the glass does not fall from the frame.
Tighten the bolts around the outside of the glass retainer until securely fitted.
Do not over-tighten the glass retainer bolts.
NOTE: If there is any residue left on the glass from the plastic wrap packaging
of the replace, it must be cleaned using any standard glass cleaner prior to
operation.
NOTE: If the glass gasket requires a replacement, call your nearest Escea agent, who will ensure the
part is replaced with the correct type. In the event that the glass is broken by impact, purchase the
replacement from an authorised Escea agent only.
Confirm the appliance is working correctly by lighting it 2 or 3 times to ensure correct operation
and smooth ignition. Also confirm that both the flue and the room duct fans are running
correctly.
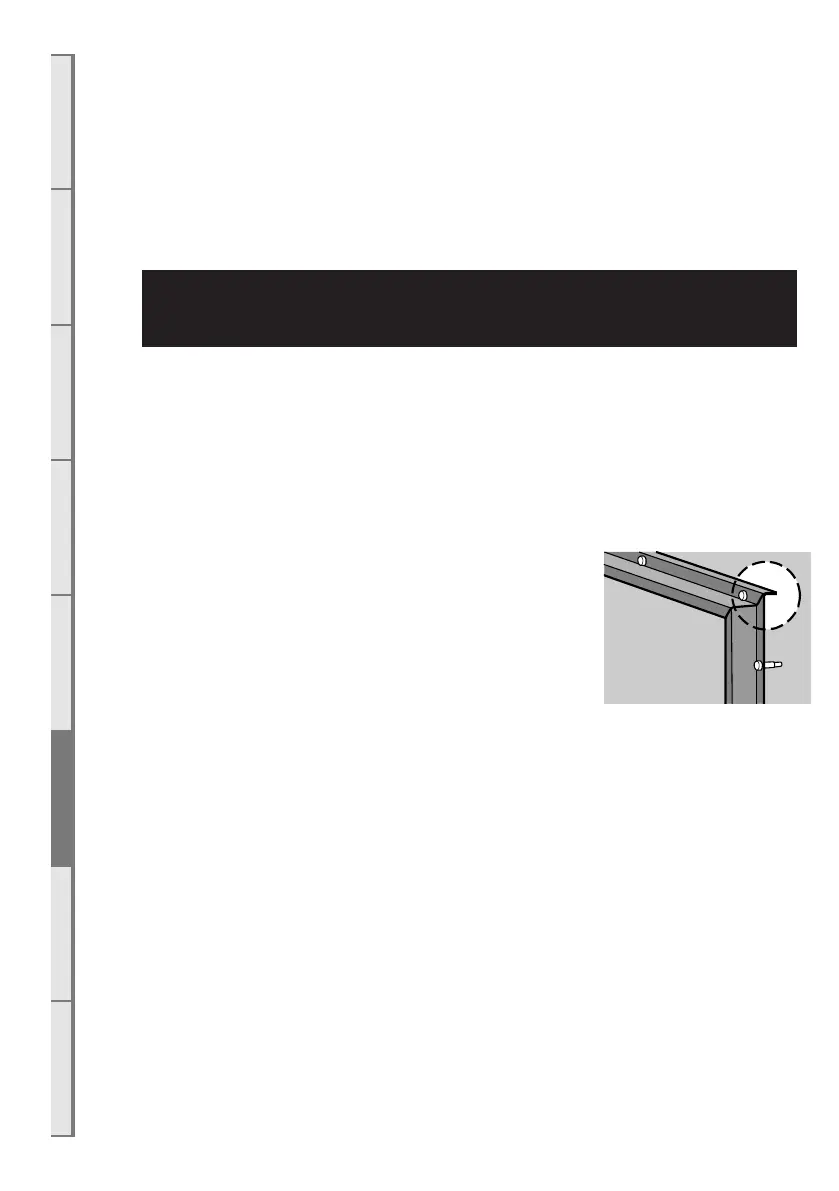
NOTE WHEN REPLACING THE GLASS
When replacing the glass, note that the metal flange shown to
the right must be on top or the glass will not fit correctly to the
fireplace.
F4 Wall Lining
Commence with the final wall linings only after the above sections are completed.
The appliance and all corresponding ducting needs to be adequately covered (both sides if
double sided) to prevent plasterboard and building dust from entering the ducting system during
completion of the wall lining.
Wall lining cutout dimensions around the glass must be adhered to.
Please refer to section “B8 Mantle Clearance” on page 13 for wall finishing dimensions
surrounding glass.
Ensure the air inlet gap surrounding the glass is maintained. The glass frames must still be able to
be removed after wall linings installed.