IP Server 900 Programming Manual Function 4: Auto attendant programming
G.7
Function 43: Automatic day/night tables
You program the day/night mode table by selecting the day of the week, then entering the start time, and then
selecting the mode — day, night, day2 or night2.
1
At the time you’ve programmed, the appropriate greeting for
that mode will play and the system will follow the appropriate day or night forwarding. Day forwarding is the same
for both day mode and day2 mode; night forwarding is the same for both night mode and night2 mode. Enter the
times in military time (0000–2359). Each day can have up to six different times.
1. Enter the tenant number.
2
2. Select the day of the week by pressing a scroll key (either or ).
3. Press # to confirm.
4. Enter the day’s start time in 24-hour format.
5. Press # to confirm.
6. Select the mode — DAY, NIGHT, DAY2 or NIGHT2 — by pressing a scroll key (either or ).
7. Press # to confirm.
8. Repeat steps 4–7 for the day’s next setting or press # again to program another day.
9. When finished, press # again to exit.
Note: To delete an entry, press HOLD.
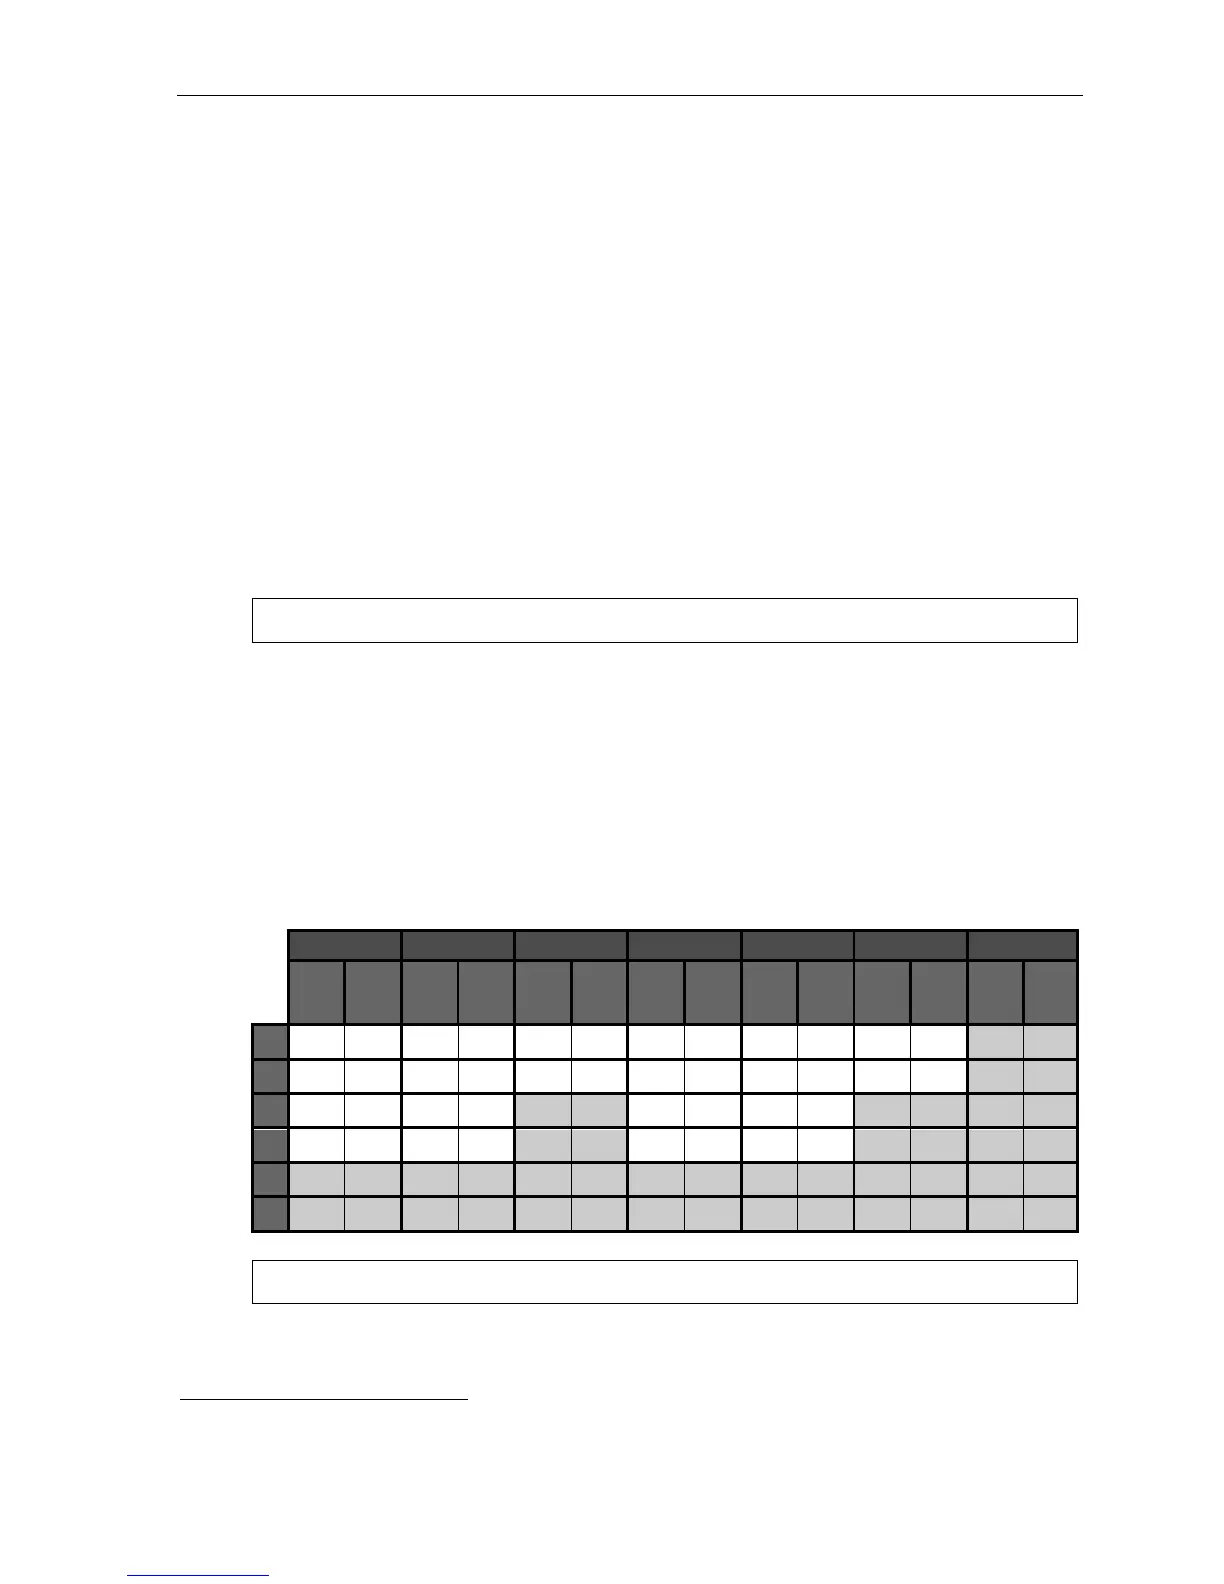
Day/night mode worksheet example
In the example below, the company or tenant has:
• Day mode programmed for: 8 AM to 12 noon Monday, Tuesday, Thursday, and Friday; 8 AM to 2 PM
Wednesday and Saturday; and 1 PM to 5 PM Monday, Tuesday, Thursday, and Friday.
• Night mode programmed for after 5 PM Monday, Tuesday, Thursday, and Friday.
• Night2 mode for Wednesday and Saturday after 2 PM and all day Sunday.
• Day2 mode for lunchtime Monday, Tuesday, Thursday and Friday.
Tenant 1
MON TUE WED THU FRI SAT SUN
Start
time
Mode
Start
time
Mode
Start
time
Mode
Start
time
Mode
Start
time
Mode
Start
time
Mode
Start
time
Mode
1
0800 D 0800 D 0800 D 0800 D 0800 D 0800 D
2
1200 D2 1200 D2 1400 N2 1200 D2 1200 D2 1400 N2
3
1300 D 1300 D 1300 D 1300 D
4
1700 N 1700 N 1700 N 1700 N
5
6
Note: For the schedule to take effect, the system must be placed in the “auto” mode.
1
Available only on branches ID1–ID8.
2
Applies only if Function 169 (tenant service) is enabled.