IP Server 900 Programming Manual Function 3: Station programming
F.19
4. IP address — Enter the IP address that the phone will be using at its remote site.
Note: This information will have to be obtained in advance of programming the phone.
Enter this address in dotted-quad notation (for example, 192.168.1.3) using the # key as the
period between octets. The remote IP phone must be on the same subnet as the LAN interface
of the gateway device (cable modem, router, etc). For instance, if the LAN interface’s IP address is
192.168.210.1, and its subnet mask is 255.255.255.0, the first three octets of the phone’s
address must be 192.168.210, and its last octet between 2 and 254.
5. Subnet mask — Enter the valid subnet mask of the gateway device to which the remote IP
phone will be connected.
Range: 128.0.0.0 through 255.255.255.252. Default: 255.255.0.0.
6. Gateway address — Enter the IP address of the remote IP phone’s default gateway — that is,
the LAN interface of the gateway device at the remote site. The phone must be on the same
subnet as the LAN interface of the remote gateway.
7. UDP port — Enter the remote IP phone’s UDP port. The UDP port for the remote IP phone
doesn’t have to be the same as for the IP PBX (as programmed in Function 81). The UDP port
for the phone must be one that the remote WAN gateway can program as “open” and must not
be already assigned to another device at the remote site. The remote gateway will then have to
be programmed to recognize that traffic destined for that UDP port should be allowed to pass
through its security system.
If the remote gateway can’t open the UDP port, or if that port is already open but designated for
another device, the Installer can choose any other UDP number, 10000–65000, inclusive.
8. Remote-access IP address — Enter the IP address that will be used for remote access to the
IP Server 900. The display will default to the IP address entered in Function 82 (see page L.2). If
a remote IP phone will use this address to connect to the system, press # to confirm; if a remote
IP phone will use an alternate IP address to connect to the system, enter that address and press
# to confirm. “SAVE PARAMETERS?” will appear on the display. If you have
correctly entered the IP addressing parameters (items 1–7), press # to program the parameters
for any remote IP phone; to abort programming, press to restore the system parameters to
their previously set values.
9. Extension name — Used for the display, reports, and as a programming aid. The name’s
length can be no longer than 10 characters (See “Entering alphanumeric characters,” page C.2).
Default: The extension number.
10. Caller ID — Used for outgoing calls to identify the extension and for callback to the specific
extension or another nearby extension. Each entry must be valid and 10 digits in length.
Default: Blank.
11. Tenant — Assign the extension to a tenant. This is used to direct-dial operator (0) calls to the tenant’s
operator destination; it’s also used to play the tenant’s MOH source when calls are placed on hold.
Note: To view and assign tenant, tenant service must be enabled in Function 169.
Default: 1.
12. CO line group — Assigns the extension’s ability to access one or more CO line groups
(9, 8, and 71–76).
Default: 9.
13. and 14. Call forward busy/no answer — The extension can be set to call forward busy/no
answer to another extension (or department), a mailbox or a branch ID for day mode and
differently for night mode.
Default: The extension’s mailbox.
15. Extension page zone assignment.
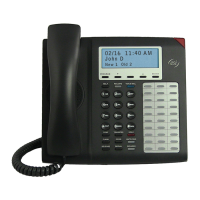
Note: You also can use Esi-Address to program address parameters into a remotely installed ESI
desktop IP phone or an ESI Remote IP Cordless Handset (but not VIP 7 Softphone).