Chapter 4. API Guides
Eclipse
Note: It is recommended to first check if debugger works using idf.py debug targets or from Command Line and
then move to using Eclipse.
Debugging functionality is provided out of box in standard Eclipse installation. Another option is to use pluggins like
“GDB Hardware Debugging”plugin. We have found this plugin quite convenient and decided to use throughout this
guide.
To begin with, install “GDB Hardware Debugging”plugin by opening Eclipse and going to Help > Install New
Software.
Once installation is complete, configure debugging session following steps below. Please note that some of configu-
ration parameters are generic and some are project specific. This will be shown below by configuring debugging for
“blink”example project. If not done already, add this project to Eclipse workspace following guidance in section
Build and Flash with Eclipse IDE. The source of get-started/blink application is available in examples directory of
ESP-IDF repository.
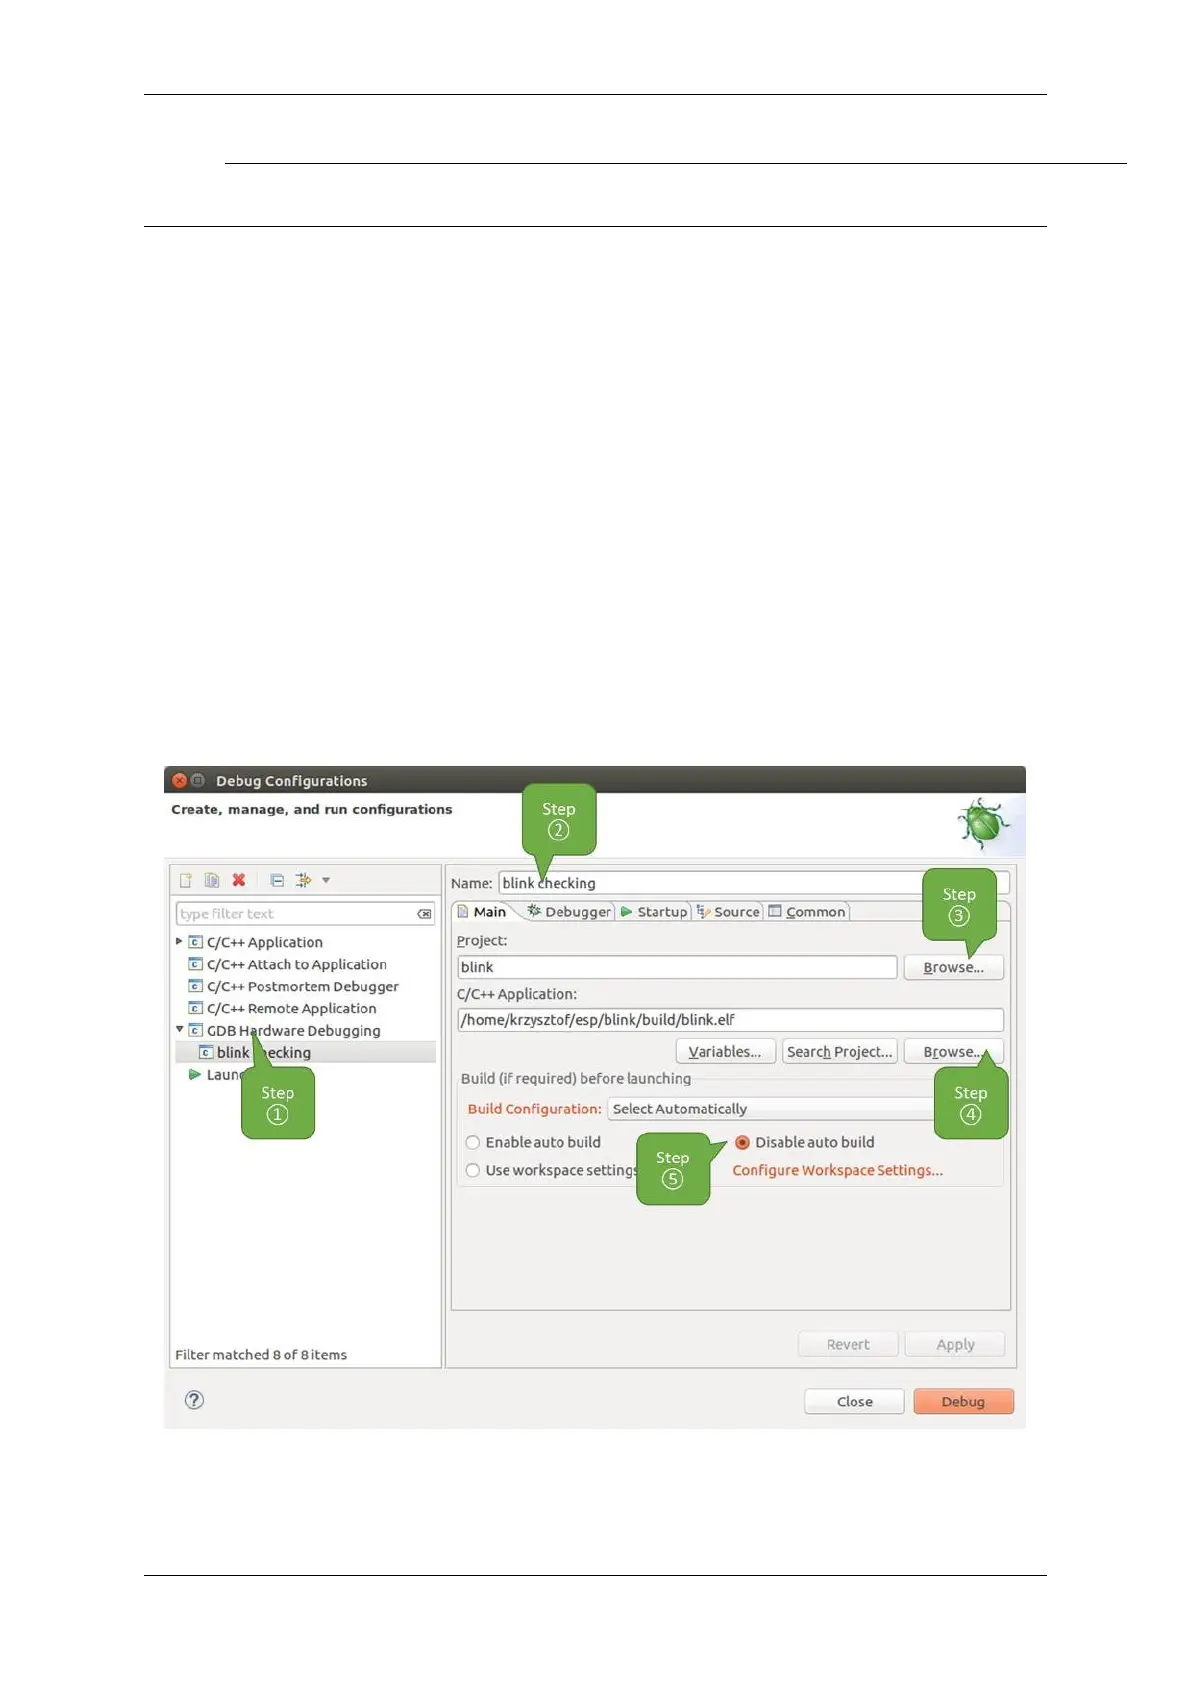
1. In Eclipse go to Run > Debug Configuration. A new window will open. In the window’s left pane double
click “GDB Hardware Debugging”(or select “GDB Hardware Debugging”and press the “New”button)
to create a new configuration.
2. In a form that will show up on the right, enter the “Name:”of this configuration, e.g. “Blink checking”.
3. On the “Main”tab below, under “Project:”, press “Browse”button and select the “blink”project.
4. In next line “C/C++ Application:”press “Browse”button and select “blink.elf”file. If “blink.elf”is
not there, then likely this project has not been build yet. See Build and Flash with Eclipse IDE how to do it.
5. Finally, under “Build (if required) before launching”click “Disable auto build”.
A sample window with settings entered in points 1 - 5 is shown below.
Fig. 22: Configuration of GDB Hardware Debugging - Main tab
6. Click“Debugger”tab. In field“GDB Command”enter xtensa-esp32s2-elf-gdb to invoke debugger.
Espressif Systems 1387
Submit Document Feedback
Release v4.4