Chapter 1. Get Started
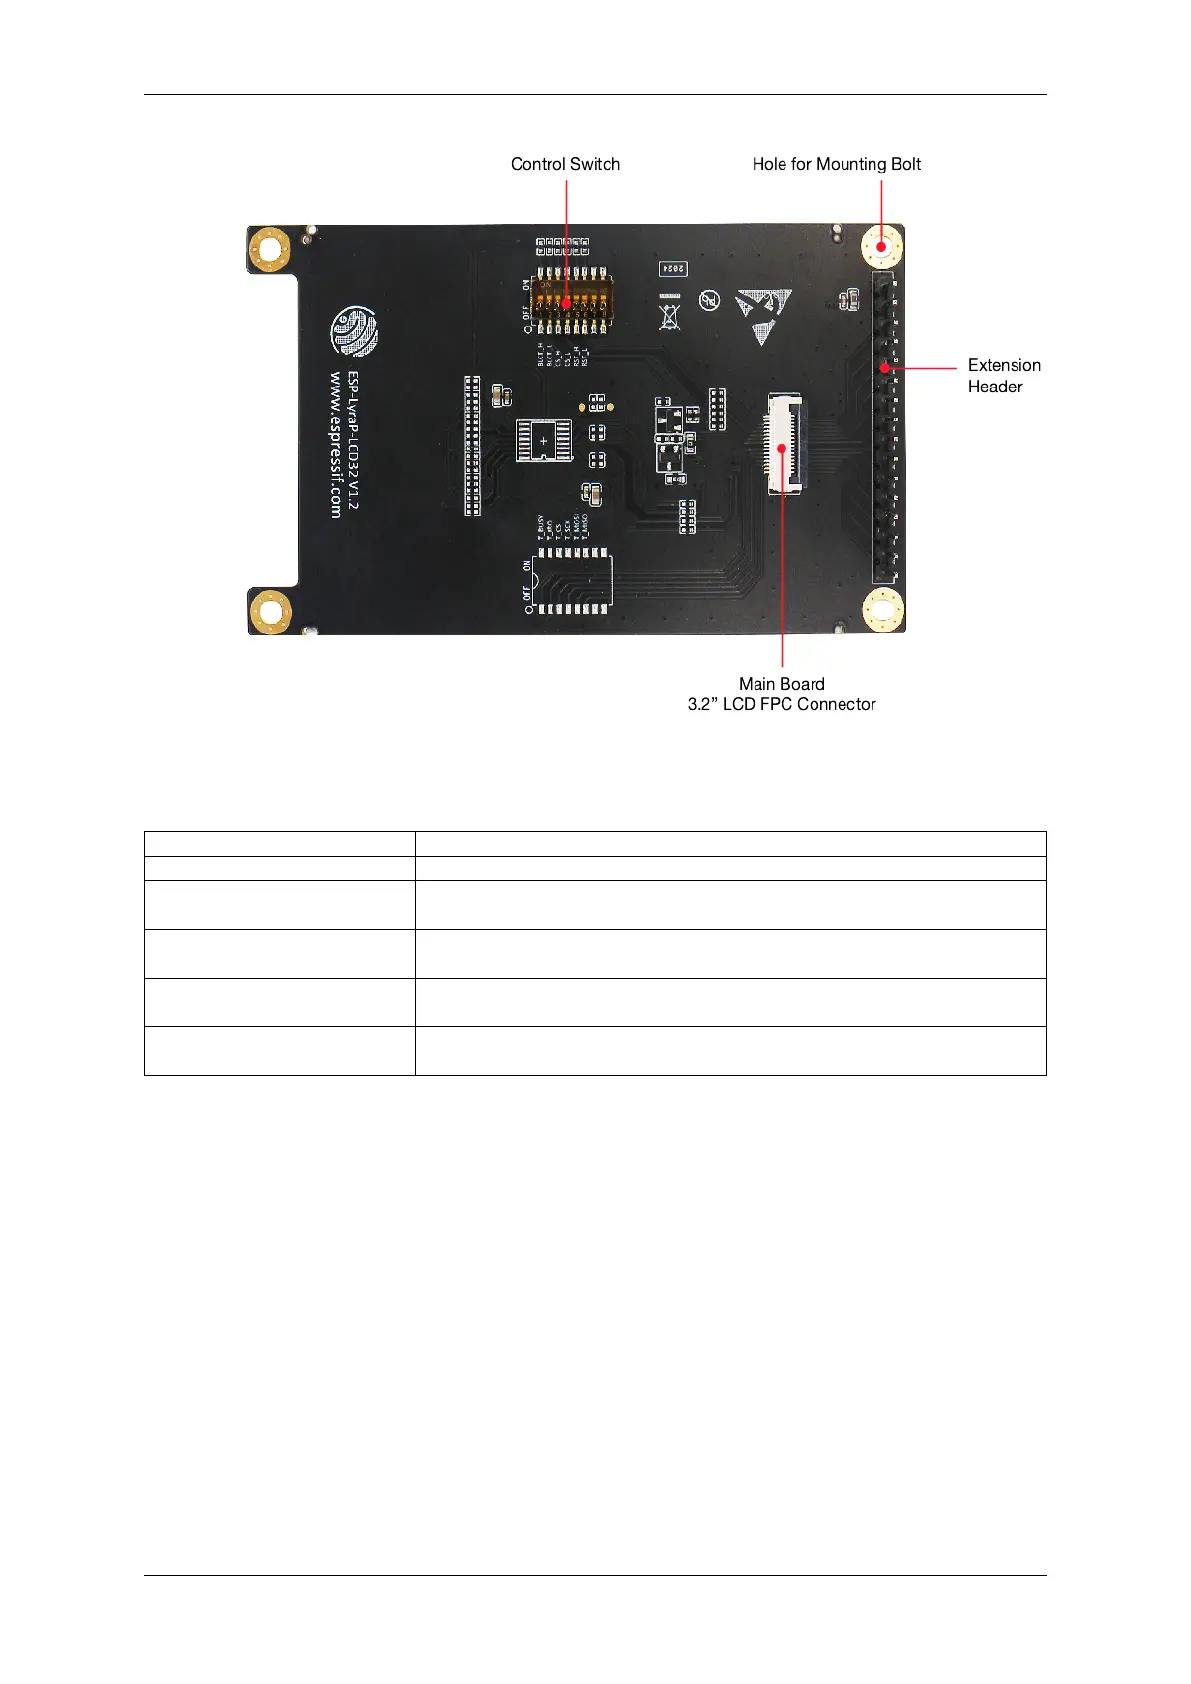
Fig. 41: ESP-LyraP-LCD32 - back (click to enlarge)
Key Component Description
Extension Header Male Extension Header for mounting onto a female Extension Header
LCD Display This version has a 3.2”320x240 SPI LCD display module; the display
driver/controller is either Sitronix ST7789V or Ilitek ILI9341
Touch Screen Switch No support for touch screens, keep the switches to OFF to make the pins avail-
able for other uses
Main Board 3.2”LCD FPC
Connector
(Reserved) Connect to main board’s 3.2”LCD FPC connector
Control Switch Switch to ON to set Reset/Backlight_control/CS to default high or low; switch
to OFF to make the pins available for other uses
Start Application Development Before powering up your ESP-LyraP-LCD32, please make sure that it is in good
condition with no obvious signs of damage.
Required Hardware
• Board with a female Extension Header (e.g., ESP32-S2-Kaluga-1, ESP-LyraT-8311A)
• ESP-LyraP-LCD32 extension board
• Four mounting bolts (for stable mounting)
• Computer running Windows, Linux, or macOS
Hardware Setup To mount your ESP-LyraP-LCD32 onto the board with a female Extension Header:
1. Install the four mounting bolts onto the board with a female Extension Header
2. Align the ESP-LyraP-LCD32 with the bolts and Extension Header and insert it carefully
Software Setup See Section Software Setup of the ESP32-S2-Kaluga-1 kit user guide.
Espressif Systems 49
Submit Document Feedback
Release v4.4