2 Setup 23
Patch Devices
There are 24 device channels that can be patched to two DMX universes (1024 outputs).
Each device can have a DMX footprint of up to 48 outputs.
There is no default patch since every moving light or DMX device requires a specific pre-
built patching personality (see below).
We recommend that you patch all your devices at the same time, to avoid problems with
overlapping addresses. Many fixtures offer different modes of operation which can change
the amount and order of DMX addresses the fixture uses. You must know the mode of the
fixture before patching it to ensure reliable and predictable operation. Consult the user
manual of your fixtures and devices before patching them if you are unsure which mode to
use.
Patching devices is simple and is performed in the LCD menu.
Device Personalities
The console contains about 500 standard device personalities. A separate file that you can
download from www.etcconnect.com called PERSLIB.BIN may be placed on an SD card
and browsed on the console, or in the simulator in SmartSoft, and this contains over 3000
more personalities.
New personalities will be distributed in this file allowing SmartFade ML to support an
unlimited number of devices. You may load up to 100 personalities from the file into the
console. See “Load Personalities from Card” on page 8.
Patch Multiple Devices
There is a patch wizard that makes it really easy to patch one or more devices.
Step 1: Open the Patch Wizard:
Menu>Patch>Patch Devices>[Patch Wizard]
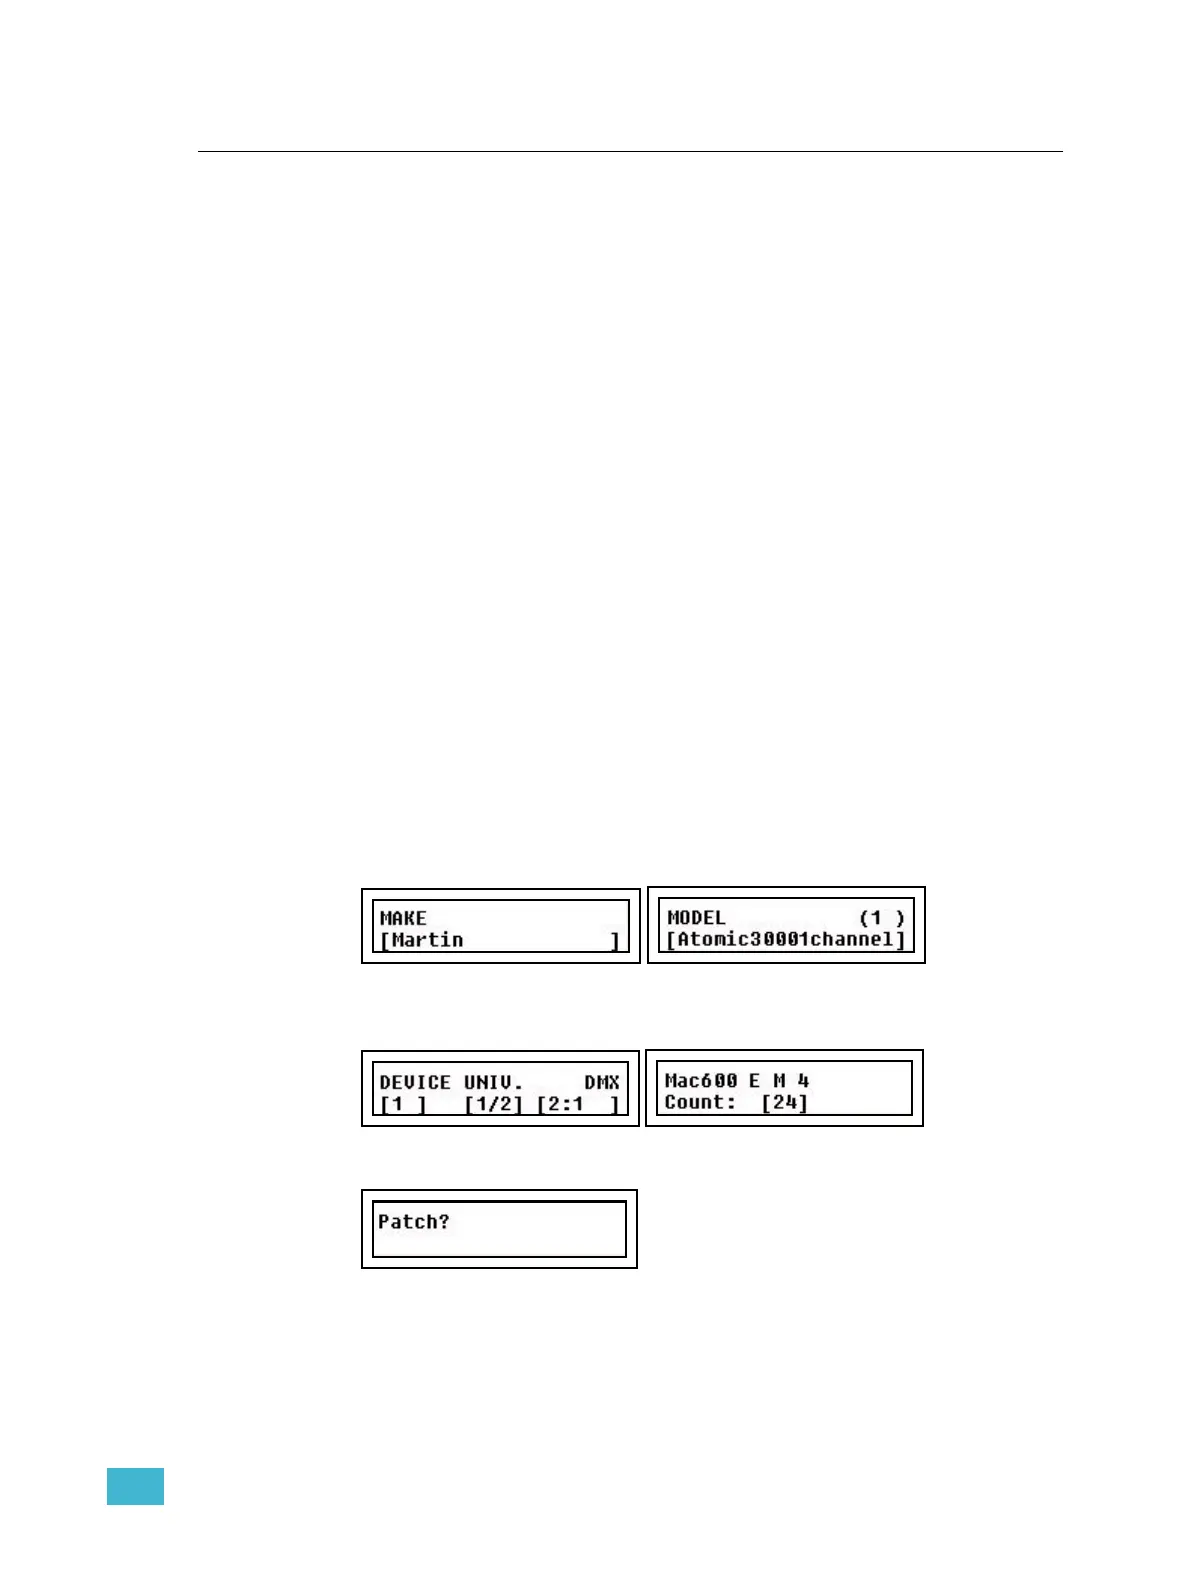
Step 2: Select MAKE and MODEL for the device you wish to patch.
Press (MENU) to confirm.
Step 3: Now use the wheels from left to right to select starting device, DMX address and
number of devices. Press MORE to toggle between DMX universe 1/2.
Press (MENU) to confirm.
Step 4: You will get a confirmation request.
Press (MENU) to confirm.
Step 5: Done. Exit the menus or continue patching from Step 2.