5700MSC-IP
IP Network Grand Master Clock & Video Master Clock System
Revision 0.2 Page - 9
1.1.8. Checking the Status of the Unit
After the input references are connected and set up, the status of the unit can be checked by pressing
the STATUS button on the front panel. There are several different status screens which can be
selected by using the control knob or the and buttons. The status of the frequency and time
references can be viewed by choosing the Lock status screen and pressing SELECT. Press ESC to
return to the status menu to select another screen for viewing. Any screen name that is highlighted with
a red or yellow background indicates that one of the statuses in that screen is in a fault or warning
condition.
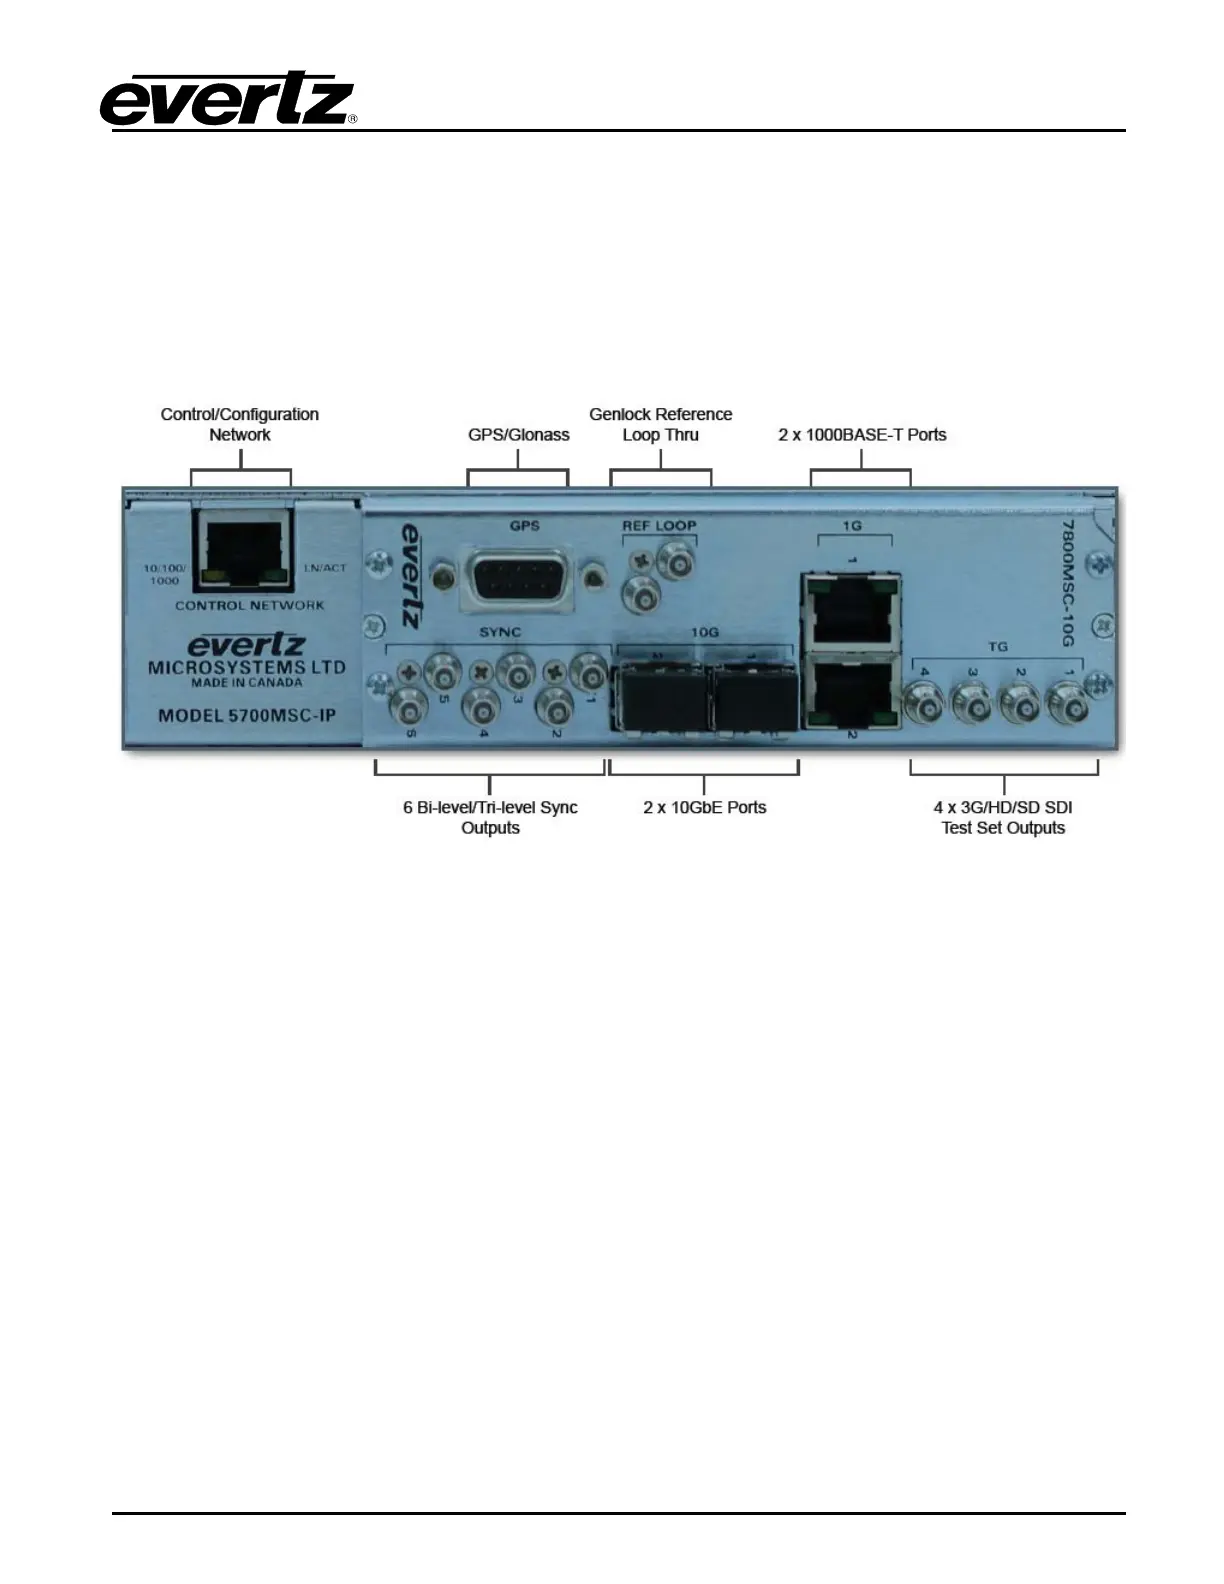
Figure 1-6: 5700MSC-IP Rear Panel View
1.1.9. Wiring the Outputs
Most outputs are provided as HD-BNC connectors and wiring is straightforward. The GigE 1 and GigE
2 ports use a standard RJ-45 connector, and the 10GbE ports require an SFP10G-TR13-A (not
included).
1.1.10. Configuring the Sync Outputs
The sync outputs of the 5700MSC-IP are configured in the OUTPUT menu, accessed by pressing the
OUTPUT button. All sync outputs are derived from the master oscillator and will be locked in frequency
and phase. The sync outputs are all programmable to output several different sync types and can be
phased independently from each other.
In the OUTPUT menu, the sync outputs are configured using the SYNC 1 to SYNC 6 sub-menus.
Each sync output can set to output any number of black burst or HD tri-level standards. They are all
phased independently. When configuring a sync output, the mode must be selected first. By default,
the mode of all sync outputs are set to NTSC-M black burst for North American units, and PAL-B black
burst for European units. Configure the mode of each sync output to the format desired for the
installation. Note that with +AUX option, the 10MHz and WC outputs may also be configured as sync
outputs.
There are numerous other configuration settings for each sync output, some may be disabled (dark
text) or enabled (white text) depending on the output mode selected. Scroll over each of the available
menu items and press the HELP button for more information on the function of each menu item.