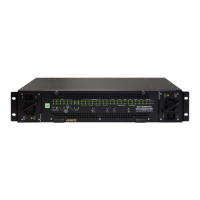
5700MSC-IP
IP Network Grand Master Clock & Video Master Clock System
Revision 0.2 Page - 3
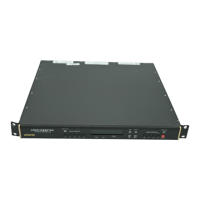
Automatic Changeover Option:
• 5700ACO Automatic changeover unit (5700ACO) provides automatic survivability
changeover for baseband signals (video reference,wordclock, 10Mhz,
LTC, DARS, and SDI test generators)
1.1. QUICK START GUIDE
This section discusses the major steps in getting a new installation of a 5700MSC-IP up and running.
1.1.1. Mounting and Power Connections
The 5700MSC-IP chassis holds the main board, one power supply, and one fan module. Dual power
supplies are an available option in which case a second power supply replaces the fan module. The
chassis has built-in rack mounting ears and fits in a standard 19” rack. Two fans on each side cool the
unit. Clearance of 2” (5cm) must be maintained around the fan exhausts on either side of the chassis.
The power supply operates from an AC line frequency of 50Hz to 60Hz, at 100V-240V (auto-sensing).
The fan module runs off of the single power supply. The power consumption of a 5700MSC-IP is 125
Watts with all options installed.
If dual power supplies are fitted, they should both be supplied with AC power. Each power supply has
its own IEC C14 AC power inlet. The inlets are isolated from each other and can be powered by the
same AC power source but ideally should be powered from different AC sources for true redundancy.
If both supplies are not powered, the unpowered supply will trigger a system fault. A redundant power
supply may be added at any time to a unit by removing the fan module and installing the second power
supply.
The fan module is hot swappable and the power supplies are hot swappable when configured with
dual power supplies. The fan module and power supplies can accessed from the front of the unit by
removing the front panel. Each power supply and fan module has a Phillips mounting screw at the
front that can be used to secure the module in order to prevent accidental removal.
1.1.2. Front Panel Installation
The 5700MSC-IP comes with a removable front panel that is equipped with two color LCD screens,
along with 10 pushbuttons, and a control knob for navigating the menu system and configuring the
unit. The front panel is secured by the two thumbscrews on either end. The front panel can be
removed and re-installed while the unit is running to provide access to the power supplies and for
troubleshooting purposes. When re-installing the front panel be sure to fully tighten the thumb screws.
Note: Care should be taken when handling the front panel to not inadvertently
disconnect the ribbon cable connection on the 7800MSC-IP card or the 5700-AUX
card.
When AC power is applied to the 5700MSC-IP and the power supplies are switched on, the unit will
start up automatically. The front panel should become operative within approximately 30 seconds.
1.1.3. Configuring the Ethernet Ports
The 5700MSC-IP chassis houses a 7801FC-IRD frame controller board and a 7800MSC-10G master
clock board. The 7800MSC-10G master clock board has five Ethernet interfaces. The two 1Gb/s and