13
AIR CLEANER
Clean every 3000KM᧤2000 miles᧥
If the air cleaner is clogged with dust, intake resistance will, be increased with a resultant decrease in power
output and an increase in fuel consumption. Check and clean the element in the following manner.
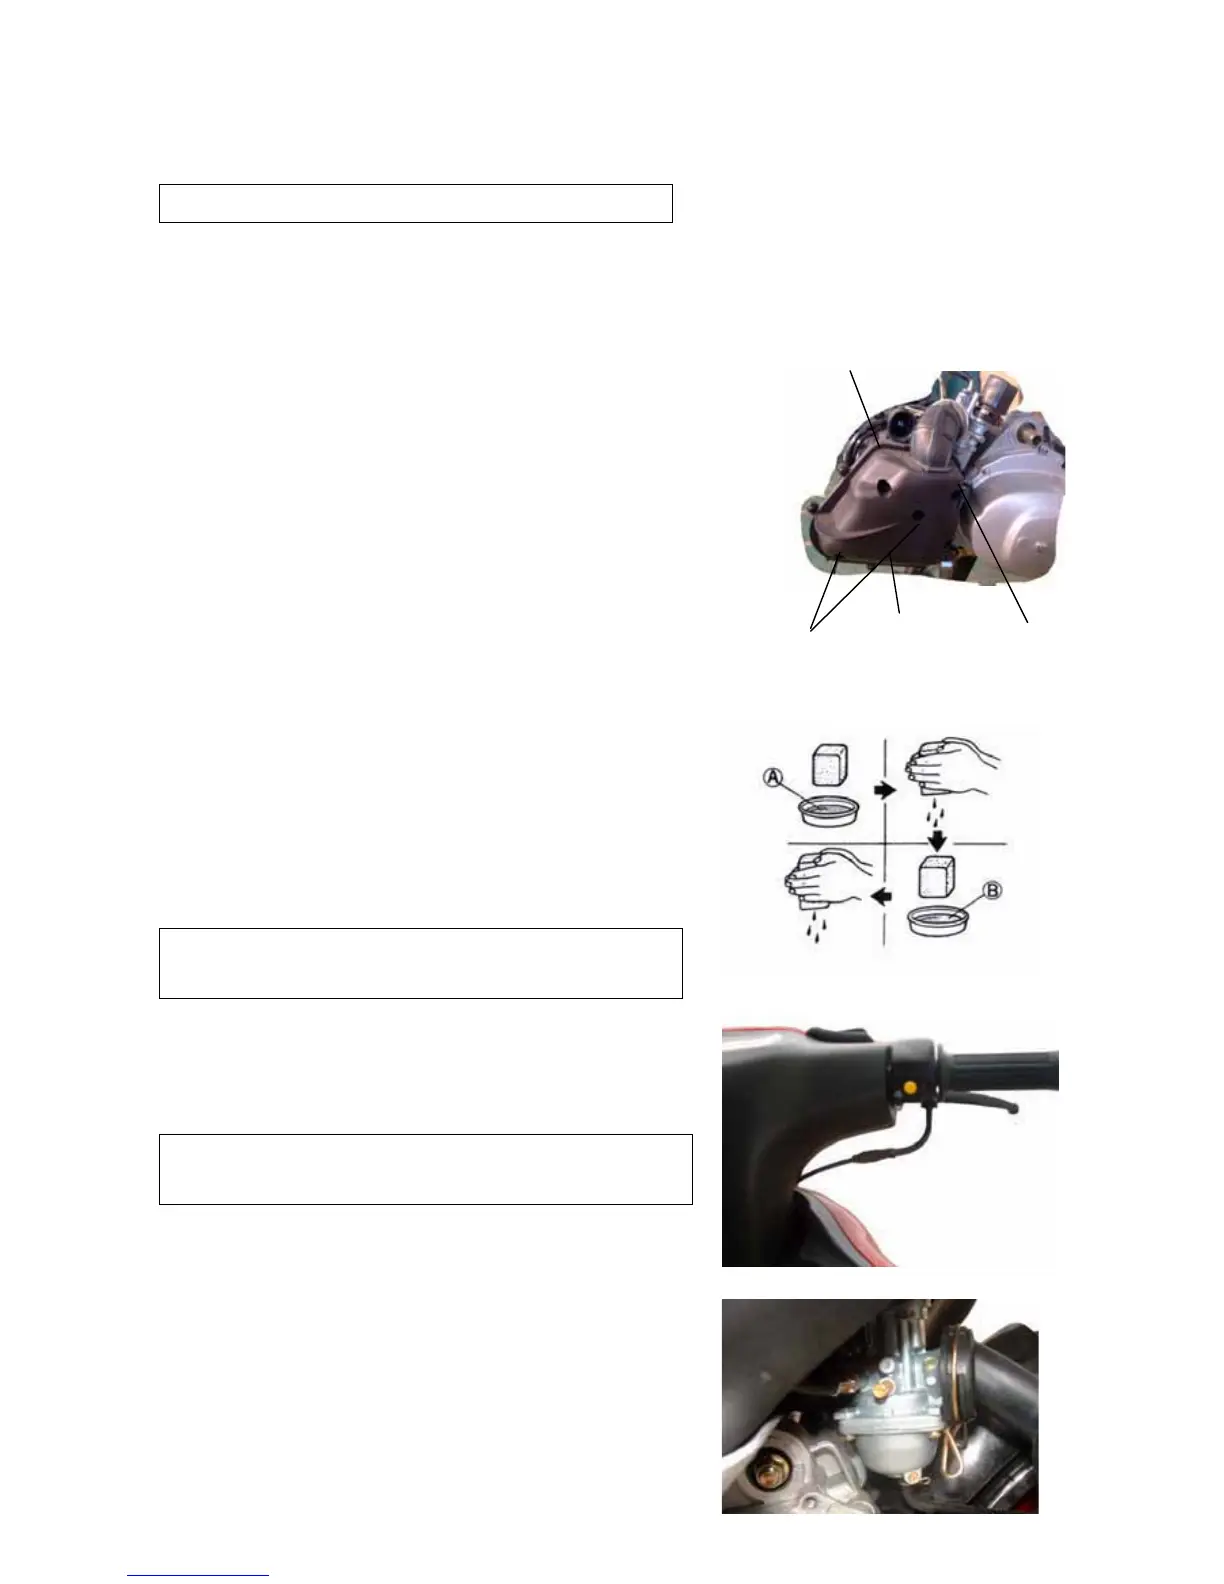
Remove clamp 1 and screw 2᧨take down air cleaner
Unscrew tapping screw 3᧨remove air cleaner cap 4
Fill a washing pan of a proper size with
Non-flammable cleaning solvent. Immerse the air
Cleaner in the cleaning solvent and wash them clean.
Squeeze the cleaning solvent out of the washed element
By pressing it between the palms of both hands: do not twist
or wring the air cleaner filter core element or it will develop tears.᧨
Immerse cleaned filter core of air cleaner
in CCI or CCI SUPER oil, and squeeze the oil out of
the core᧨which may be slightly wet with oil.
Install air cleaner filter core in the reverse
order of removal.
CAUTION᧶
Before and during the cleaning operation, inspect the core for tears. A tore core must be replaced
Be sure to position the filter core, so that no
incoming air will bypass it. Remember, rapid wear
of piston rings and cylinder bore is ofter caused by
defective or poorly fitted filter core.
Ⱥ Non-flammable cleaning solvent
Ȼ CCI or CCI SUPER oil
THROTTLE CABLE
Adjust at initially 1000KM᧤600 miles᧨2 months᧥᧨and
every 6000 km᧤4000 miles᧨12 months᧥
Loosen locknut ᧨and adjust throttle cable play by turning adjuster in or
out to obtain the following cable play. After adjusting the calbe play᧨
tighten the locknut.
Cable play᧶0.5-1.0MM᧤0.02.-0.040 inch᧥
Engine idle speed
Adjust at initially 1000KM᧤600 miles᧨2 months᧥ and every
6000 km᧤4000 miles᧨12 months᧥thereafter.
Adjust the throttle cable play.
warm up the engine.
Note᧶
Warm up engine for 10 minutes.
Connect an electric tachometer to the connecting protion of the
magneto lead wire as shown in the illustration. Use the selector key
“C’ position.