Room Scheduling System • Room Agent Installation and Configuration 29
3
Background image: (see figure 23 on the previous page) —
• Change Image... button — Click to open a dialog box to assign a background
image (see figure 53 and the following procedure).
• Remove button — Click to clear any assigned background image.
1111111111
1111
1111111111
1111
2222222222
2222
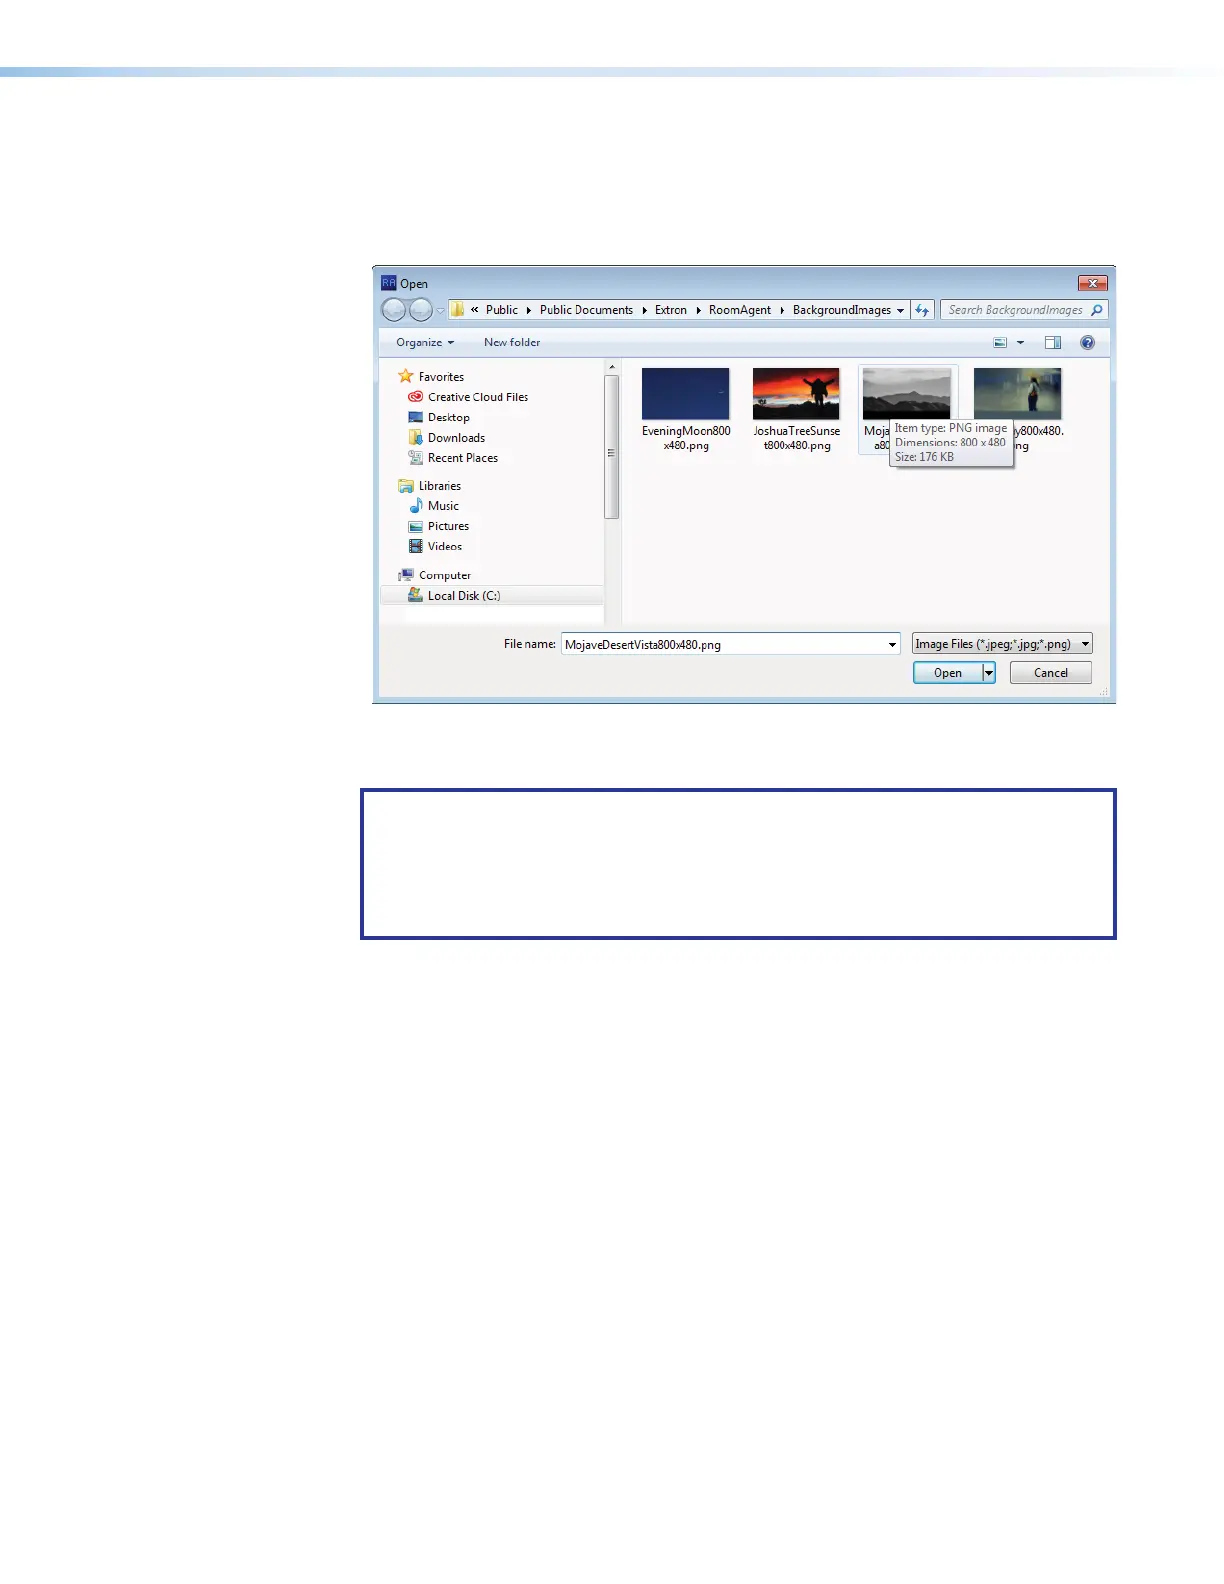
Figure 24. Open Dialog Box and Assign a Background Image
Assign or change a background image as follows:
NOTE: Room Agent software and the scheduling system support image files with
the following traits only:
• JPEG or PNG format
• 800x480 resolution
• 8-bit color
1. Click the Change Image... button (see figure 23,
3
on the previous page). The
Open dialog box opens.
2. Navigate to the folder where you saved the background image file. Select the file
(see figure 51,
1
).
3. Click Open (
2
). The Open dialog box closes and the newly assigned background
image is displayed in the preview pane.
4
Overlay Opacity (see figure 23) — Click and drag this fader control or type a value
directly in the field to set the opacity of any displayed background image.