Room Scheduling System • EMS Setup 53
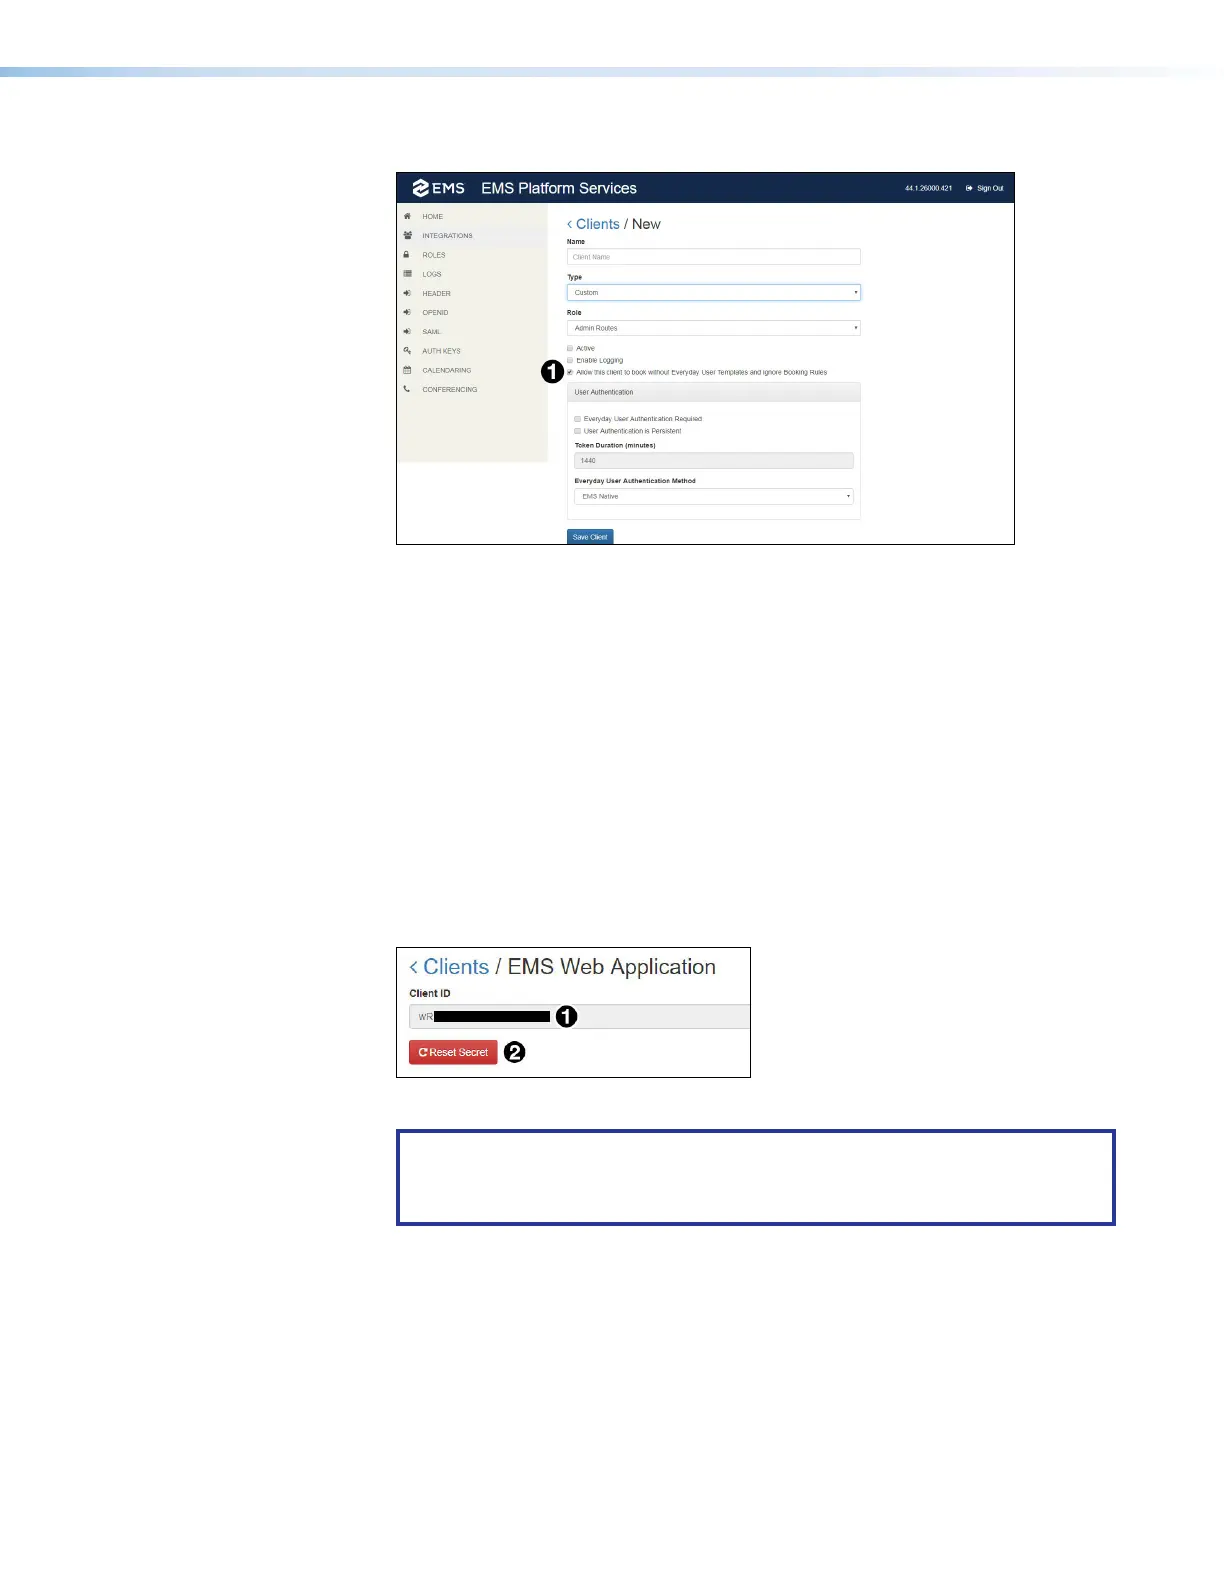
The Clients/New page opens:
Figure 56. EMS Clients/New Page
4. Configure the new client as recommended by your EMS representative.
How the client is configured depends on your requirements and is beyond the
scope of this guide. However, to allow touchpanels to make ad hoc bookings, you
must select Allow this client to book without Everyday User Templates
and ignore Booking Rules (see figure 49,
1
).
5. Click Save Client (
2
).
The Clients/New page closes and the EMS Web Clients page opens (see
figure 55 on page 52) with the new client listed.
6. Click the new client.
7. Whether you clicked on a new or existing client, the Clients/EMS Web
Application page opens.
The client ID listed (see figure 57,
1
) is the one required by Room Agent.
Figure 57. EMS Client ID
NOTES:
• Enter this ID in the Client ID field of the Panel Conguration tab.
• The ID is case sensitive.
step 7
figure 57