Maintenance, 10h
4812164601_C.pdf2023-01-05
Sprinkler system/Drum
Cleaning of sprinkler nozzle
3
2
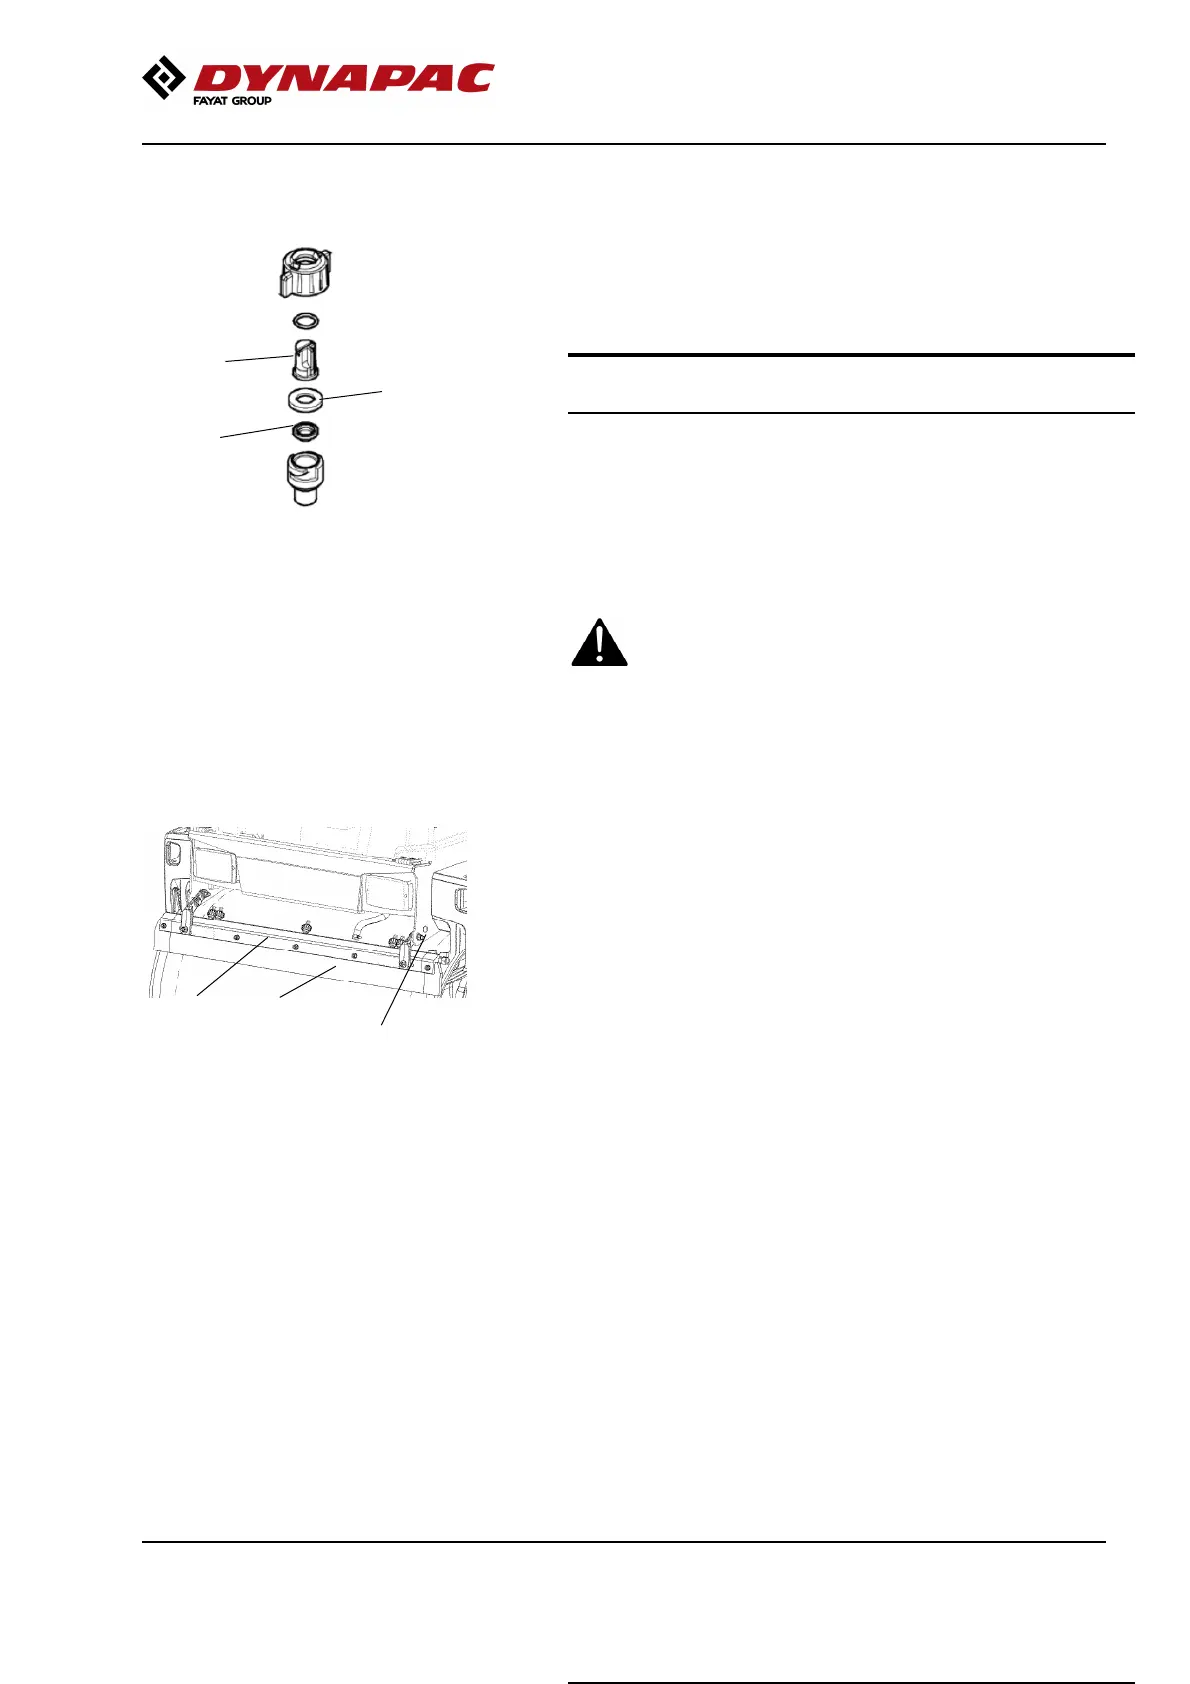
Fig. Nozzle
1. Nozzle
2. Gasket
3. Filter
1
Dismantle the blocked nozzle by hand.
Blow the nozzle (1) and fine filter (3) clean using
compressed air. Alternatively, fit replacement parts
and clean the blocked parts later on.
Nozzle Colour l/min (at 2.0
bar)
gal/min (at
40 psi)
Nozzle Colour l/min (at 2.0
bar)
gal/min (at
40 psi)
Standard yellow 0.63 0.20Standard yellow 0.63 0.20
Option blue 0.98 0.30Option blue 0.98 0.30
Option red 1.31 0.40Option red 1.31 0.40
Option brown 1.63 0.50Option brown 1.63 0.50
After inspecting and carrying out any necessary
cleaning, start the system and check that it works.
Wear protective goggles when working with
compressed air.
Wear protective goggles when working with
compressed air.
Scrapers, fixed
Checking - Setting
Fig. Drum
1. Scraper blade
2. Adjusting screws
3. Mounting plate
3
2
1
Make sure that the scrapers are undamaged. Adjust
the scrapers so that they are 1-2 mm from the drum.
For special asphalt compounds, it may be better if the
scraper blades (1) lie lightly against the drums.
Asphalt remnants can accumulate on the scraper and
affect the contact force. Clean as required.
Loosen the screws (2) to adjust the contact pressure
of the scraper blade against the drum.
Lock this setting by tightening the lock nut (2) against
the mounting plate (3).
Adjust the contact surface
on both scraper attachments.
Remember to tighten all the screws
after any adjustment.
127