OPERATION MT100 Multipoint Flow Meter
Using the Touchscreen Display
The MT100’s touchscreen display is a resistive type display that relies on deflection of screen layers to register an input. The touch response
of a resistive type display is different from the more sensitive capacitive type display that is commonly used in cellphones. For consistent
results operate the MT100 touchscreen by tapping firmly using the tip of your fingernail, or use a stylus made for touchscreen use.
Configuring the MT100
There are two ways to configure the MT100:
● HMI Front Panel Menu – Open the enclosure door and tap MENU on the HMI front panel display to access the instrument’s Service
menu. Refer to APPENDIX C, page 139 for an overall view of the menu structure. Note that the front panel menu provides a small
subset of the instrument’s settings, which makes the front panel menu an ideal tool for quick adjustments.
● MT100 Configuration Software application – The MT100 comes with software (PC only) that provides comprehensive programming
of the MT100 settings via a PC connection to the instrument’s USB or Ethernet service port (refer to Service Port Connection, USB &
Ethernet, page 31). Configure the MT100 to your application using the MT100 configuration software. Refer to the MT100
Configuration Software manual 06EN003461 for full instructions on the use of the application.
Make sure the MT100 is up and running
connecting to USB and/or launching the MT100 configuration
software application.
Data Logging
The MT100 can record process data on a microSD memory card.
Removing/Inserting Memory Card
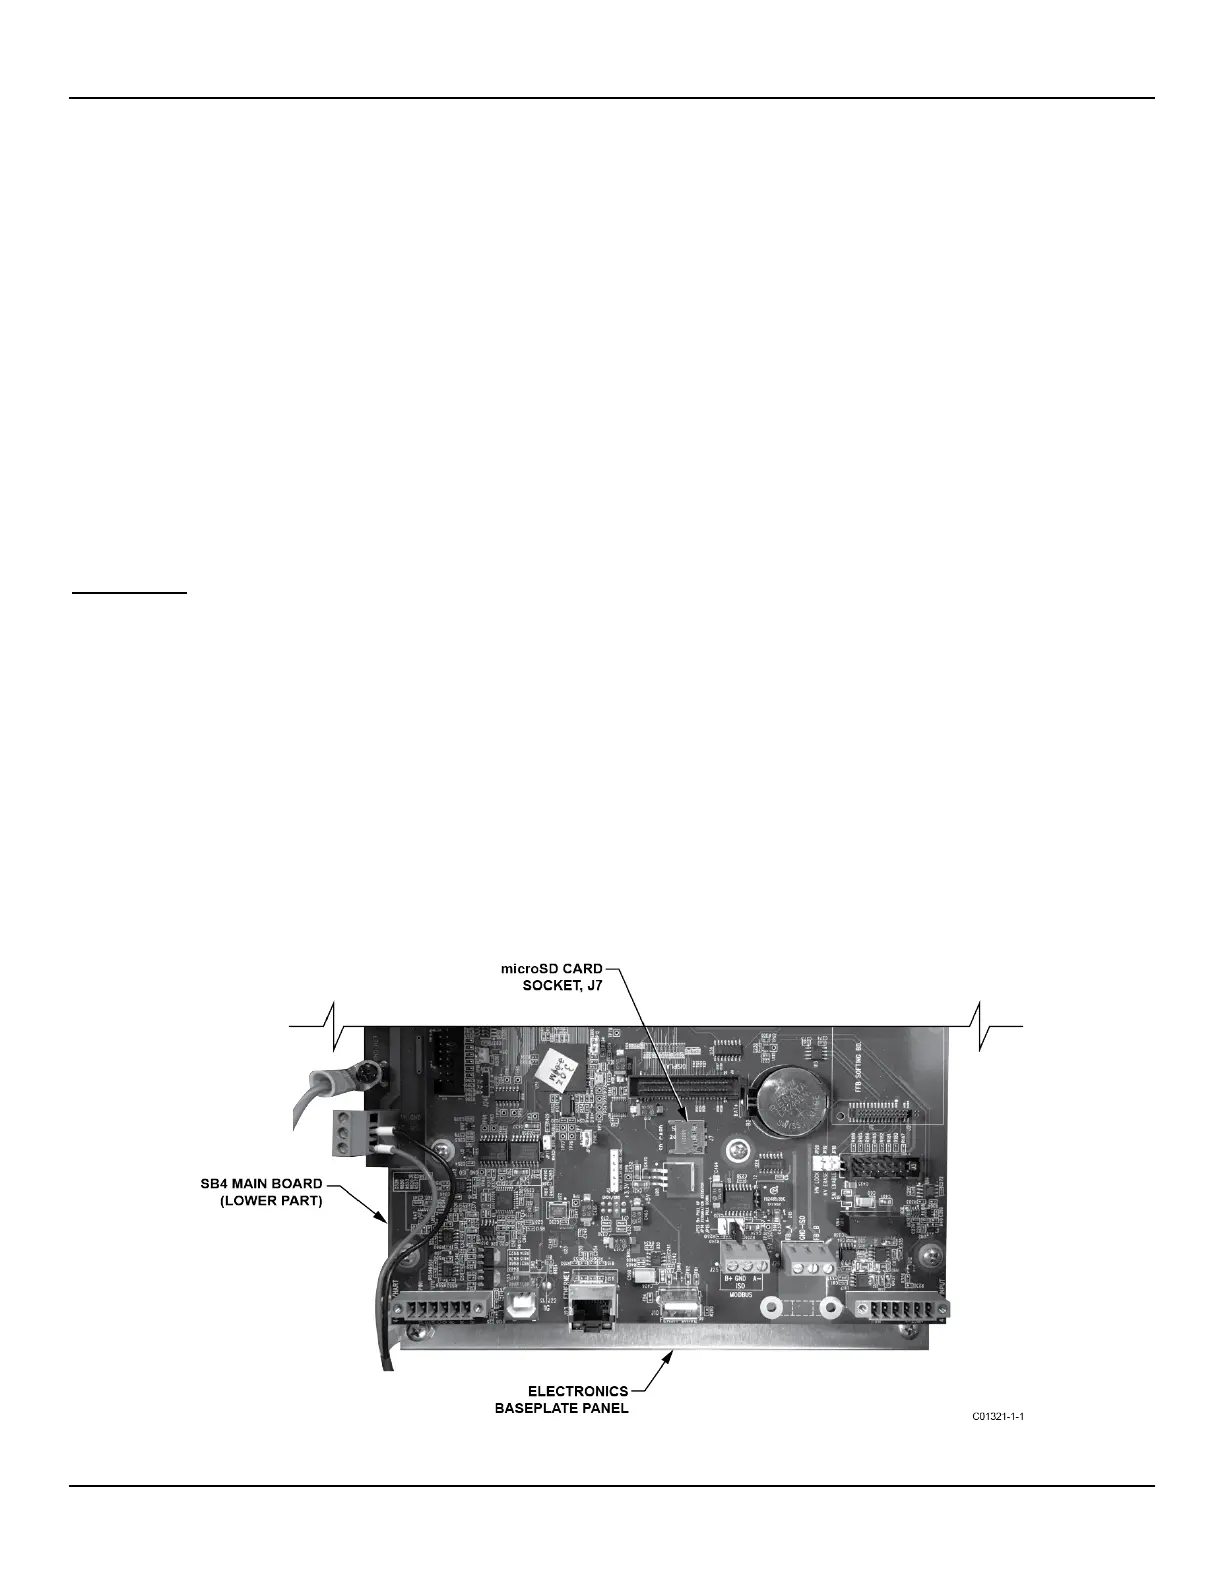
Refer to Figure 31 below. The MT100 comes with an 8 MB microSD card. Use a microSD card of up to 32 GB capacity, Class 2 or higher.
1. Tap MENU on the front panel display.
2. Tap LoggerSDcard (under Service). This brings up two menu choices: Remove and Inserted.
3a. Removing the microSD card – Tap Remove. After the front panel display shows OK to Remove SD Card carefully slide the
microSD card out of its J7 socket. When picking up the card avoid having the card’s gold edge contacts touch any metal part or
exposed trace or pad on the board.
3b. Installing the microSD card – With the card’s gold edge contacts facing down carefully slide the microSD card into its J7 socket and
then tap Inserted. Observe that the front panel display shows SD Card Ready For Use followed by the amount of space available on
the card. If the system detects an issue the message Error: SD Card Insert Failed is shown.
4. Tap QUIT when done.
Figure 31 – microSD Card Socket J7 Location
Fluid Components International LLC 34