- 30 -
Install Waste Tubing
Attach tubing from the outlet of the pump to an appropriate waste container (directly or via a Bulk Head
connector).
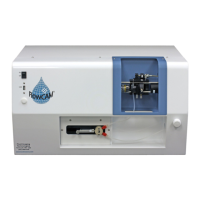
Figure 15. Tubing to Pump Connection and Tubing to Waste Installation for Benchtop FlowCAM
Engage the Pump to Forward
Using the software controls (See Section Four) engage the syringe pump to move the sample down into
and through the flow cell.
Remove any bubbles from the flow cell
To ensure accurate results, especially when utilizing the FlowCAM for counting/concentration
determination, the flow cell needs to be free of bubbles. Bubbles can be removed from smaller flow
cells (50, 100, 300 µm) by pinching the tubing between the flow cell and the pump (squeeze for 1-3
seconds, release, and repeat as necessary). Bubbles can also be removed from larger flow cells (> 300
µm) by reversing the pump flow until any air bubbles are backed all the way out to the funnel or into the
sample container. Finally increasing the flow rate may dislodge and remove entrapped bubbles.
Pump Tubing & Tubing Port
Fine Focus Adjustment Knob
Out to waste container