724/725/726
Calibration Manual
44
Cal mA Output (725 Only)
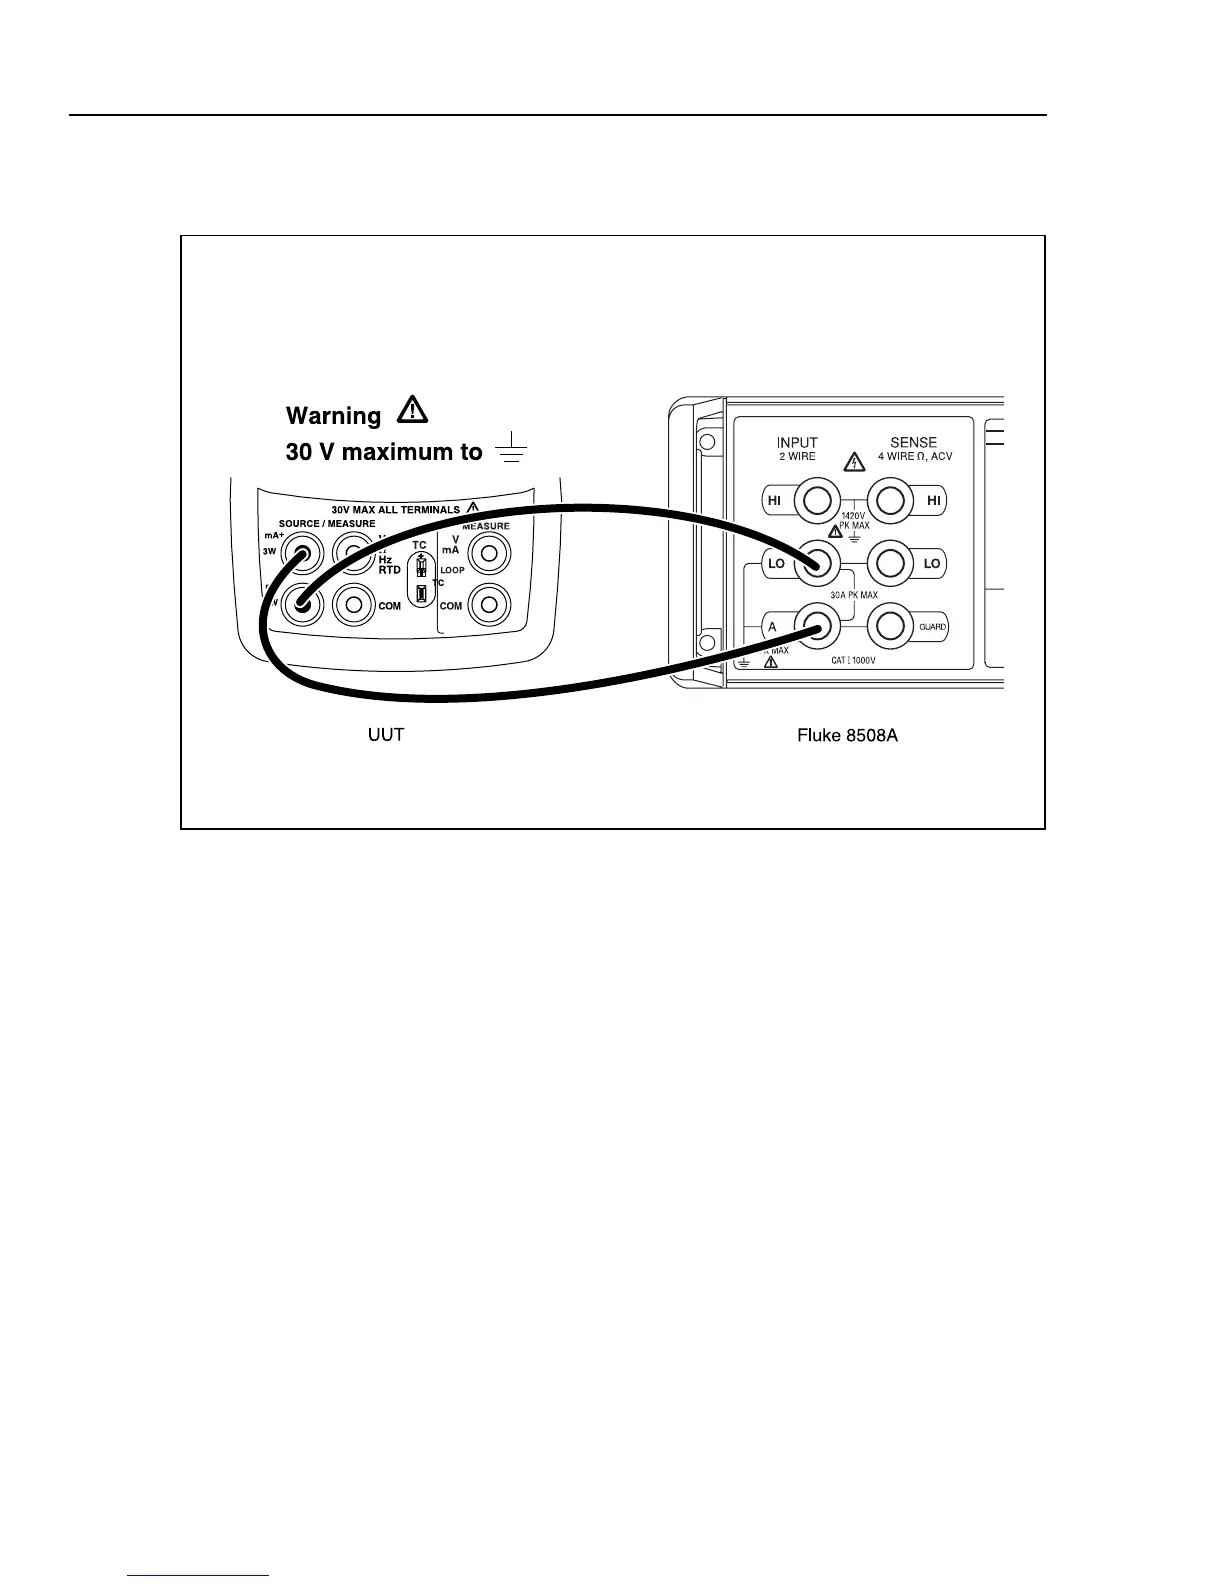
Connect the UUT as shown in Figure 16.
aal12f.eps
Figure 16. mA Output Calibration Connections
From the Calibration Menu, enter the cal step for Cal mA Output. The PC displays:
Zero into DAC. Enter mA displayed :
Set the Fluke 8508A to read DC current. When the reading on the Fluke 8508A has
stabilized, enter the value in milliamps on the PC, then press Enter. You only need to
enter four places past the decimal point and do not need to enter the units (mA). Wait for
the following prompt on the PC:
Max value into DAC. Enter mA value displayed :
Enter the current reading from the Fluke 8508A in the PC, then press Enter. After a short
while, the following calibration constants and new prompt are displayed on the PC:
-1.628906 = ( 24.735999 - 0.076400 )/ 65279.00
mA per count = -1.628906
- press space bar to continue
Press the space bar to return to the Calibration Menu.

 Loading...