MANTIS User's Guide | Chapter 6: Initial Setup
13. Optional: If you find that the geometry parameters determined by the wizard
require further adjustment, please follow the steps below:
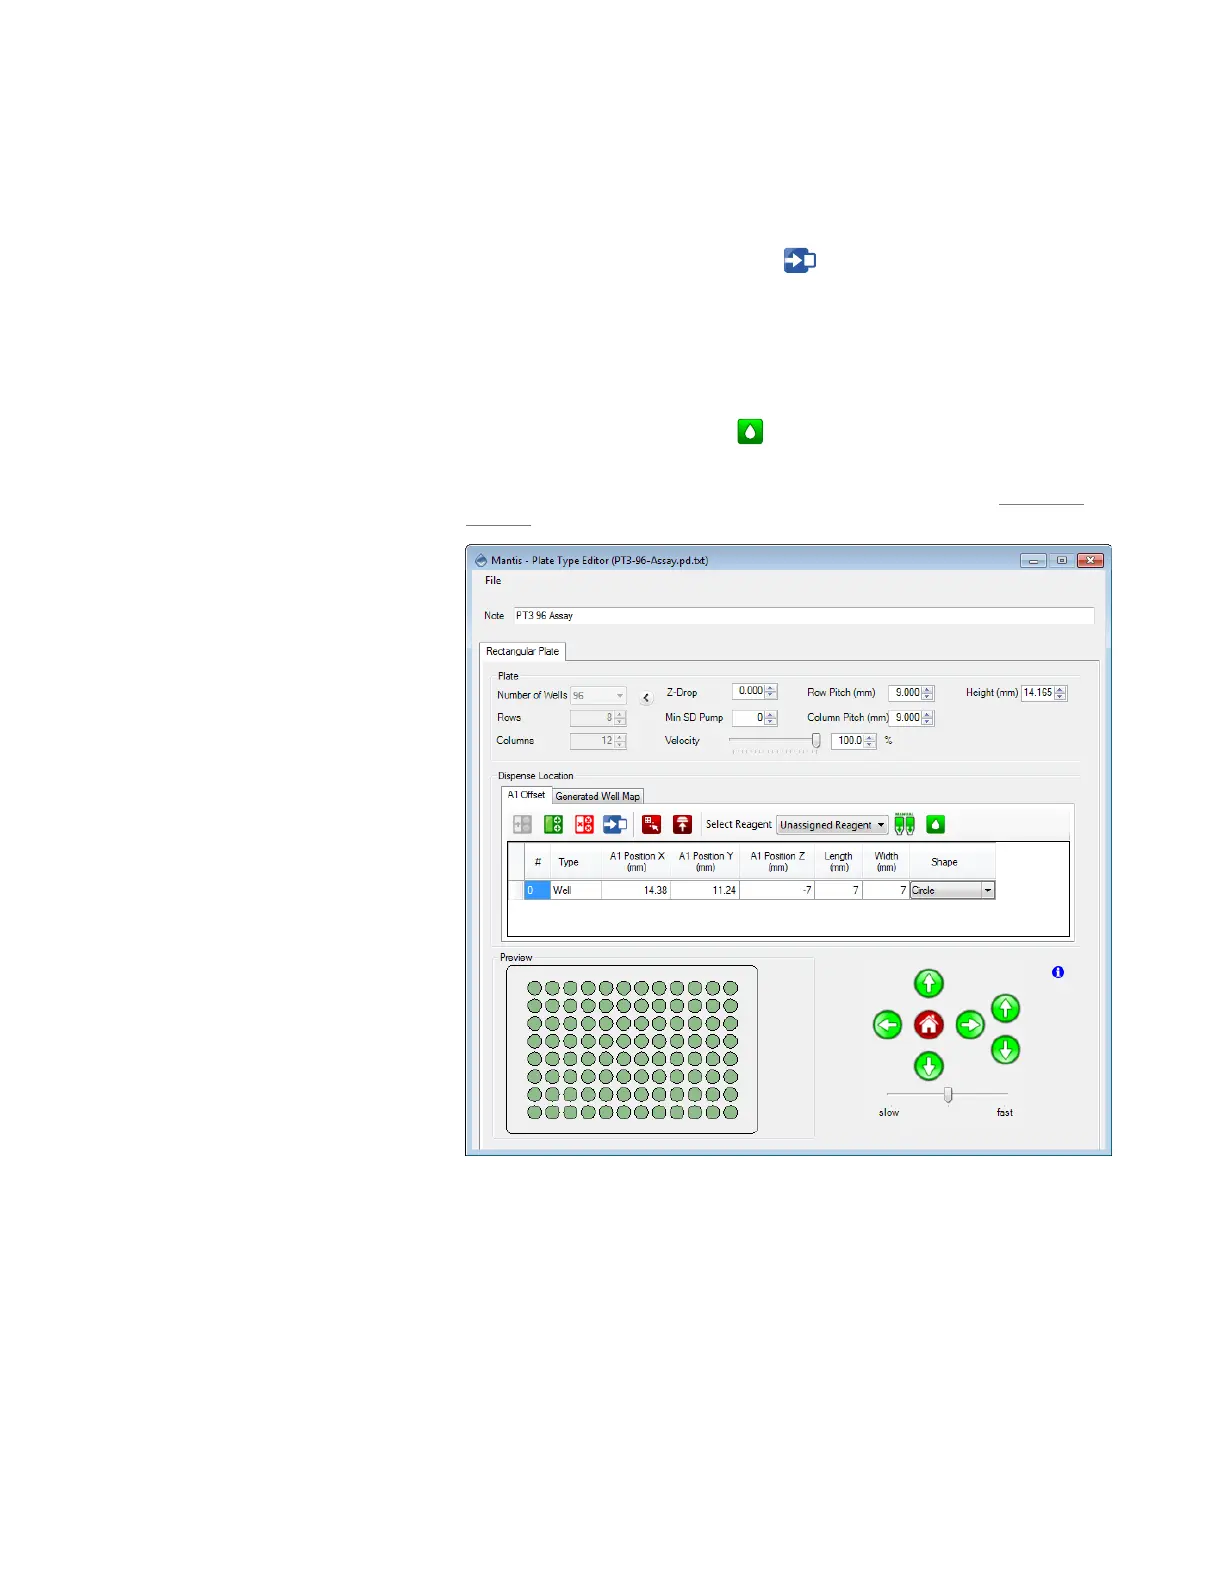
a. Click the A1 Offset tab.
b. Click the Move To A1 Position button . The MANTIS will go to the A1
well location.
c. Use the Motion Control Pad at the lower right of the Plate Type Editor to
modify the A1 well position. Use the arrow keys to maneuver the MANTIS
hand to the A1 location of your plate. View the plate from both the side and
the front to ensure your center location is correct.
d. Click the Test Dispense button to dispense a test drop to the A1 well.
The drop should be in the A1 well.
e. Optional: Modify the Row Pitch and Column Pitch values in the Advanced
Options if the other well positions are not accurate.
14. Optional: You can modify the advanced options by clicking the Show Advanced
Options menu.
● Z-Drop determines the distance you would like MANTIS to move down into
each well before dispensing (default is zero).
● Min SD Pump determines the minimum enforced number of Small
Diaphragm pumps (default is zero). This forces the MANTIS to use the Small
Diaphragm for a larger portion of the dispense, if possible.
A1 Offset Tab Options