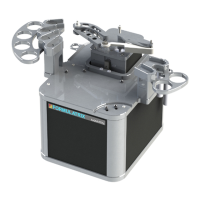
Device View. Device View displays the MANTIS hardware in use. In the image displayed
above, chip 1 is on the MANTIS hand. Double-clicking one of the chips will cause that chip
to be picked up by the MANTIS hand. Double-clicking a second time will return the chip
from the MANTIS hand to the chip changer station. In the image above, you will also see
the LC3 attached on the left side of the MANTIS. It will only appear if you have the LC3
instrument in your system.
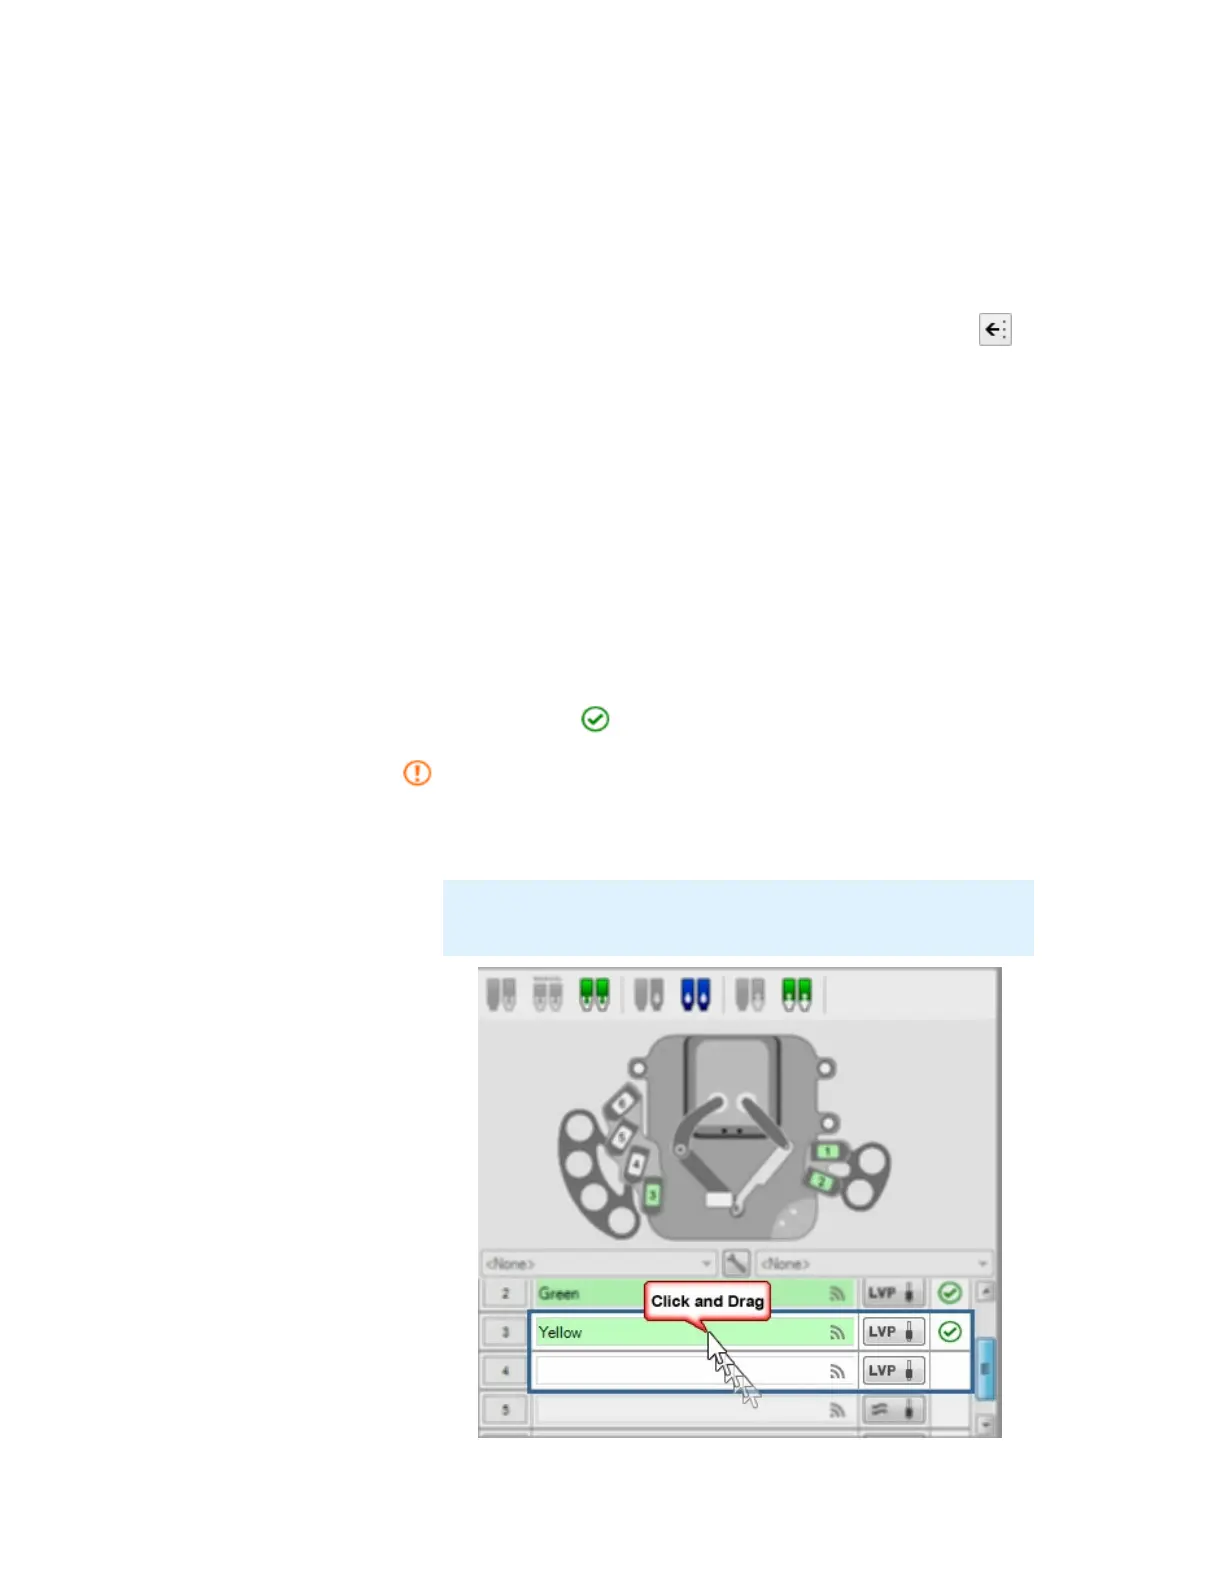
To add a reagent from the Dispense List to the Device View, drag it from the Dispense List
to the reagent's chip changer station. OR click the Assign To Input button to assign
all reagents from the Dispense List at once.
Input. The Input tells you which reagent is assigned to which chip station. To the right of
each reagent input field is a symbol or an abbreviation that represents the type of chip
attached to that chip station. Options include:
You can see the status of your input through the Input Status box, whether it is defined in
the
Dispense List or not. This means that your input has been properly defined in the
dispense list. You should check and define your reagent in the Dispense List if you find
this in your Input Status box.
To move the chips between inputs, you can drag and drop the chips on the Input panel.
The chip information will also be automatically updated.
LV Low Volume Chip
HV High Volume Chip
HVP High Volume Chip PFE
LVP Low Volume Chip PFE
≈ High Volume Continuous Flow Chip
Note: Before you drag and drop the chip on the Input panel, make
sure that you move the chip on the chip changer first.
Drag and Drop to Move the Chips
MANTIS User's Guide | Chapter 7: Software Overview