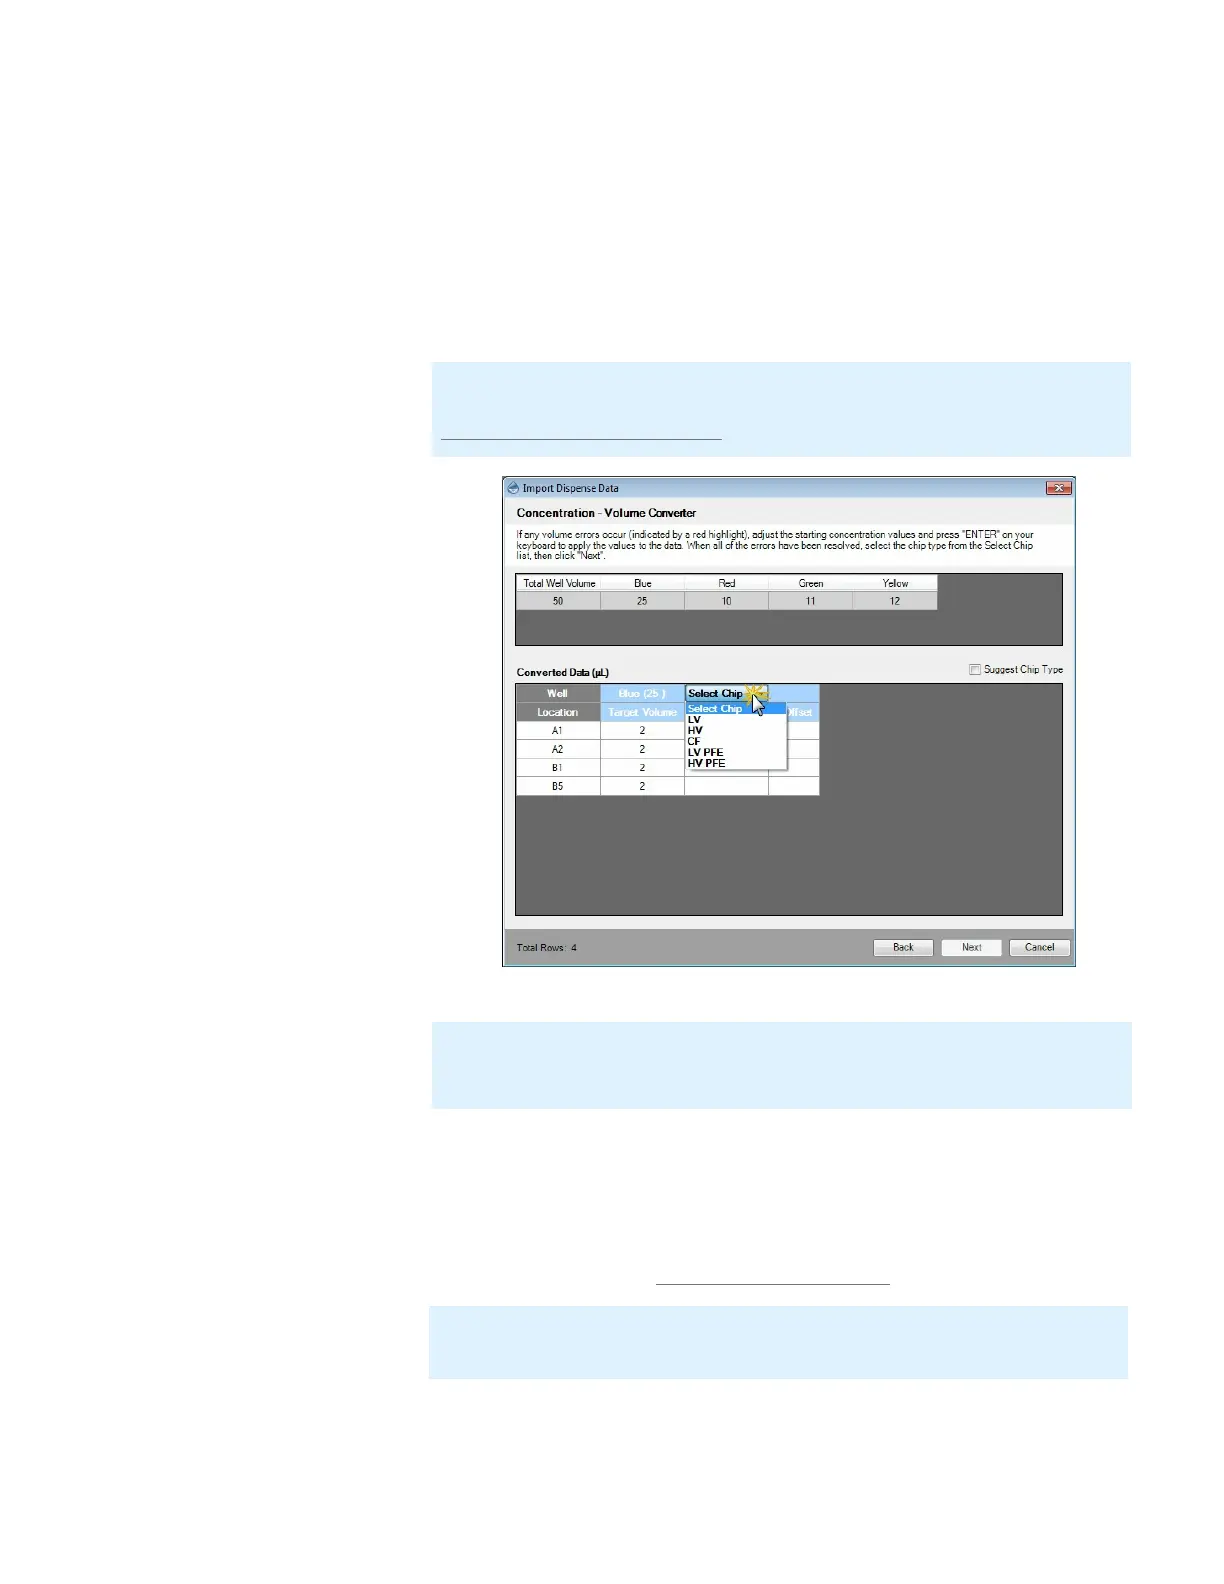
8. Click the Chip Type drop-down list and select the desired chip type (Low Volume,
High Volume, or Continuous Flow) that you want to use. The table columns to help
you make an informed choice:
● Target Volume: The result calculated by the concentration to volume
converter.
● Actual Volume: The actual volume that can be achieved with the selected chip.
● % offset: The difference between the Target Volume and the Actual Volume,
expressed as a percentage.
9. Click Next to select chip types for the other reagents and the diluent. When you are
done selecting the chip types for all reagents, click Next.
10. To save your settings as a protocol, type a descriptive name in the Protocol Name
box. Your new protocol will be added to the MANTIS Protocol List database, which
you can access from the Load option under the File and Protocols menus. To learn
more about protocols, see Creating and Using Protocol on page 54.
MANTIS User's Guide | Chapter 9: Dispensing With the MANTIS
Note: For Continuous Flow chip, when the target volume is lower than 5 μL, the
actual volume will display the error volume in red. For more information, see the
FORMULATRIX Chip Specification.
Select Chip Type Options
Note: You can also select the Suggest Chip Type option on the right corner of the
Converted Data (μL) panel, which enables MANTIS to suggest a chip type for each
reagent, based on the volume data, while maximizing speed and minimizing error.
Note: You will not be able to modify a saved protocol from the Import Dispense
Data wizard if you re-open it after you close the MANTIS software.