EasyManuals Logo

Fronius Symo Service Manual

Fronius Symo
Go to English
180 pages
To Next Page IconTo Next Page
To Previous Page IconTo Previous Page
Page #51 background imageLoading...
Page #51 background image
51
DE
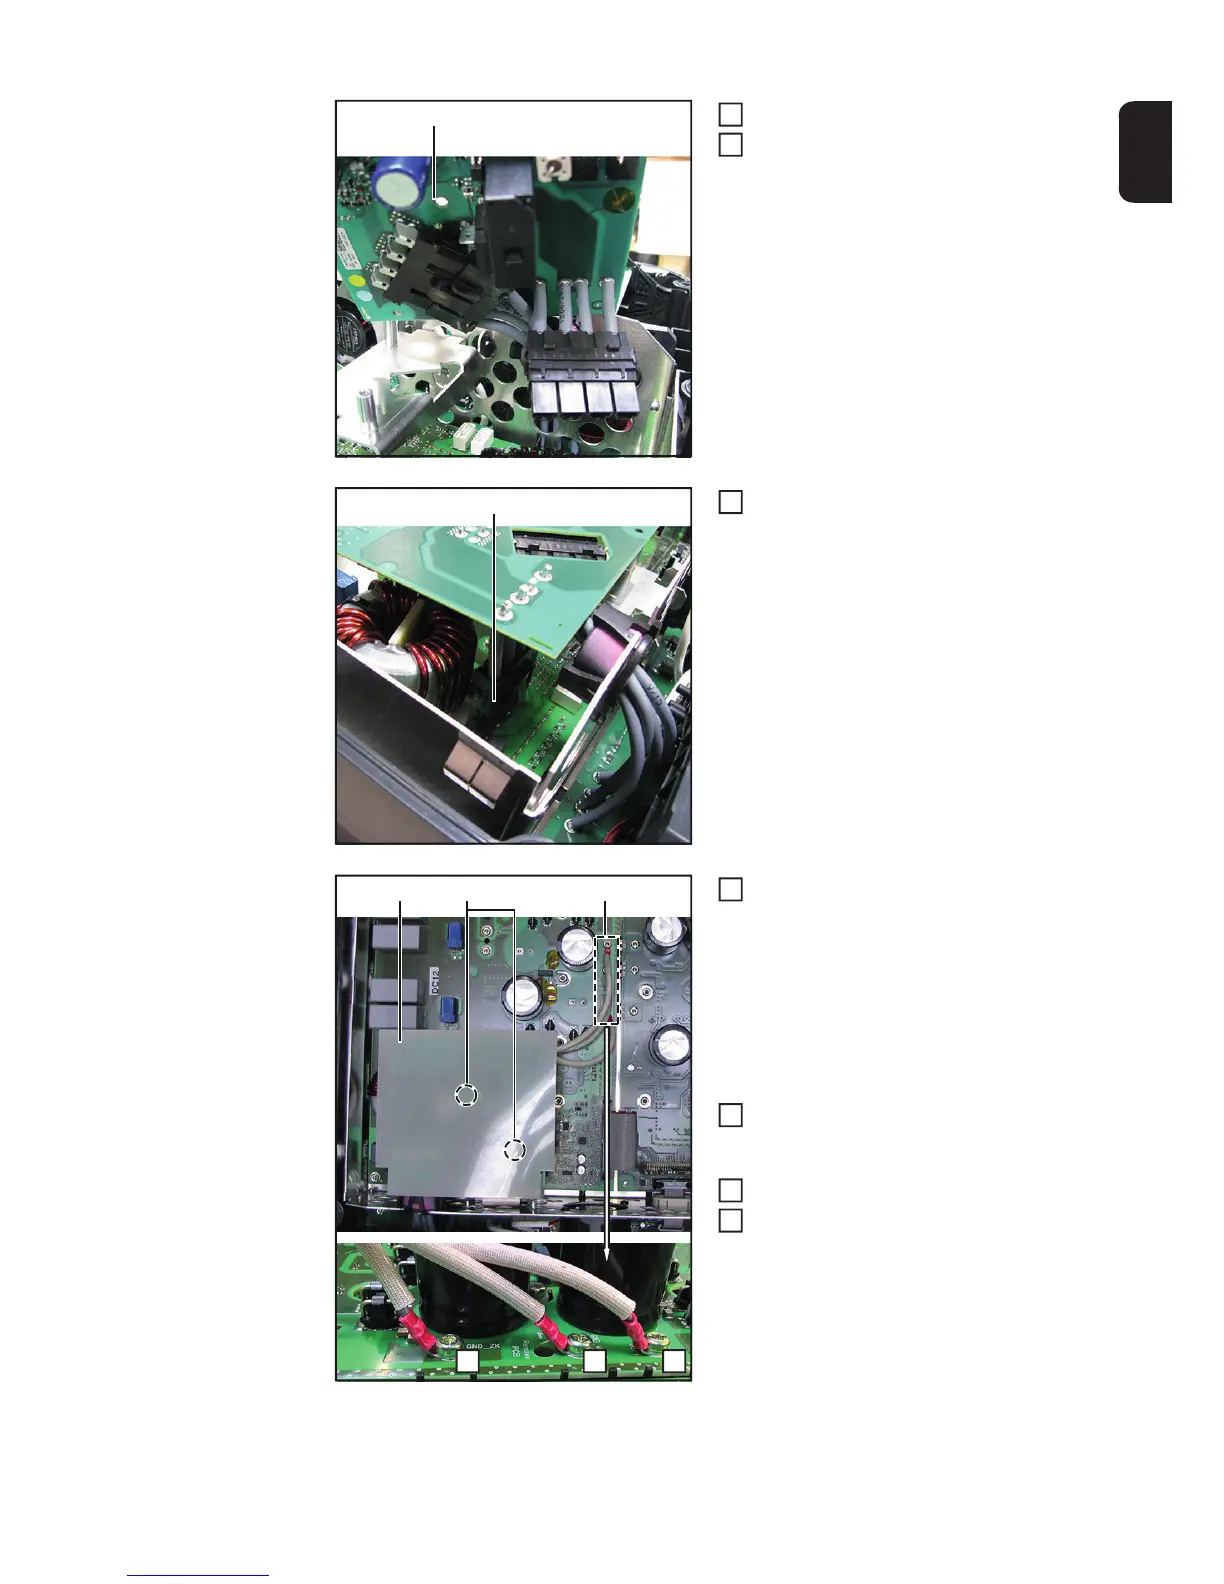
Overvoltage-Print einsetzen
Steckverbindung zum OVP (5) herstel-
len
Kabelverbindung (4) herstellen
Neuen Overvoltage-Print mit 2 Stk.
Schraube 4x9 TX20 (3) montieren
[2 Nm]
Kabelverbindungen (2) mit 3 Stk.
Schraube 4x9 TX20 montieren
[2 Nm]
Isolierfolie (1) einsetzen
Wechselrichter schließen und in die
Wandhalterung einsetzen (siehe Ab-
schnitt „Gerät öffnen und schließen“)
(5)
3
4
(4)
5
(2)(3)(1)
A B C
WICHTIG! Kabelverbindungen A (kurz), B
(mittel) und C (lang) nach dem Montieren
darauf achten, dass diese vom Print weg
gebogen werden (siehe Abbildung)
6
7
8
9

Table of Contents

Other manuals for Fronius Symo

Questions and Answers:

Question and Answer IconNeed help?

Do you have a question about the Fronius Symo and is the answer not in the manual?

Fronius Symo Specifications

General IconGeneral
THD< 3 %
Number of MPP Trackers2
Protection ClassIP65
Frequency Range50 / 60 Hz
Operating Temperature Range-25°C to +60°C
Power Range3.0 kW - 20.0 kW
AC Output Voltage230 V
CommunicationEthernet
Warranty5 years
ModelSymo

Related product manuals