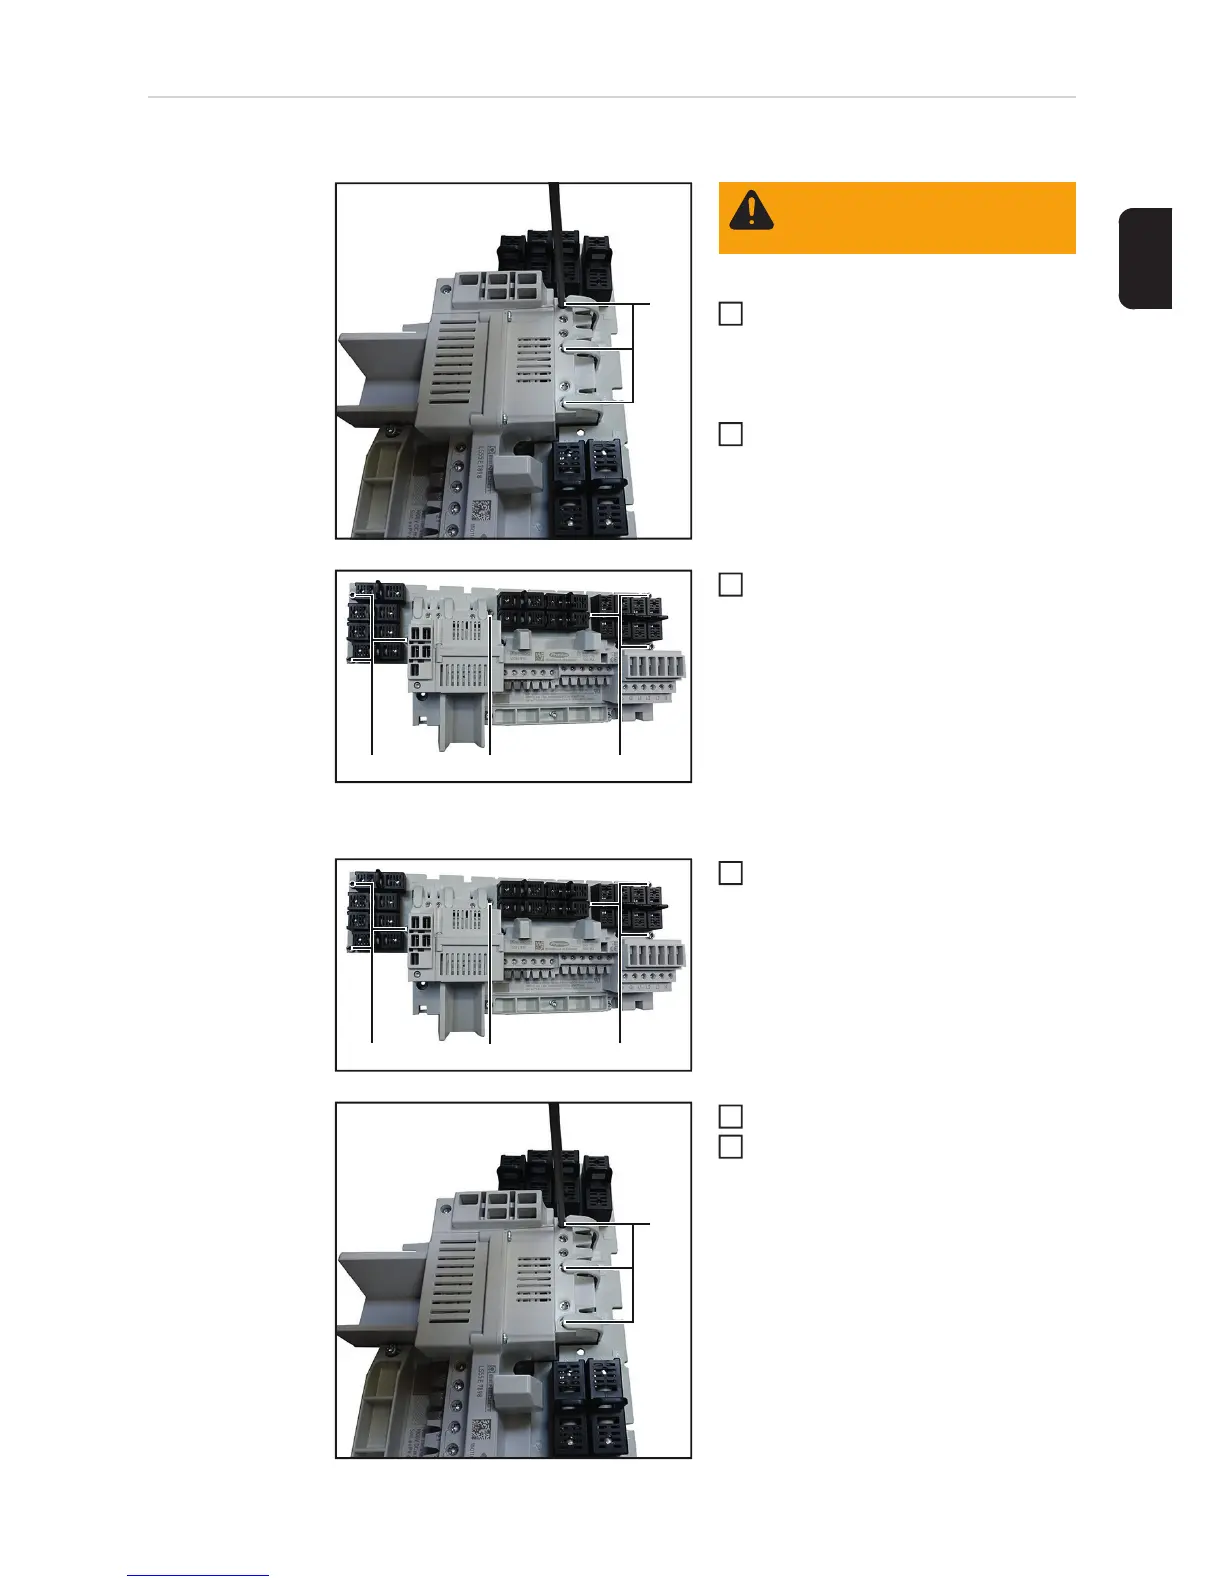
EasyManuals Logo

Fronius Symo Service Manual

Fronius Symo
Go to English
180 pages
To Next Page IconTo Next Page
To Previous Page IconTo Previous Page
Page #129 background imageLoading...
Page #129 background image
129
EN
Replacing the
Eco fuse
Removing the Eco fuse:
Take the inverter out of the wall bra-
cket and remove the DC disconnector
Eco (see "Opening and closing the de-
vice" and "Replacing the DC dis-
connector Eco" sections)
Undo the three TX20 screws (1)
Undo the seven 4x12 TX20 screws (2)
and remove the Eco fuse
Inserting the Eco fuse:
Insert the new Eco fuse and secure it
with seven 4x12 TX20 screws (2)
[1.5 Nm]
Tighten the three TX20 screws (1)
Insert the DC disconnector Eco, close
the inverter and place it in the wall bra-
cket (see "Replacing the DC dis-
connector Eco" and "Opening and
closing the device" sections)
(1)
WARNING! Observe the safety
rules (see the beginning of the
"Safety" section)
1
2
(2) (2) (2)
3
(2) (2) (2)
1
(1)
2
3

Table of Contents

Other manuals for Fronius Symo

Questions and Answers:

Question and Answer IconNeed help?

Do you have a question about the Fronius Symo and is the answer not in the manual?

Fronius Symo Specifications

General IconGeneral
THD< 3 %
Number of MPP Trackers2
Protection ClassIP65
Frequency Range50 / 60 Hz
Operating Temperature Range-25°C to +60°C
Power Range3.0 kW - 20.0 kW
AC Output Voltage230 V
CommunicationEthernet
Warranty5 years
ModelSymo

Related product manuals