1 Before Using the Machine
30
Before Using the Machine
1
Assigning Services to the <Custom> Buttons
You can assign services to the <Custom 1> to <Custom 3> buttons on the control
panel.
Assigning a service to a <Custom> button allows you to switch to this service without
having to return to the [Services Home] screen. If you do not need to assign any service
to a <Custom> button, select [(Not Set)].
[Copy] is assigned to the <Custom 1> button and [Review] is assigned to the <Custom
3> button by factory default, while the <Custom 2> button has no assignment.
This section describes how to assign [Send from Folder] to the <Custom 2> button, as
an example.
Note • After you change the assignment, apply the labels provided with the machine. When you
assign a service for which no label is provided, use a blank label and write down the service
name with a permanent marker. The labels include the services that are not supported by
the machine.
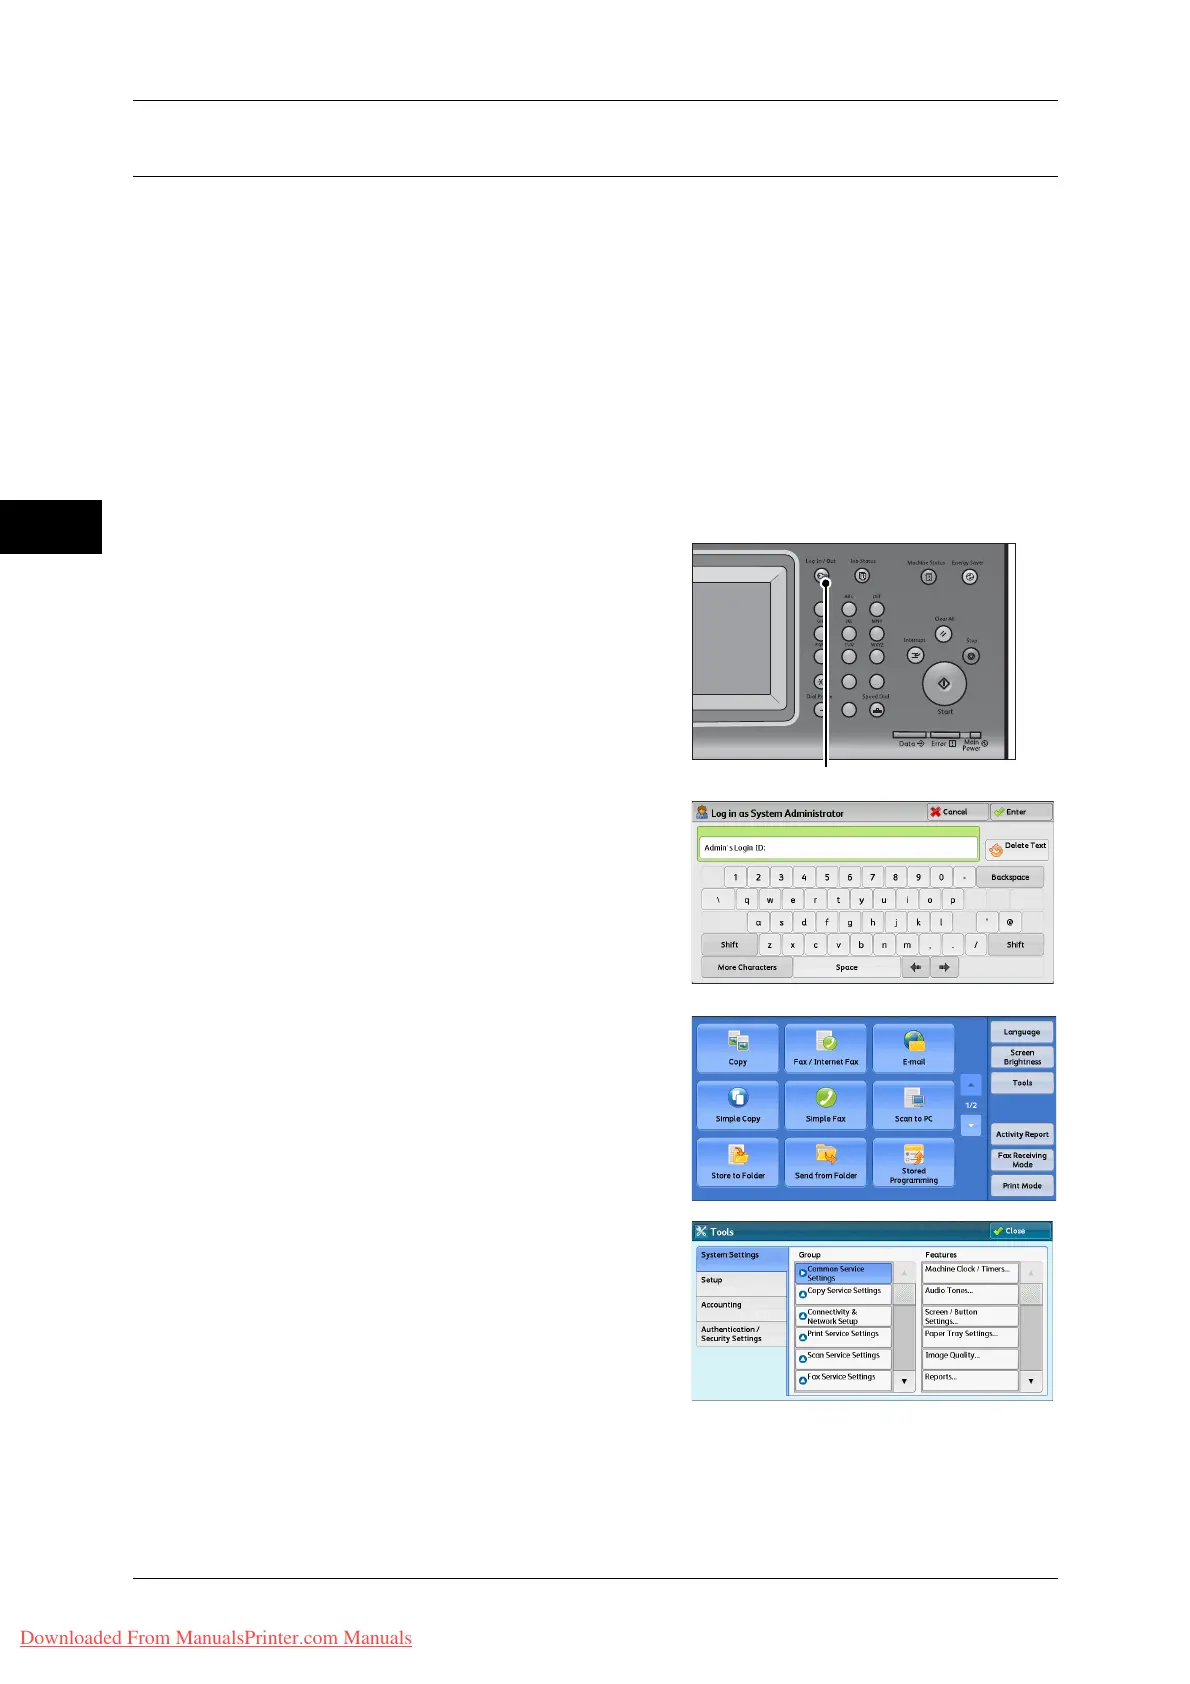
1 Press the <Log In/Out> button.
2 Enter the system administrator’s user ID with
the numeric keypad or the keyboard
displayed on the screen, and select [Enter].
When a passcode is required, select [Next]
and enter the system administrator’s
passcode, and select [Enter].
Note • The default user ID is "11111".
• The default passcode is "x-admin".
3 Select [Tools] on the [Services Home]
screen.
Note • When the [Services Home] screen is not
displayed on the touch screen, press the
<Services Home> button.
4 Select [System Settings] > [Common
Service Settings] > [Screen/Button Settings].
123
456
789
0#
C
Downloaded From ManualsPrinter.com Manuals

 Loading...

