Common Condition Section
Programming the Mixers
Activation of command
In the Condition Menu, press the PMX key to get the
PROG MIX menu shown as Screen 1 in the top of the
illustration below.
Selection and Activation of Mixing Menu (Nos. 1 to 5)
Press the number key associated with the mixing menu
that you wish to program with the 1 to 5 ( F to H )
keys. Press the
A
key (moves to Screen 2 display shown
below), then activate the mixer by pressing the ACT—
Fkey.
You may
inhibit
the
mixer
by pressing the INH
Gkey.
Choosing the Mixing Type
Press the D key to get to the mix type selection
menus. Now, you may select the Linear type by pressing
the LIN E key, select the hovering type by pressing
the
HOV G
key, select the 7-point curve type by
pressing the
CRV H
key, or select the Rate Control
type by pressing the
CTL
I key.
Master channel setting (not for offset and hovering type
mixing)
To select the control to be used as the Master channel,
press the B key. then press the key of the channel to be
set with the E to L keys. Depending on the Model
setup, the following keys will appear on the bottom of
the screen:
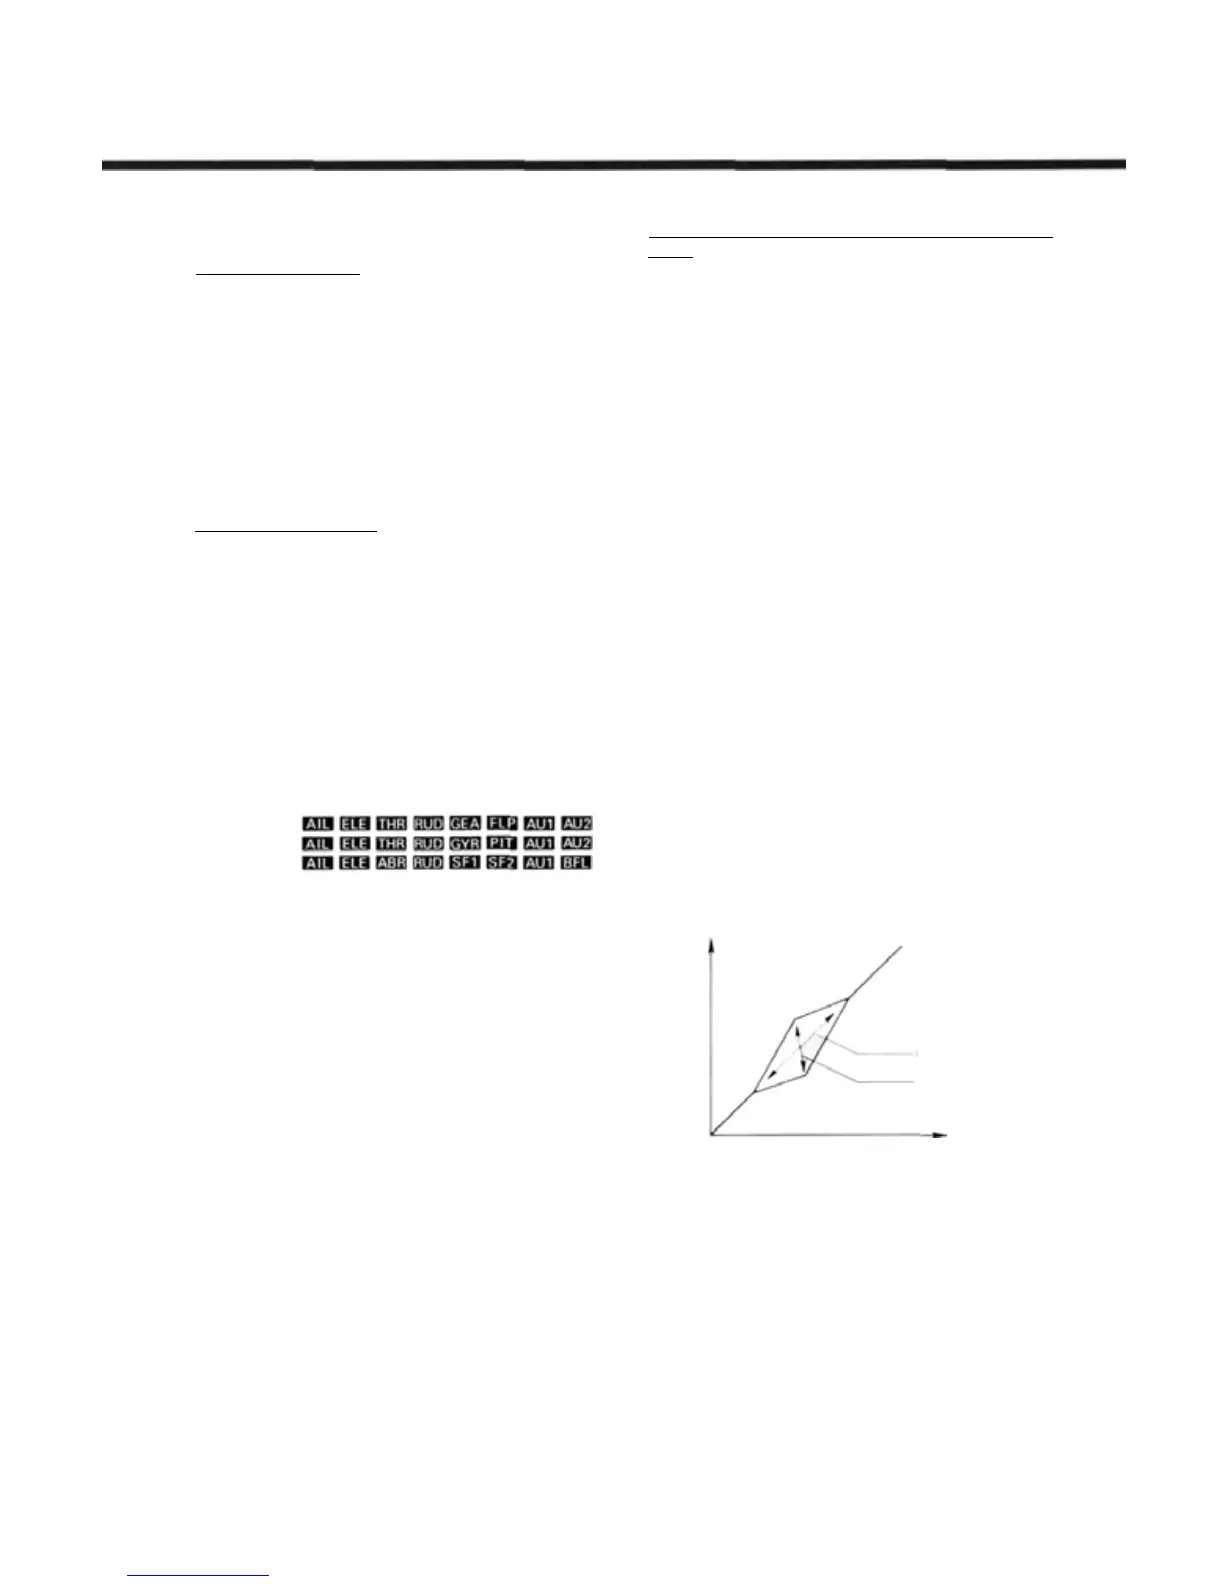
Airplane:
Helicopter:
Sailplane:
Mixing ON/OFF switch selection and ON/OFF direction
setting
When a mixer is first activated, an ON/OFF switch is
not defined. If you wish to define an on/off switch to
control the mixing, call the switch setting screen by
pressing the
SWT P
key. For a description of the
switch setting method, see page 37.
Mixing Rate Inputting
To input the mixing rate, call the rate setting screen
by pressing the
NXT O
key. This action calls up the
menus shown in the figure as Screen 3.
If the linear type of mixing is selected, you may offset
the
Mixing switching point setting by
pressing
the B key.
then setting the master control to the desired switching
point, and pressing the
SET F key.
Mixing Rate Setting, Sides A and F
To input the numerical mixing values for the A side of
Linear
mixing, press the C key. You may then set the
rate with the numeric setting keys E to M. The mixing
rate is initially set to a value of +50%, but may be set
anywhere in the range between —100 to +100%. Note
that on the setting screen graph, the top is — and the
bottom is+.
You may now set the values for Side B mixing as side
A was done above.
If Offset mixing is selected, you may set the offset
with the rate setting keys
E to
M The initial offset
value is 0%, but you may set this anywhere between —100
and +100% with the numeric keys.
If you will be linking this mixer with other mixers,
press the
LNK M
key. Linking is turned on and off
alternately each time the key is pressed. When linking is
ON, a "-»" is displayed in front of the Master channel
name.
Slave channel setting
To select the Slave channel, press the C key and
select the desired channel with the
E to M
keys. To link
the Slave channel with other mixing, press the LNK M
key. A "-»" is displayed after the channel name.
Trim ON/OFF Setting
Trim ON/OFF only applies to Linear type mixing. To
select Trim ON/OFF, press the R key. To add the master
trim
operating
rate
to
mixing,
press
the
ACT F
key. If
you do not wish to add trim operating rate to mixing, use
the INH G
key.
Master Channel MIX Mode Definition
This definition does not apply to offset-type and
hovering-type mixing. To define the Master channel mix
mode, press the
Q
key. If you wish to add AFR, D/R,
and curve set rate to mixing, press the
MIX F
key, if
you do not wish to add AFR, D/R, and curve set rate to
mixing, press the
G
(UN) key.
SERVO
RESPONSE
OFFSET RANGE
OFFSET RATE
STICK MOTION
If Hovering mixing is selected, you input the Slave
channel
neutral
position
offset range
setting
using the C
key, and set the offset range with the rate setting keys F
to M . This value is initially set 5to 100%, but can vary
anywhere between 0 and 100%.
Now
you
will
set
Slave
channel
neutral
width
setting.
To do this, press the D key and set the offset with the
rate setting keys E to M. This value is initially set to
0%, but can vary anywhere between 0 and 100%.
Common Conditions Section, Page 66