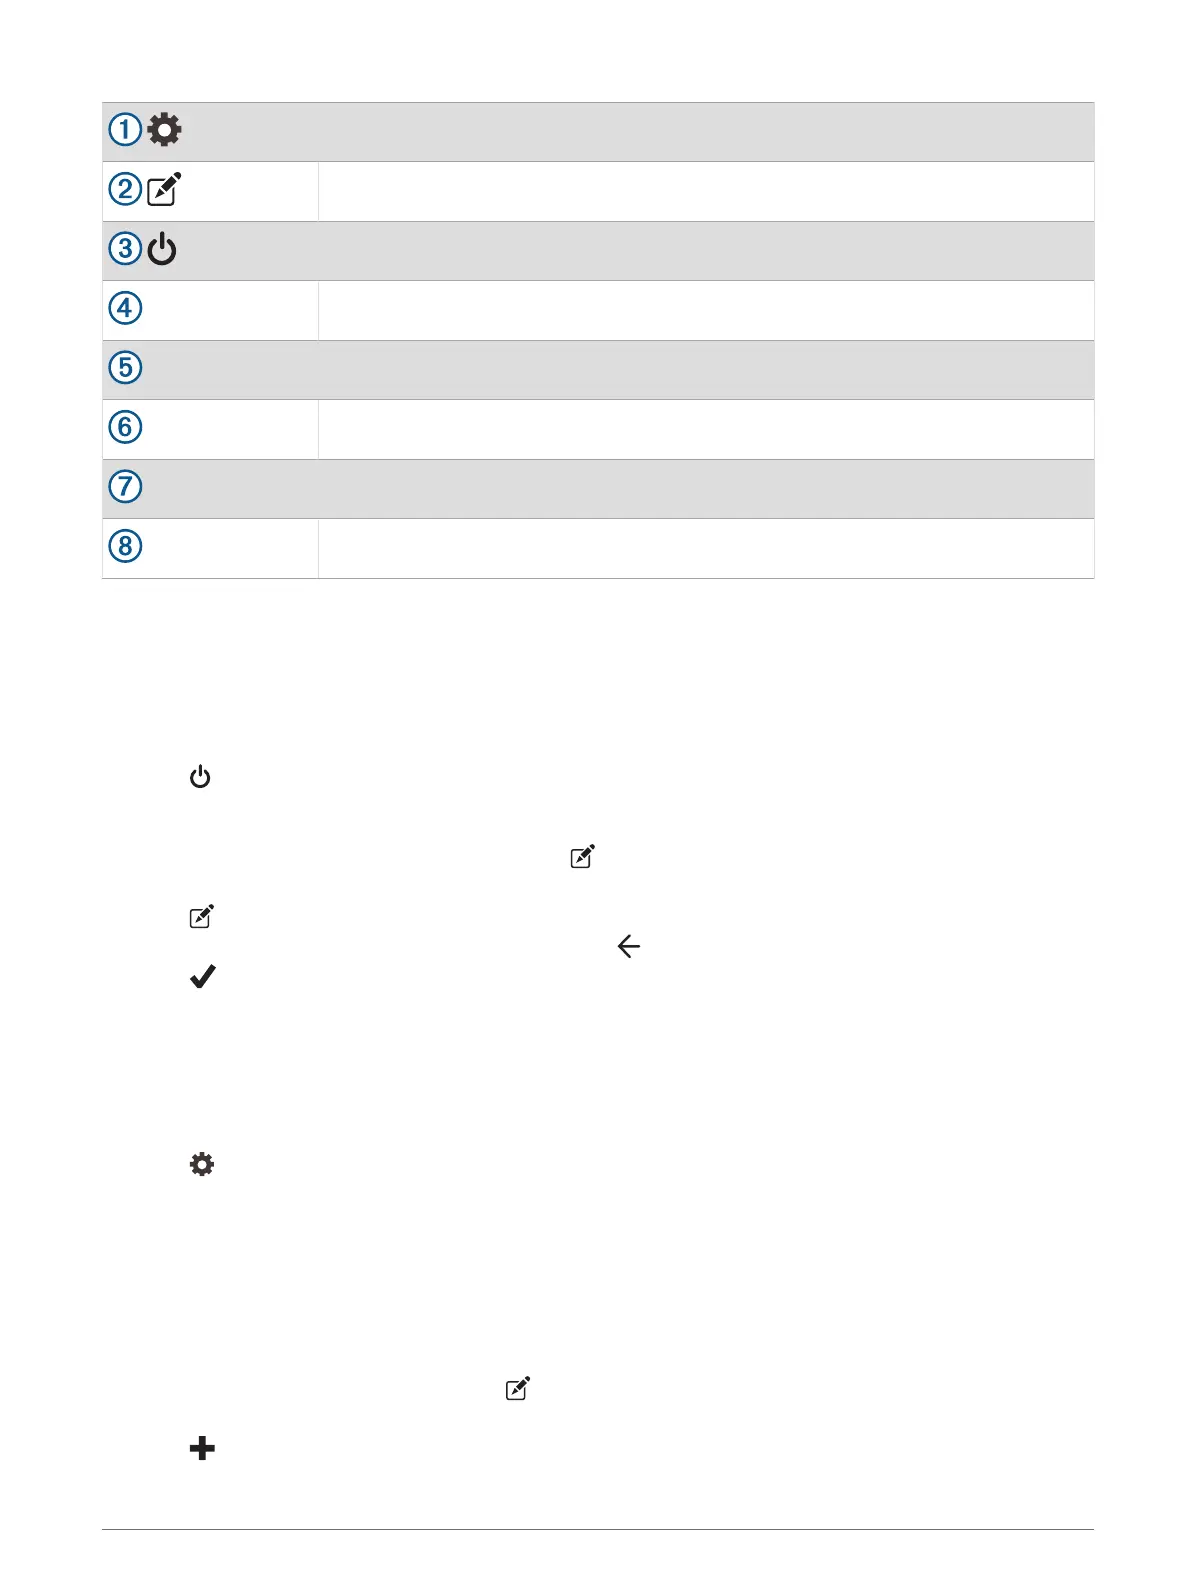
Opens the app settings menu
Enters editing mode to customize the app layout and functions
Turns off all outputs
Power buttons
Activates each connected output
Displays input voltage
Displays the total amperage of the selected Garmin PowerSwitch device
Displays the device name
Displays Garmin PowerSwitch device tabs and custom layout tabs
Activating a Power Switch
Before you can use the Garmin PowerSwitch app to activate a switch, you must install your Garmin
PowerSwitch device in your vehicle and pair it with the Garmin PowerSwitch app.
From the Garmin PowerSwitch app, select a power button to turn a switch on or off.
Turning Off All Switches
Select .
Customizing a Button
1 From the Garmin PowerSwitch app screen, select .
The app enters editing mode.
2 Select on the button you want to customize.
3 When you have finished customizing the button, select .
4 Select .
Assigning a Switch to a Control Input
Before you can use control input functions, you must connect a control input to your Garmin PowerSwitch
device.
You can assign one or more switches to turn on when the Garmin PowerSwitch device receives a signal from a
control input.
1 Select .
2 Select your Garmin PowerSwitch device.
3 Select a control input.
4 Select one or more switches.
Adding a Custom Layout
You can add a custom layout tab to the Garmin PowerSwitch app. Buttons added to a custom layout can control
multiple switches at the same time.
1 From the Garmin PowerSwitch app, select .
The device enters editing mode.
2 Select .
Using the Apps 41