Replacing the Transducer
Invenia ABUS 2.0 – System Setup and Basic Service Manual 8-11
4700-0043-00 Rev. 4
Transducer Functional Check
Ensure that the transducer:
• Upon Power Up moves across the Scan Head Assembly.
• That the lights on the Scan Head Assembly light up.
• That the transducer images as a scan is being performed.
• That the transducer generates a 3D Volume.
B-Mode Functional Checks
Confirm that the system:
• Performs a B-Mode scan.
• Places B-Mode imaging parameters on the Touch Screen
Monitor.
• Images evenly across the entire Touch Screen.
3D Volume Functional Checks
Confirm that the 3D Volume:
• Gets generated after each Scan View performed.
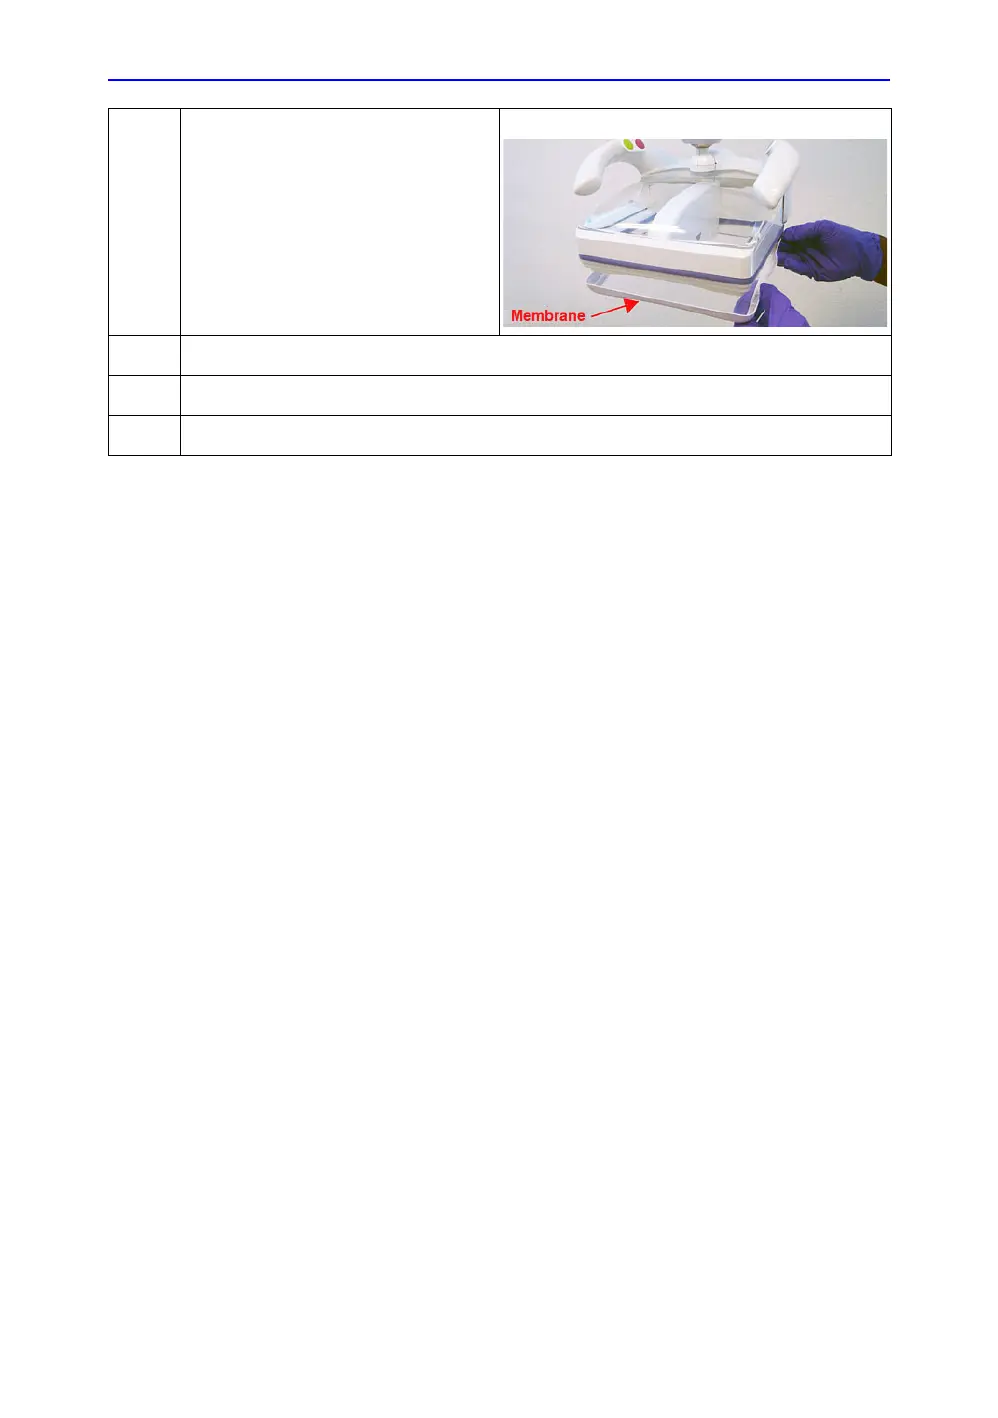
4.
Attach the Stabilizing Membrane.
5.
Plug the power cord into the Power Entry Module/Power Cord Socket and switch the power on.
6.
Power the system on by pressing the Power Button on the front of the system.
7.
Perform system functional checks listed in the Functional Checks section.

 Loading...