○○○○○○○○○○○○○○○○○○○○○○○○○○○○○○○○○○○○○○○
24 Owner’s Manual
Selecting Sounds
YOU CAN SELECT SOUNDS USING ONE OF THE FOLLOWING METHODS:
• Assigning a Sound to a real time keyboard section (Upper 1, Upper 2, Lower) by speci-
fying its corresponding number on the right selection keypad;
• Recalling a sound combination for the keyboard sections using the Direct Sound Memory
buttons;
• Selecting a Performance containing a sound combination as well as other performance
parameters.
• Recalling a Single Touch Play setting using one of the 9 function buttons (F1 … F9)
while SINGLE TOUCH PLAY is active (display indicator on).
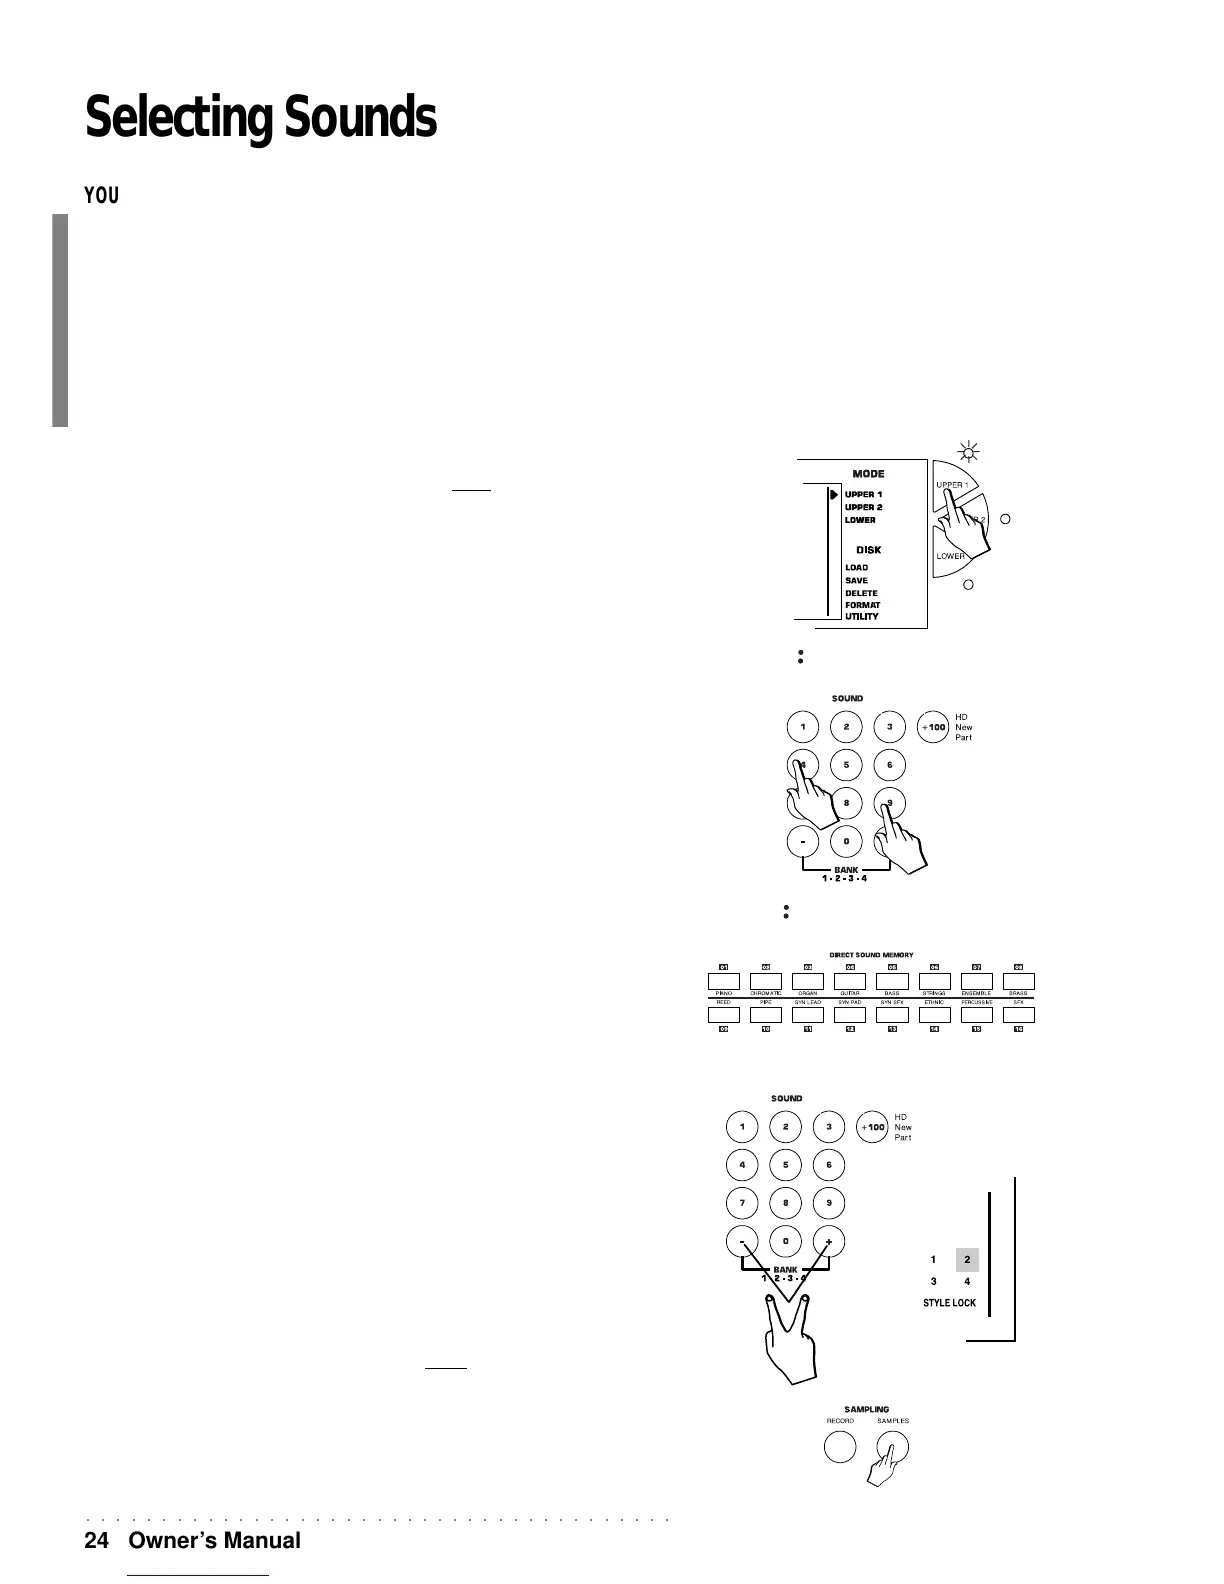
TO SELECT KEYBOARD SOUNDS
To assign a Sound to a Keyboard section, you must first select the section using either the
relative activators (Upper 1, Upper 2, Lower) or the corresponding function buttons (F9, F8,
F7).
Only one section at a time can be in an enabled state.
1. Press one of the section selectors to the right of the display, or use the corresponding Function
buttons (F7…F9).
The arrowhead to the right of the display shows which section is selected and the
display shows the assigned sound.
2. Specify the corresponding Sound number on the SOUNDS selection keypad.
To select a Sound with a number greater than 99, first press the 100+ button to specify
the hundreds, then specify the two remaining digits. For example, referring to the
SOUNDS tables on the top right of the control panel, select Sound n. 100 BRIGHT-
NESS: press 100+ then press ‘0’ twice to specify 100.
3. Play on the keyboard and listen to the Sound recalled.
Repeat the operation to listen to other sounds.
The sound shown in the display is always the one assigned to the section indicated by
the right arrowhead.
4. Any sound combination can be memorised to one of the 16 direct access memory locations.
Configure the Real Time keyboard sections as preferred and hold down one of the
Direct Sound Memory buttons for a few seconds to save the current sound combination
for future recall.
BANK 1, 2, 3 AND 4
The WK2 Sounds are organised in SOUND BANKS which are accessed by pressing the
both + and – buttons of the right hand selection keypad at the same time.
Banks 1, 2 and 3 each contain 128 Sounds; those of Bank 1 are General MIDI compatible.
Bank 4 houses a further 60 Sounds which can be selected by activating Bank 4 and select-
ing them in increasing or decreasing order using the + / – buttons of the right hand selection
keypad. Bank 1, 2 and 3 sounds are GMX compatible (GMX is an extended GeneralMIDI
standard implemented by Generalmusic).
The WK2 Drumkits are in Banks 2, 3 and 4 (112-119). You can choose between 17 Drumkits;
the relative drum maps appear in the Appendix. Bank 4 contains an additional Drumkit
(DrumSFX). To assign a Drumkit to one of the keyboard sections, use the same operation
as described for the Sound assignment. Remember however, to select BANK 2 or BANK 3
with the –/+ buttons of the Sound selection keypad before specifying the relative Drumkit
Program Change number (112 - 119). The current BANK number is shown in the display
zone in the extreme bottom right hand corner.
SAMPLES, when in RAM, reside in a special bank which is accessed by pressing the
SAMPLES button. The Samples are assigned to a selected (flashing) track with the + and
– buttons of the right hand selection keypad.
SL STRIN
49
PIANO 1
00