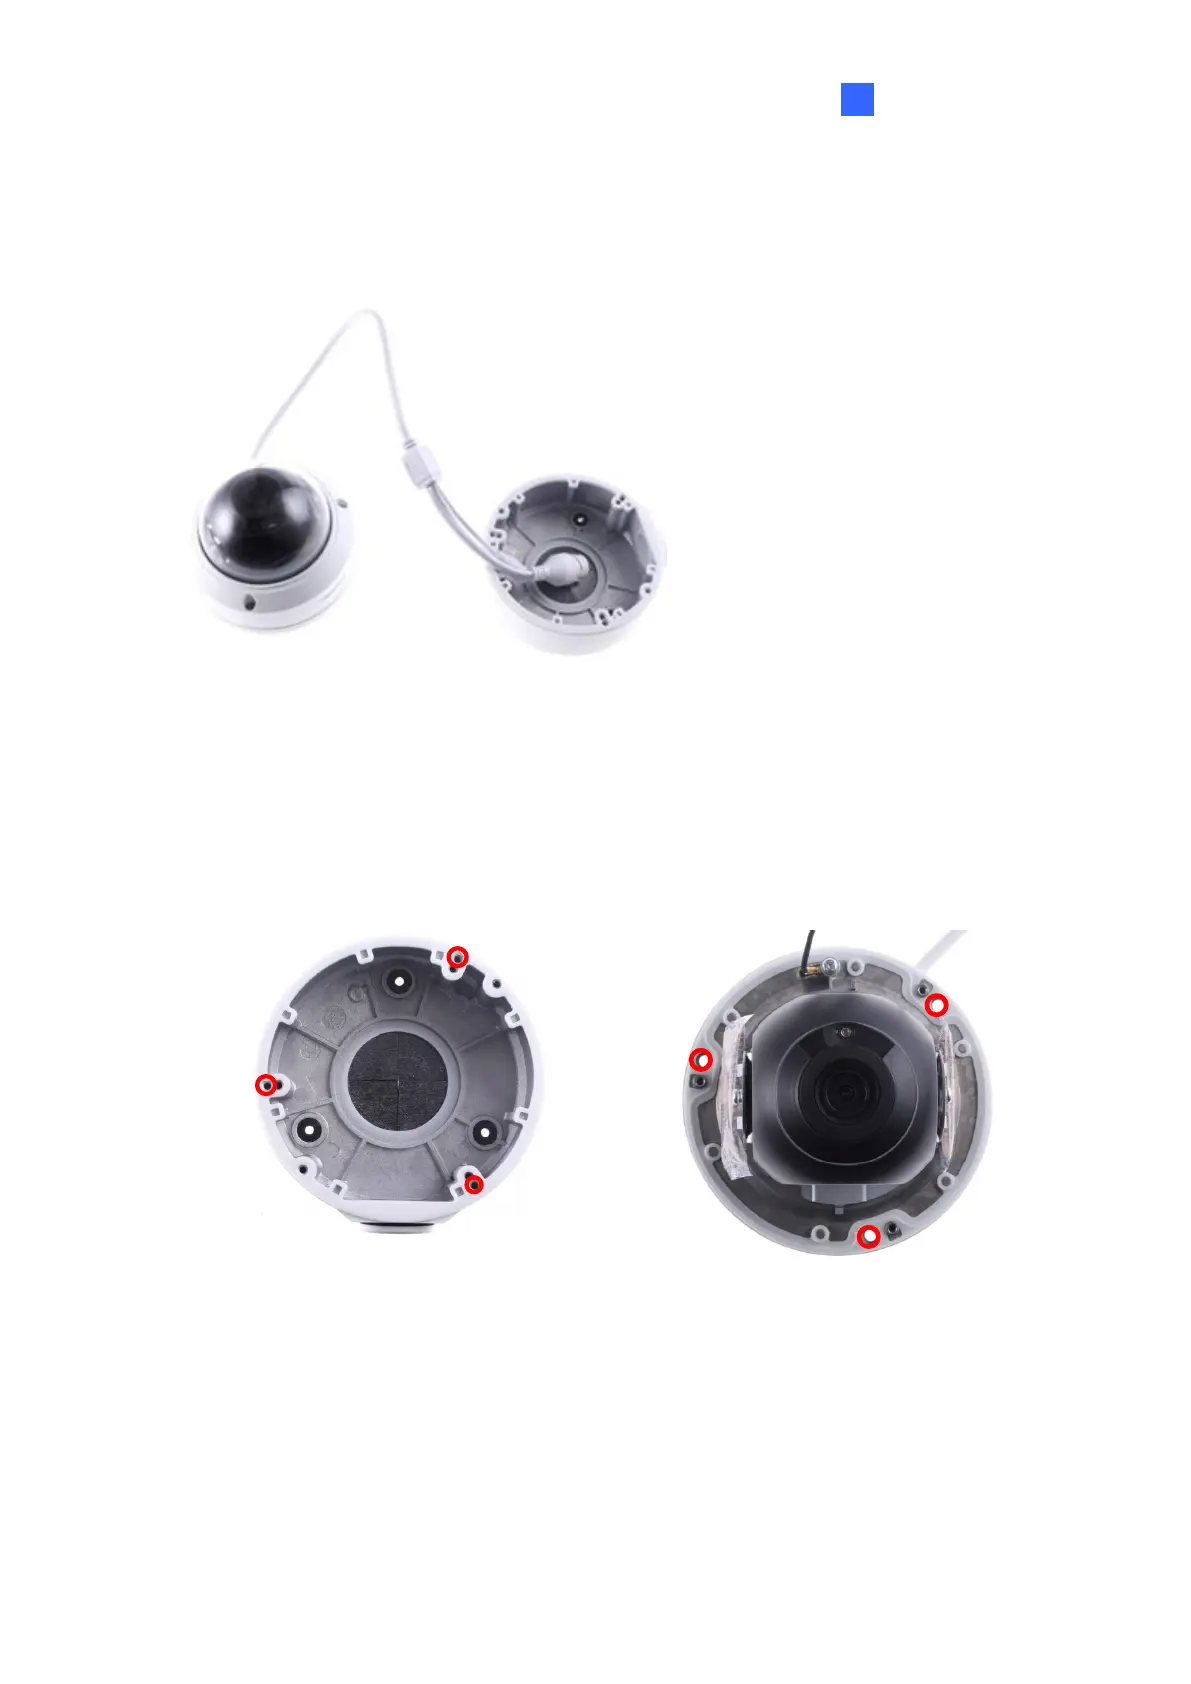
3. Insert 3 screw anchors to the screw locations and secure the GV-Mount213 to the wall /
ceiling with 3 long screws.
4. Thread the Ethernet cable through the center socket and waterproof the Ethernet cable.
For details, see 1.8 Waterproofing the Cable.
Figure 1-79
5. Fit the cable into the GV-Mount213.
6. Remove the camera cover and fasten the camera to the wall box mount as indicated
below using the supplied short screws.



 To Next Page