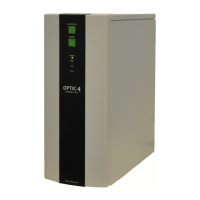
3.7 OPTIC-4 Local Control
OPTIC-4 provides simple local control features. For more extensive control and the method
definition and development, the Evolution Workstation software running on a host PC is required.
The two buttons keypad of the OPTIC-4 control unit provides basic control to:
• Override the standard procedure to run the method that is being initialized or stop the
running method.
• Put the system into the standby state by pressing subsequently END RUN and STANDBY
buttons.
• Switch system into the firmware update state.
When power is applied to OPTIC-4, a system initialization sequence is performed. During this time
all the status LED’s are burning. On completion of the initialization sequence only the LED
“STANDBY” remains switched on.
3.8 OPTIC-4 Keypad
Two keys of the OPTIC-4 local keypad perform the following functions:
RUN/END RUN - overrides the standard procedure and runs a method while it is being initialized or
is in “Waiting for Ready In” or “Waiting for Run In” state. It also allows interrupting running method
and forcing the system to initialize the same method again.
STANDBY - switches the system into the standby state while the method is being initialized or is in
“Waiting for Ready In” or “Waiting for Run In” state. It is done by pressing subsequently END RUN
and STANDBY buttons.
Pressing simultaneously and holding RUN and STANDBY buttons during 15 sec while rebooting the
unit, brings the system into the firmware update mode. This is required for the firmware update via
the USB communication line.
3.9 Status LED’s
System status information is presented to the user via status LED’s:
• STANDBY – indicates that the system is in Standby state and programmed to maintain
parameters set via the Standby Parameters dialog in the Evolution Workstation software.
• Blinking READY - indicates that either method is being initialized or the system waits for
Ready In signal from GC or autosampler.
• READY – indicates that the initial parameters of method are set and the system is ready for
run.
• Blinking RUN – indicates that the system waits for Run In signal either from a GC or an
autosampler.
• RUN – indicates that method is being run.
• FAULT – indicates that the system is the error state and requires rebooting.