9.5 Saving, Displaying, and Deleting Screen Copies
144
You can save the currently displayed screen as a BMP (256-color) file. The file extension is “.bmp.” If the
instrument is connected to a printer, you can also print screens (in monochrome).
You can save (output) the screen at a given instant to the set SD memory card by pressing the key
while the screen you wish to save is displayed.
9.5 Saving, Displaying, and Deleting Screen
Copies
Save
RS
Connection:
SD memory card or printer
File names:
Auto generated, extension of “.bmp”
00000000.BMP (consecutive numbering in the folder ranges from 00000000 to 99999999)
Example: 00000001.BMP
• When saving screen copies to the SD memory card, verify that the [RS-232C] setting on
the [SYSTEM]-DF1 [MAIN]-F2 [HARDWARE] screen is set to [OFF]. (If this parameter
is set to [PRINTER], data will be output to the printer instead of the SD memory card.)
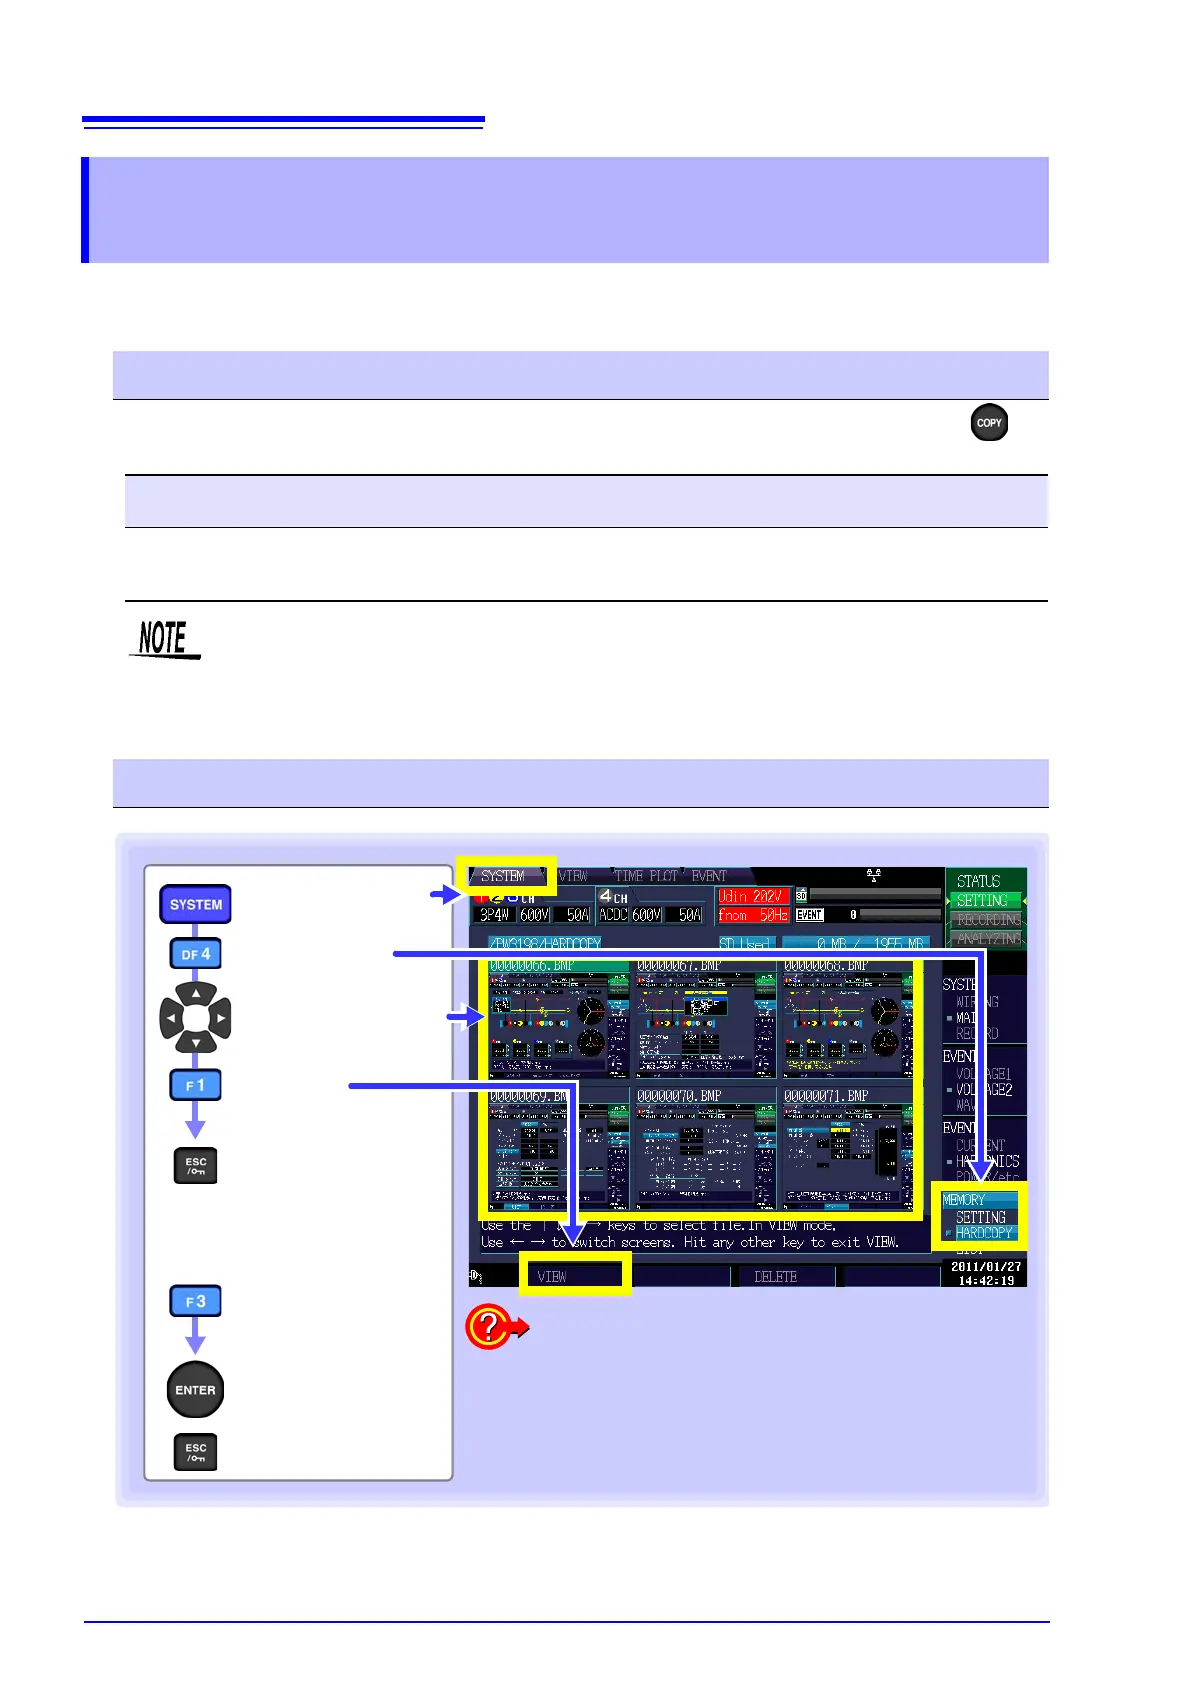
• Up to 102 files can be displayed on the [HARDCOPY] screen.
Displaying and deleting files
Return to the list.
(You can also return
with any other key.)
[HARDCOPY]
[SYSTEM] screen
Select the file you
wish to display
[VIEW]
The file will be displayed.
To delete a file:
Select the file you
wish to delete
[DELETE]
A deletion confirmation
dialog box will be dis-
played.
Execute
Cancel
To view hard copies of screens for which a screen
copy interval was set
Use the cursor keys on the [LIST] screen to move the
cursor to an [AUTO COPY] file to display a thumbnail.
Select the thumbnail whose screen you wish to view
with the cursor keys and press the [VIEW] key to view
hard copies of screens for which a screen copy interval
was set.