1
4 Select and finalize
the desired settings.
Display a pull-
down menu
Select the
desired setting
Accept setting
Move the
cursor to the
desired setting
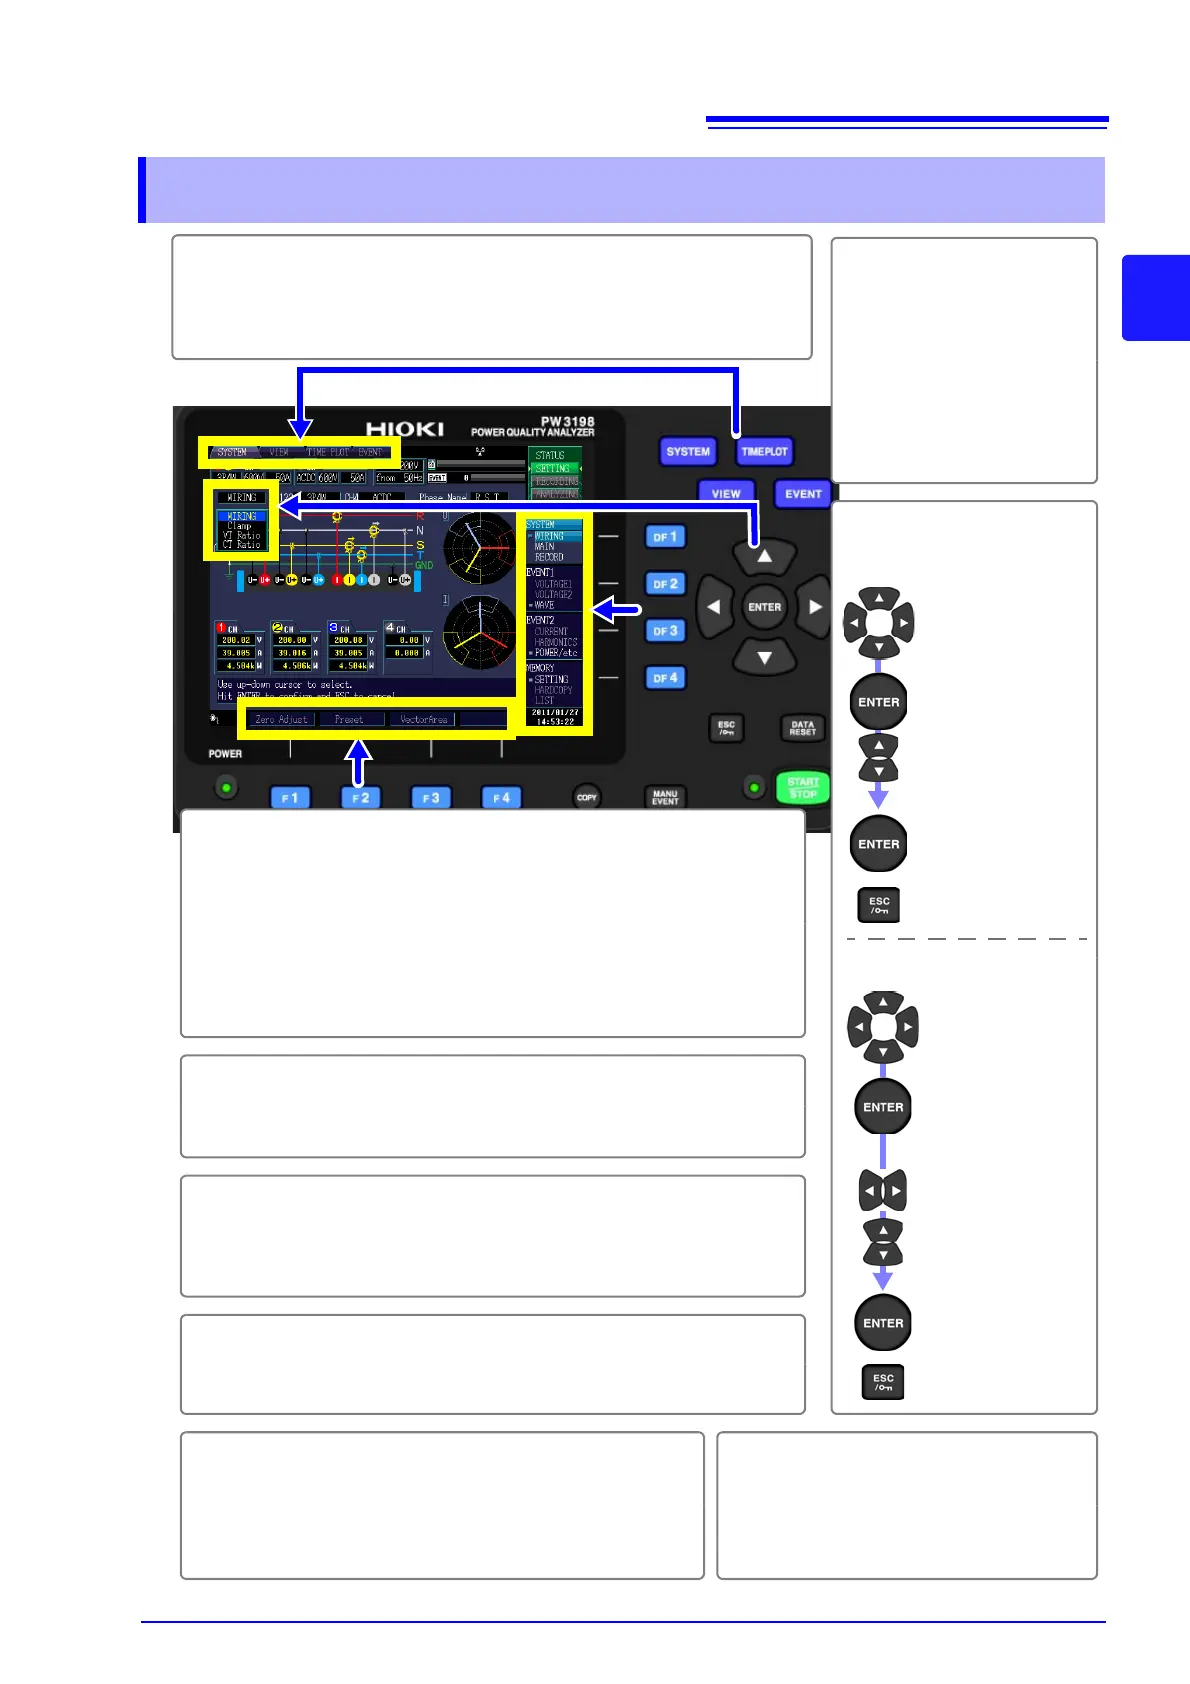
1 To select a display screen
Press SYSTEM, VIEW,TIME PLOT, or EVENT to display the correspond-
ing screen.
See: "2.3 Display Items and Screen Types" (p.20)
To change a value
Select the
value so that it
can be
changed
Select a digit
Select a value
Accept setting
Move the
cursor to the
desired setting
5 Start/stop recording.
Press the START/STOP key to start/stop recording.
See: "Starting and Stopping Recording" (p.14)
6 Revert to [SETTING] mode after stopping recording.
Press the DATA RESET key to reset the measurement data.
The instrument will return to [SETTING] mode from [ANALYZ-
ING] mode.
3 To select and change display contents and
settings
Press one of the F keys to select and change display contents
and settings. The displayed function labels depend on the cur-
rently displayed screen.
Freeze the waveform or value display.
On the [VIEW] screen, you can freeze the waveform or value
display by pressing the F4 [HOLD] key.
Cancel
Cancel
the setting
7 Engage the key lock.
Press and hold the ESC key for at least 3 seconds. To cancel
the key lock, press and hold the key for at least 3 seconds.
8 Save screen data (output it to a printer).
Press the COPY key. Data will be saved to the SD
card (or output to the printer).
See: "9.5 Saving, Displaying, and Deleting Screen Copies"
(p.144)
9 Generate an event manually.
Press the MANU EVENT key. Mea-
sured values and event waveforms
at that time will be recorded.
See: "Manual Events" (p.13)
2 Select the screen to
display.
Press one of the DF keys
to select and change dis-
play contents and set-
tings. The displayed
function labels depend
on the currently dis-
played screen.