BF135A•BF150A
5-37
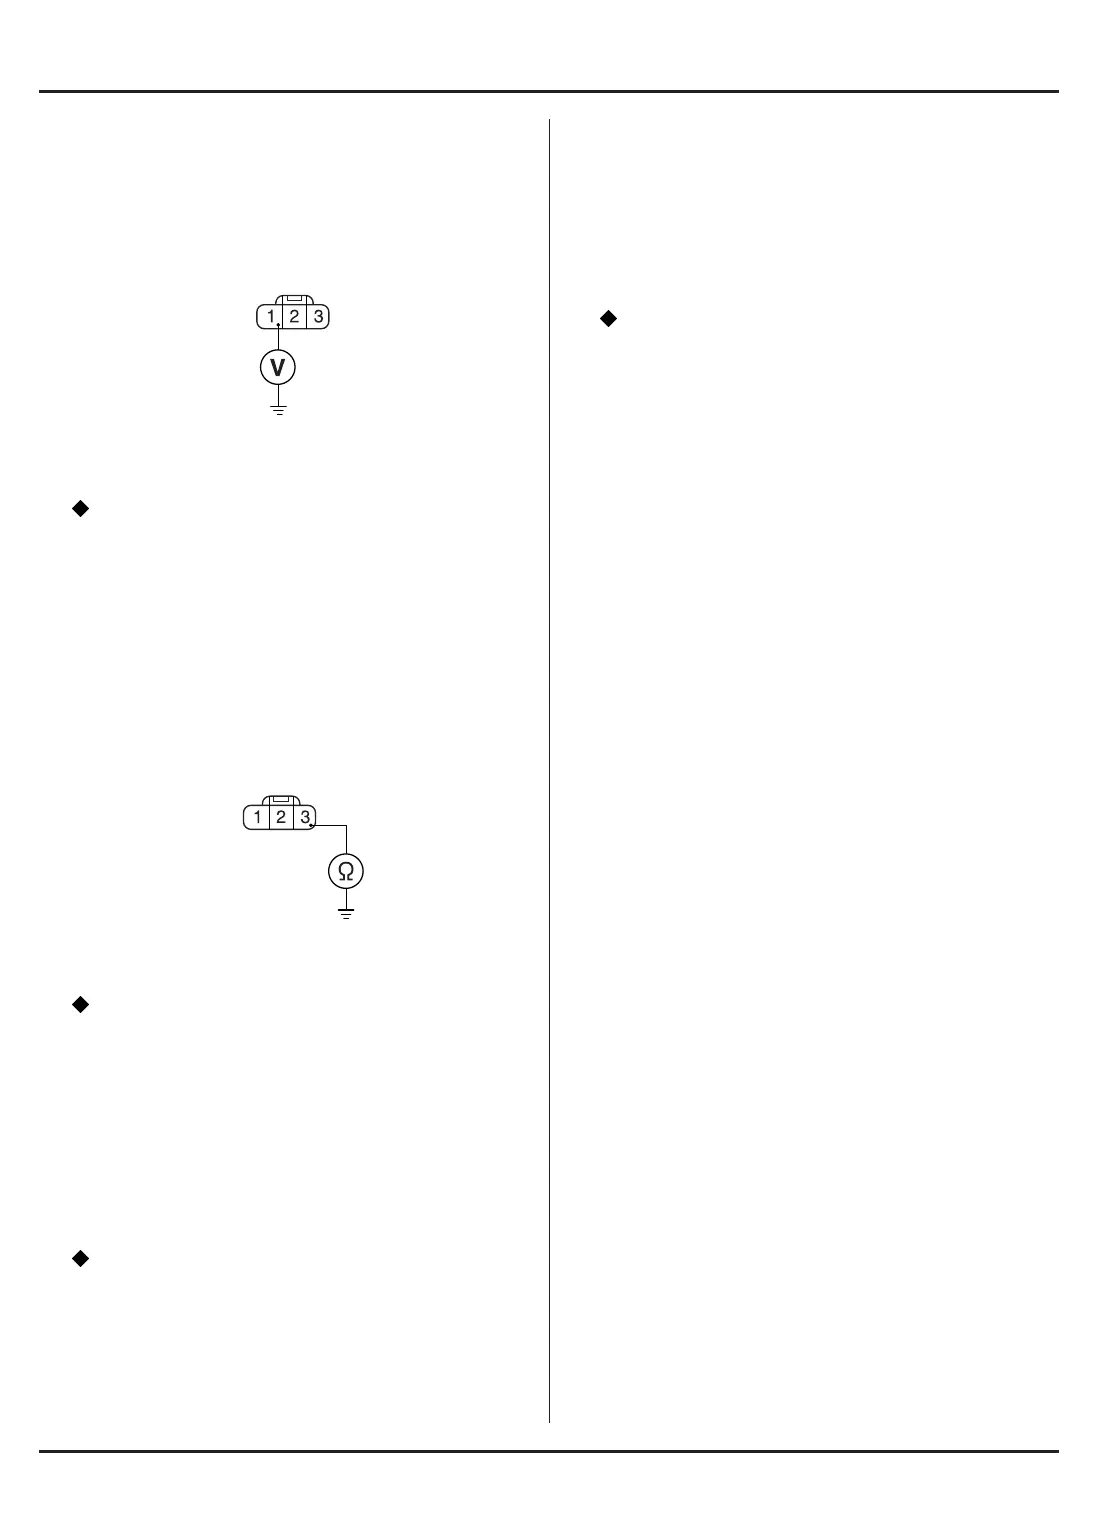
3. CMP sensor power line open circuit check
-1. Turn the ignition switch ON. Measure the voltage
between the No. 1 (Yellow/Black) terminal of the CMP
sensor harness side 3P connector and the engine
ground.
Is there the battery voltage?
YES – Repair open in the CMP sensor ground line.
NO – Repair open in the wire between the No. 4
fuse and the CMP sensor.
4. CMP sensor signal line open circuit check
-1. Turn the ignition switch ON. Measure the voltage
between the No. 3 (Green) terminal of the CMP sensor
harness side 3P connector and the engine ground.
Is the measurement voltage 4.75 – 5.25V?
YES – Perform “5. CMP sensor check”.
NO – Repair open in the wire between the CMP
sensor and the ECM.
5. CMP sensor check
-1. Connect the HDS pocket tester and clear the DTC
once.
-2. Start the engine and let it run at idling under no load.
Check the DTC using the HDS pocket tester.
Does the DTC 8-1 appear?
YES – Replace the CMP sensor and recheck. If the
DTC 8-1 appears again, substitute a known-
good ECM and recheck.
NO – End of the check
DTC 8-2: CMP sensor pulse is abnormal
1. Symptom reproduction test
-1. Connect the HDS pocket tester and clear the DTC
once. If the DTC can not be cleared, go on the trou-
bleshooting.
-2. Start the engine and let it run at idling under no load.
-3. Check the DTC using the HDS pocket tester.
Does the DTC 8-2 appear?
YES – Replace the CMP sensor and recheck. If the
DTC 8-2 appears again, substitute a known-
good ECM and recheck.
NO – Temporary failure (Disappeared)
CMP SENSOR HARNESS
SIDE 3P CONNECTOR
IGP
(YELLOW/BLACK)
VIEWED FROM THE
TERMINAL SIDE
CMP SENSOR HARNESS
SIDE 3P CONNECTOR
TDC (GREEN)
VIEWED FROM THE
TERMINAL SIDE










 To Next Page