12-6
3. INSPECTION
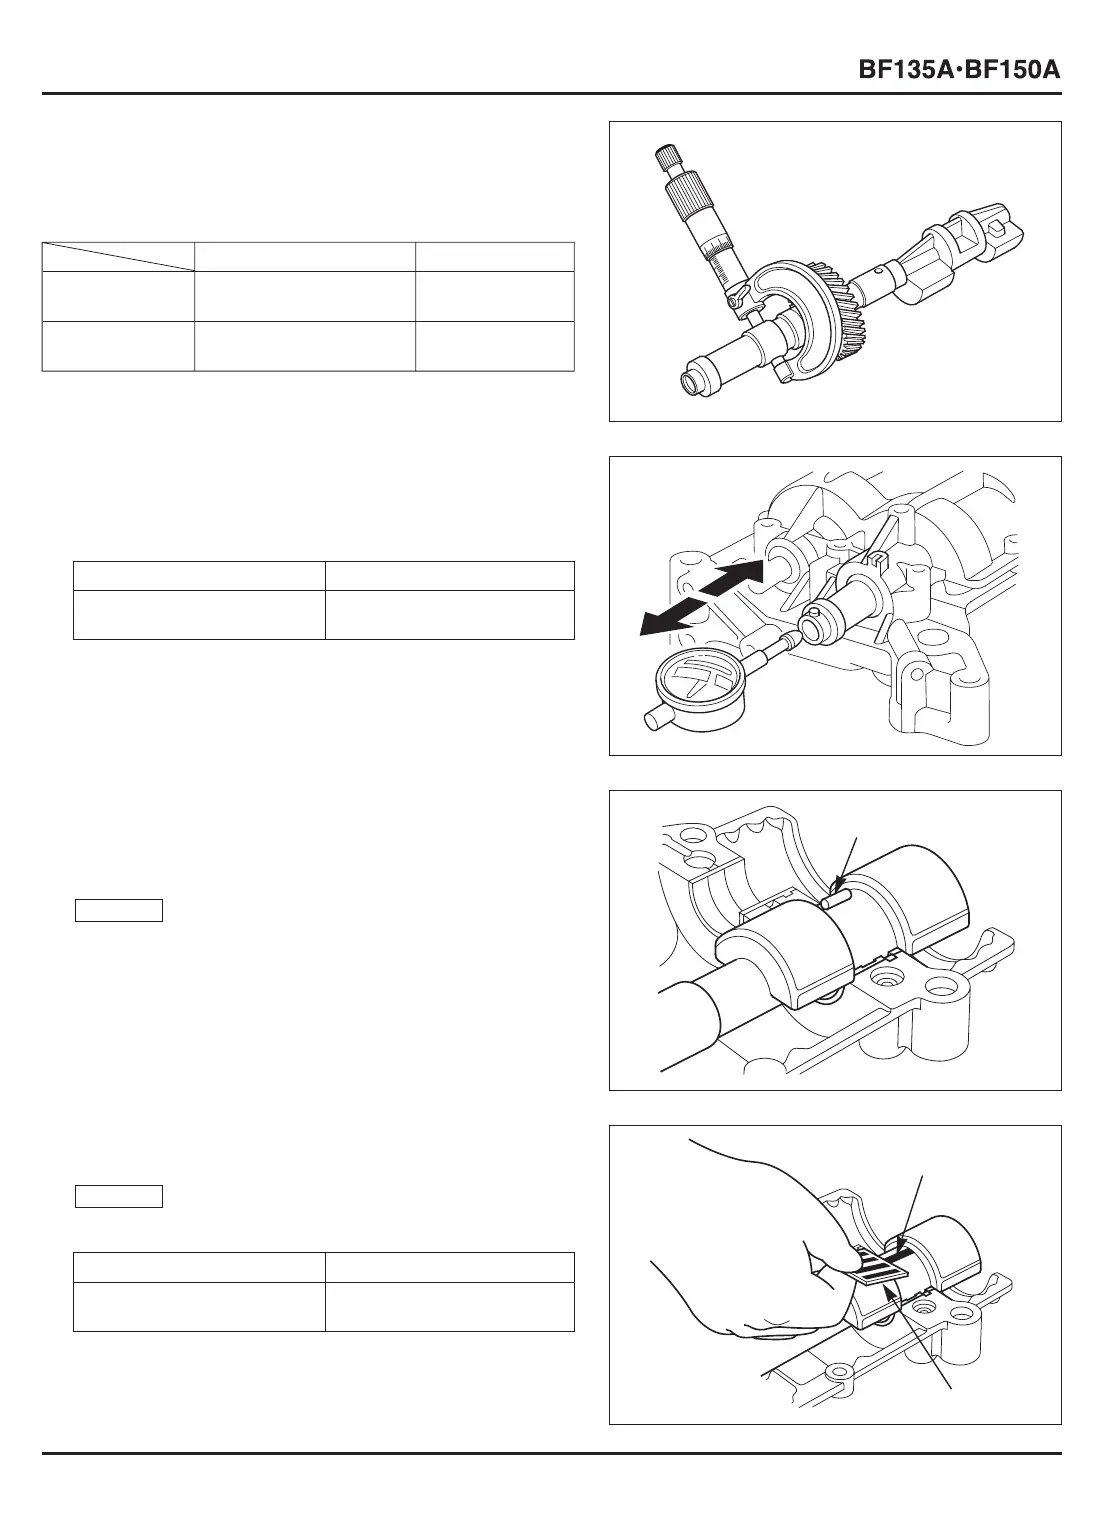
• BALANCER SHAFT JOURNAL O.D.
Measure the O.D. of the balancer shaft No.1 journal.
• BALANCER SHAFT AXIAL FREE PLAY
1) Assemble the balancer case assembly (P. 12-7).
2) Measure the balancer shaft axial play with the dial indicator
by moving the balancer shaft back and force.
3) If the measurement exceeds the service limit, replace the
balancer case assembly.
• BALANCER SHAFT OIL CLEARANCE
1) Clean the balancer shaft No.2 journal and the balancer
holder bearing. Check the journal and the bearing for
damage and wear.
2) Assemble the balancer case assembly (P. 12-7).
3) Remove the rear balancer holder. Set a plastigauge on the
balancer shaft No.2 journal as shown.
• Set the plastigauge in the axial direction on the balancer
shaft No.2 journal.
• Do not turn the balancer shaft while checking oil
clearance.
4) Reinstall the rear balancer holder and tighten the bolts to
the specified torque (P. 12-7).
5) Remove the rear balancer holder. Measure the width of the
pressed part of the plastigauge using the scale printed on
the bag of the plastigauge.
Measure the widest width on the plastigauge.
NOTICE
NOTICE
6) If the measurement exceeds the service limit, replace the
balancer shaft bearing and recheck the oil clearance.
If the measurement still exceeds the service limit, replace
the balancer shaft.
[1]
PLASTIGAUGE
[1]
PLASTIGAUGE
[2]
SCALE
STANDARD SERVICE LIMIT
Front
19.938 – 19.950 mm 19.92 mm
(0.7850 – 0.7854 in) (0.784 in)
Rear
23.938 – 23.950 mm 23.92 mm
(0.9424 – 0.9429 in) (0.942 in)
If the measurement exceeds the service limit, replace the
balancer shaft.
STANDARD SERVICE LIMIT
0.060 – 0.140 mm 0.15 mm
(0.0024 – 0.0055 in) (0.006 in)
STANDARD SERVICE LIMIT
0.060 – 0.120 mm 0.15 mm
(0.0024 – 0.0047 in) (0.006 in)




 To Next Page