Installation
3/00 DR4300 Circular Chart Recorder Product Manual 17
2.3.2 Mounting Flush in Panel (New Panel Cutout)
Procedure
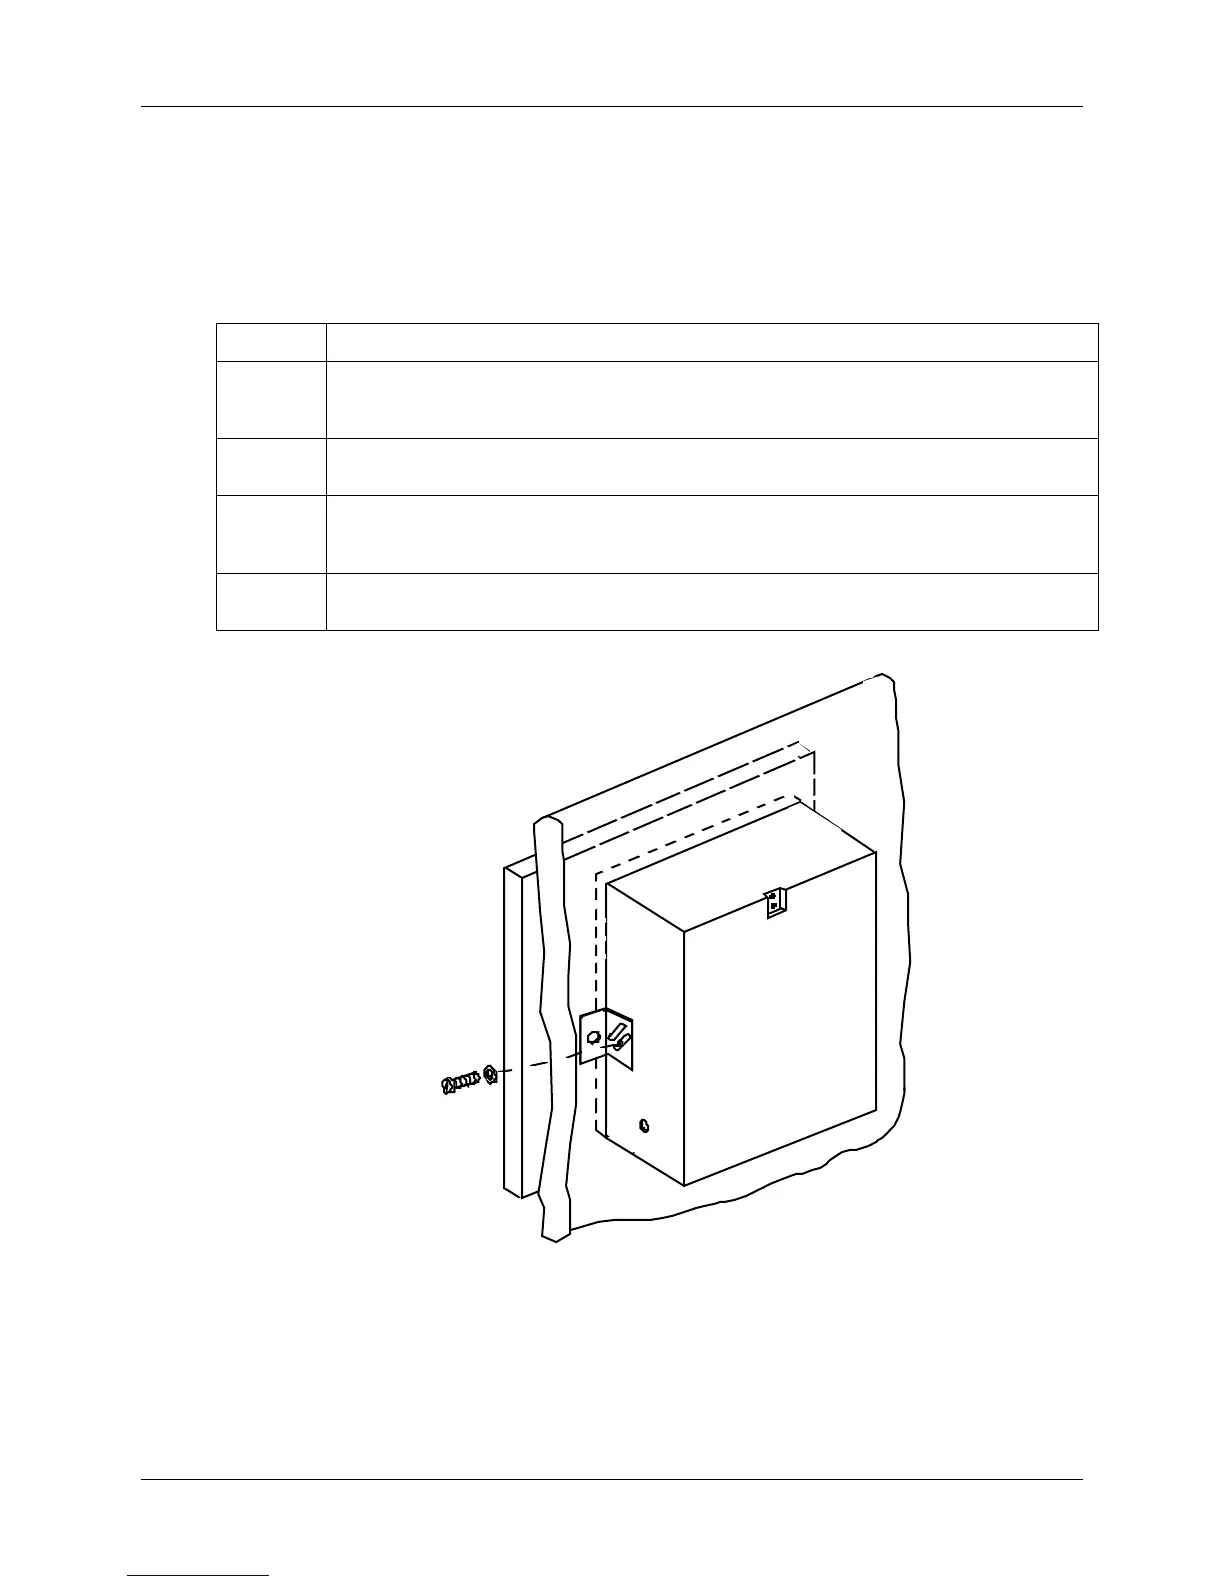
Refer to Figure 2-3 and follow the procedure in Table 2-2 to make a new cutout in a panel and mount your
recorder in the cutout.
Table 2-2 Mounting Flush in a New Panel Cutout
Step Action
1
At the appropriate location, make a square cutout in the panel. Cutout dimensions should be
322.56 mm ± 1.52 mm x 322.56 mm ± 1.52 mm [12.7 in ± 0.060 in x 12.7 in ± 0.060 in]. See
Figure 2-3.
2
Orient the recorder case properly and slide it into the cutout from the front of the panel.
Support the recorder as shown in Steps 3 and 4.
3
Refer to Figure 2-3. From the back of the panel, attach a mounting bracket to each side of the
recorder case using a 1/4-20 x 1/2-inch hex screw for each bracket (mounting hardware
supplied with recorder). Leave the screws slightly loose so you can adjust the brackets.
4
While holding the recorder firmly against the panel, slide each bracket against the back of the
panel and tighten the screws.
Hex screw,
1/4-20 x
1/2 inch and
washer
21406
Figure 2-3 Mounting Flush in a New Panel Cutout (Rear View)
 Loading...