Revision 5.0 ST 800 Series HART/DE Option User’s Manual Page 49
2. Click Execute. You will be warned to remove the loop from automatic control. After doing
so, press OK to continue.
3. Select 4mA from the list, and then click OK. A message will prompt you to apply a new
4 mA input.
4. Click OK; otherwise, click Abort.
5. When the Current applied process value: is displayed, choose Select as 4mA value, and
click OK.
6. Repeat steps 2 through 4 to set the URV to the applied input pressure for 20 mA output.
7. Click Return to go back to the Calibration menu.
8. Click Send. The Send to Device screen will be displayed.
9. Select the Apply Values check-box.
10. Click Send to download the change to the Transmitter, or click Return to continue making
changes.
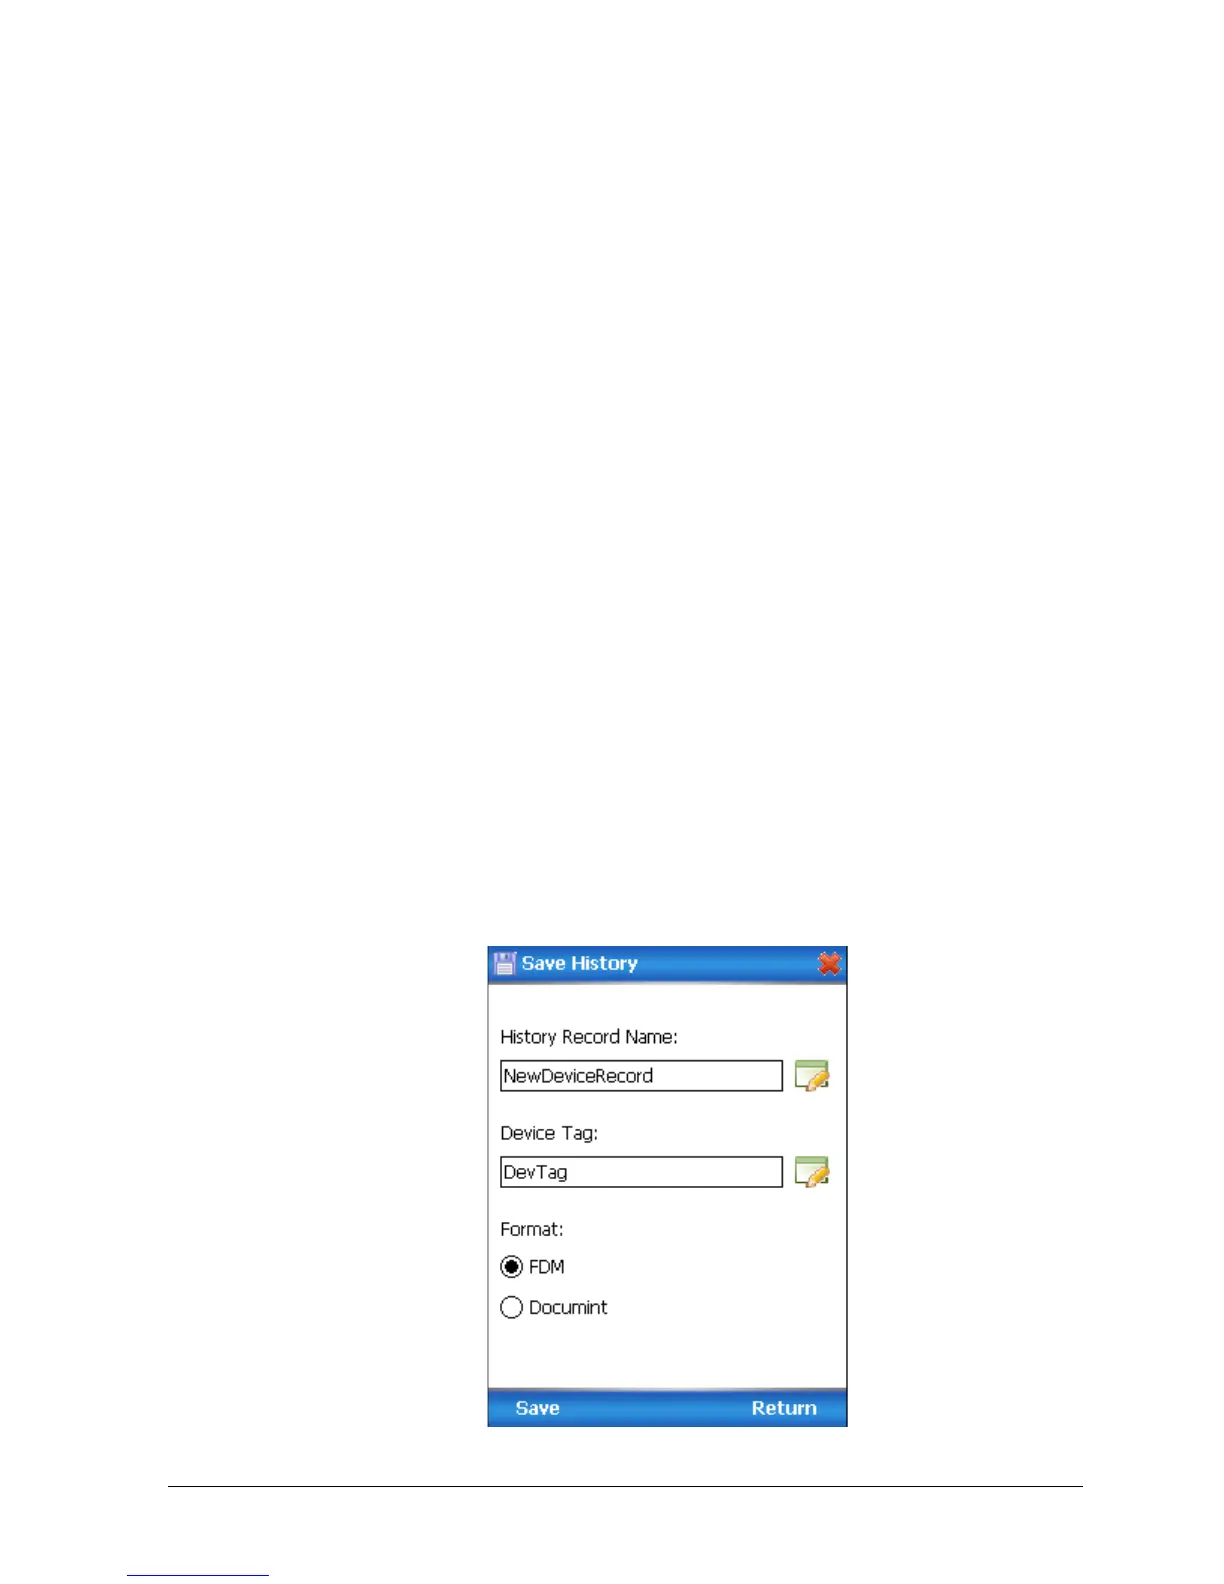
Saving device history
FDC provides you a feature wherein you can save the device configuration snapshot as history. This
history record may then be transferred to a central asset management database such as FDM.
Using this feature you can save the device configuration snapshot as device history of a connected
device at any given time in a predefined location. The following are the features of save device
history option.
• Two formats of history are supported: FDM and DocuMint.
• Only one snapshot per device instance is allowed to be saved and you can save the
snapshot of a device any number of times overwriting the existing one.
To save device history, perform the following steps.
1. On Device Home page, tap Tools.
2. Select Save History and tap Select
The Save History page appears.

 Loading...