25
Chapter 1: Installing the Emulation Probe
Connecting the Emulation Probe to a LAN
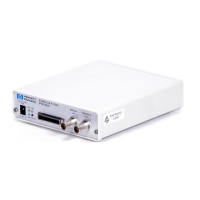
6 Disconnect the power cord from the emulation probe, and
connect the emulation probe to your network.
This connection can be made by using either the 10BASE-T connector
or the 10BASE2 (BNC) connector on the emulation probe. Do not use
both connectors at the same time.
7 Set the configuration switches to indicate the type of connection
that is to be made.
Switch S1 must be set to OFF, indicating that a LAN connection is
being made.
Switch S5 should be ON if you are connecting to the BNC connector:
Switch S5 should be OFF if you are connecting to the 10BASE-T
connector:
If you are using the 10BASE-T connector, see “To set the 10BASE-T
configuration switches” on page 28.
Set all other switches to ON.
8 Connect the power cord to the emulation probe.
9 Verify your emulation probe is now active and on the network.
See “To verify LAN communications” on page 29.
Once you have set a valid IP address, you can use the telnet utility to
connect to the emulation probe, and use the lan command to change
LAN parameters.