29
Installing/Removing an interface module
CAUTION:
hen you install or remove an interface module, follow these guidelines:
• Never touch the components on the interface module surface.
• Do not use excessive force.
The HP 5930-2Slot+2QSFP+/HP 5930-2Slot+2QSFP+ TAA switch provides two interface module slots.
The HP 5930-4Slot/HP 5930-4Slot TAA switch provides four interface module slots. For the available
interface modules, see "Appendix B FRUs and compatibility matrixes."
The interface module installation and removal procedures are the same. This section uses the
LSWM18QC interface module as an example.
Installing an interface module
1. Wear an ESD wrist strap and make sure the wrist strap makes good skin contact and is reliably
grounded.
2. (Optional.) If the target interface module slot has a filler panel installed, remove the filler
panel. Figure 35 uses th
e HP 5930-2Slot+2QSFP+/HP 5930-2Slot+2QSFP+ TAA switch as an
example.
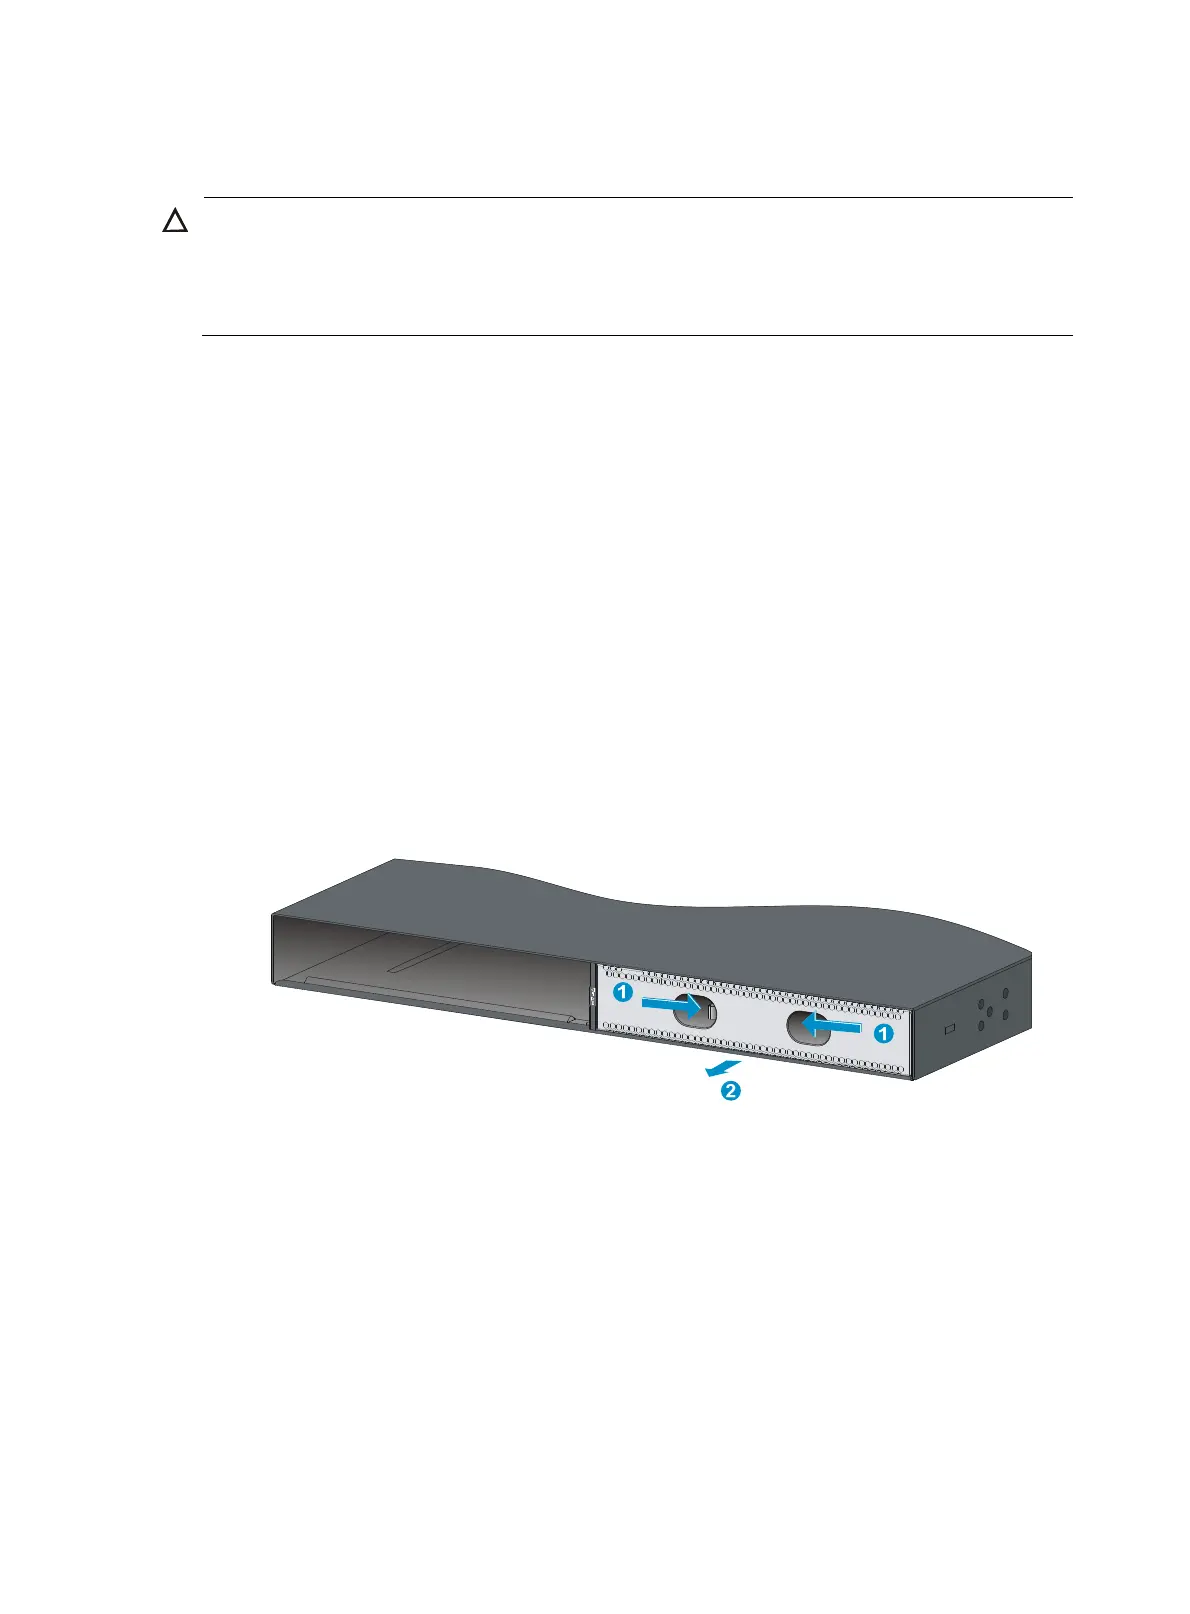
To remove a filler panel from an interface module slot:
a. Use your thumb and forefinger to hold the filler panel through the two holes.
b. Push right the metal tab in the left hole and pull out the filler panel along the guide rails.
Figure 35 Removing a filler panel from the interface module slot
Keep the removed filler panel secure for future use.
3. Unpack the interface module.