EasyManuals Logo

HP Notebook Series Reference Guide

HP Notebook Series
102 pages
To Next Page IconTo Next Page
To Previous Page IconTo Previous Page
Page #60 background imageLoading...
Page #60 background image
5–10 Reference Guide
Add-On Devices
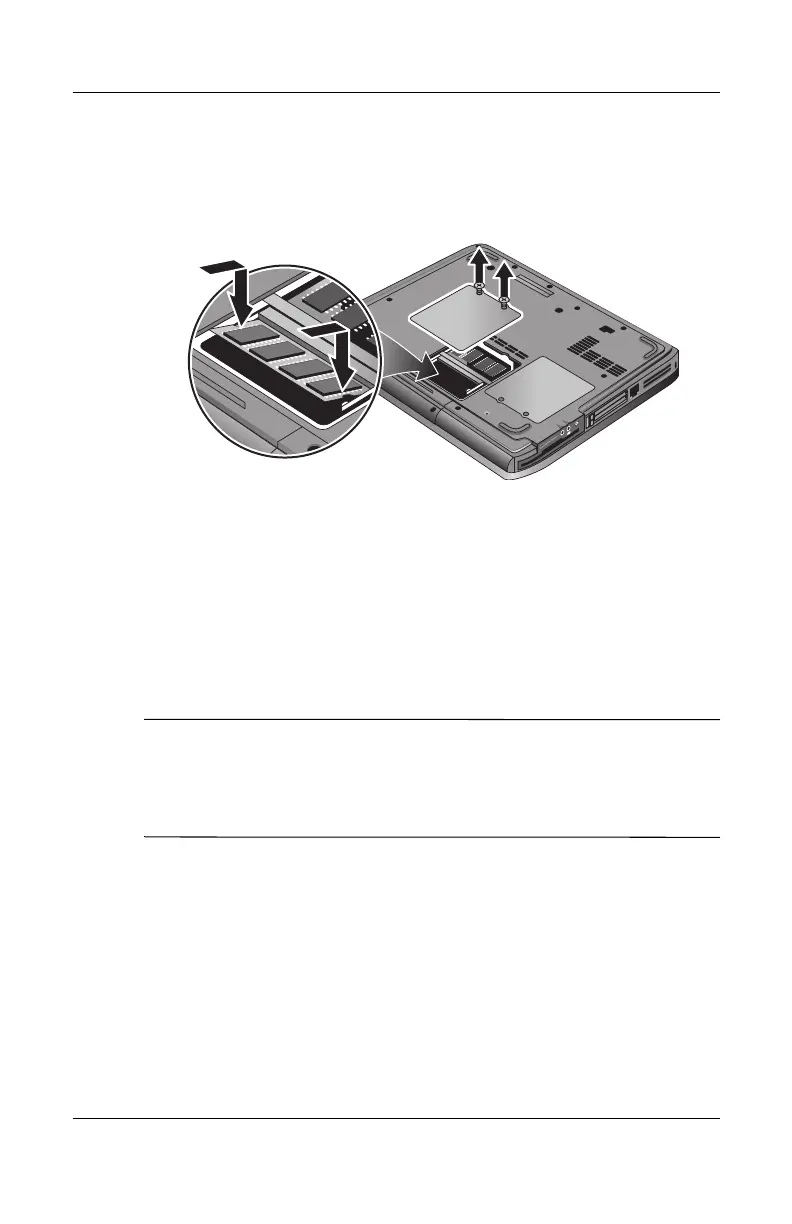
4. Insert the RAM board into the connector at about a 30-degree
angle until it is fully inserted. Then press down at both sides
until both latches snap closed.
5. Replace the cover.
6. Insert the battery pack.
To Remove a RAM Expansion Module
You may want to remove a RAM module so you can install a
larger one. You will need a small Phillips screwdriver for these
steps.
Ä
CAUTION: Your notebook internal components are extremely sensitive
to static electricity and can be permanently damaged by it. Handle the
RAM module only by its edges. Before installing the memory module,
discharge static electricity by touching the metal shielding around the
connectors on the back of the notebook.
1. Select Start > Turn Off Computer > Turn Off.
2. Unplug the AC adapter, if present, then remove the
battery
pack.
3. Turn the unit bottom-side up, loosen the screws holding the
RAM cover, then remove the cover.

Table of Contents

Other manuals for HP Notebook Series

Questions and Answers:

Question and Answer IconNeed help?

Do you have a question about the HP Notebook Series and is the answer not in the manual?

HP Notebook Series Specifications

General IconGeneral
CategoryLaptop
SeriesNotebook Series
ProcessorVaries by model (e.g., Intel Core i3/i5/i7, AMD Ryzen)
RAMVaries by model (e.g., 4GB, 8GB, 16GB)
StorageVaries by model (e.g., 256GB SSD, 1TB HDD)
Display14-inch to 17.3-inch HD or FHD (varies by model)
Operating SystemWindows 10 or Windows 11 (varies by model)
GraphicsIntegrated Intel or AMD Graphics or Discrete NVIDIA or AMD Graphics (varies by model)
BatteryVaries by model
WeightVaries by model

Related product manuals