Figure 16 HSV300-S rear view
1. Console port
2. Ethernet port
3. Browse to http://10.77.77.77 for the Controller 1 switch.
NOTE:
Fibre Channel switches are referred to as
left slot switch
and
right slot switch
in Brocade Web
Tools.
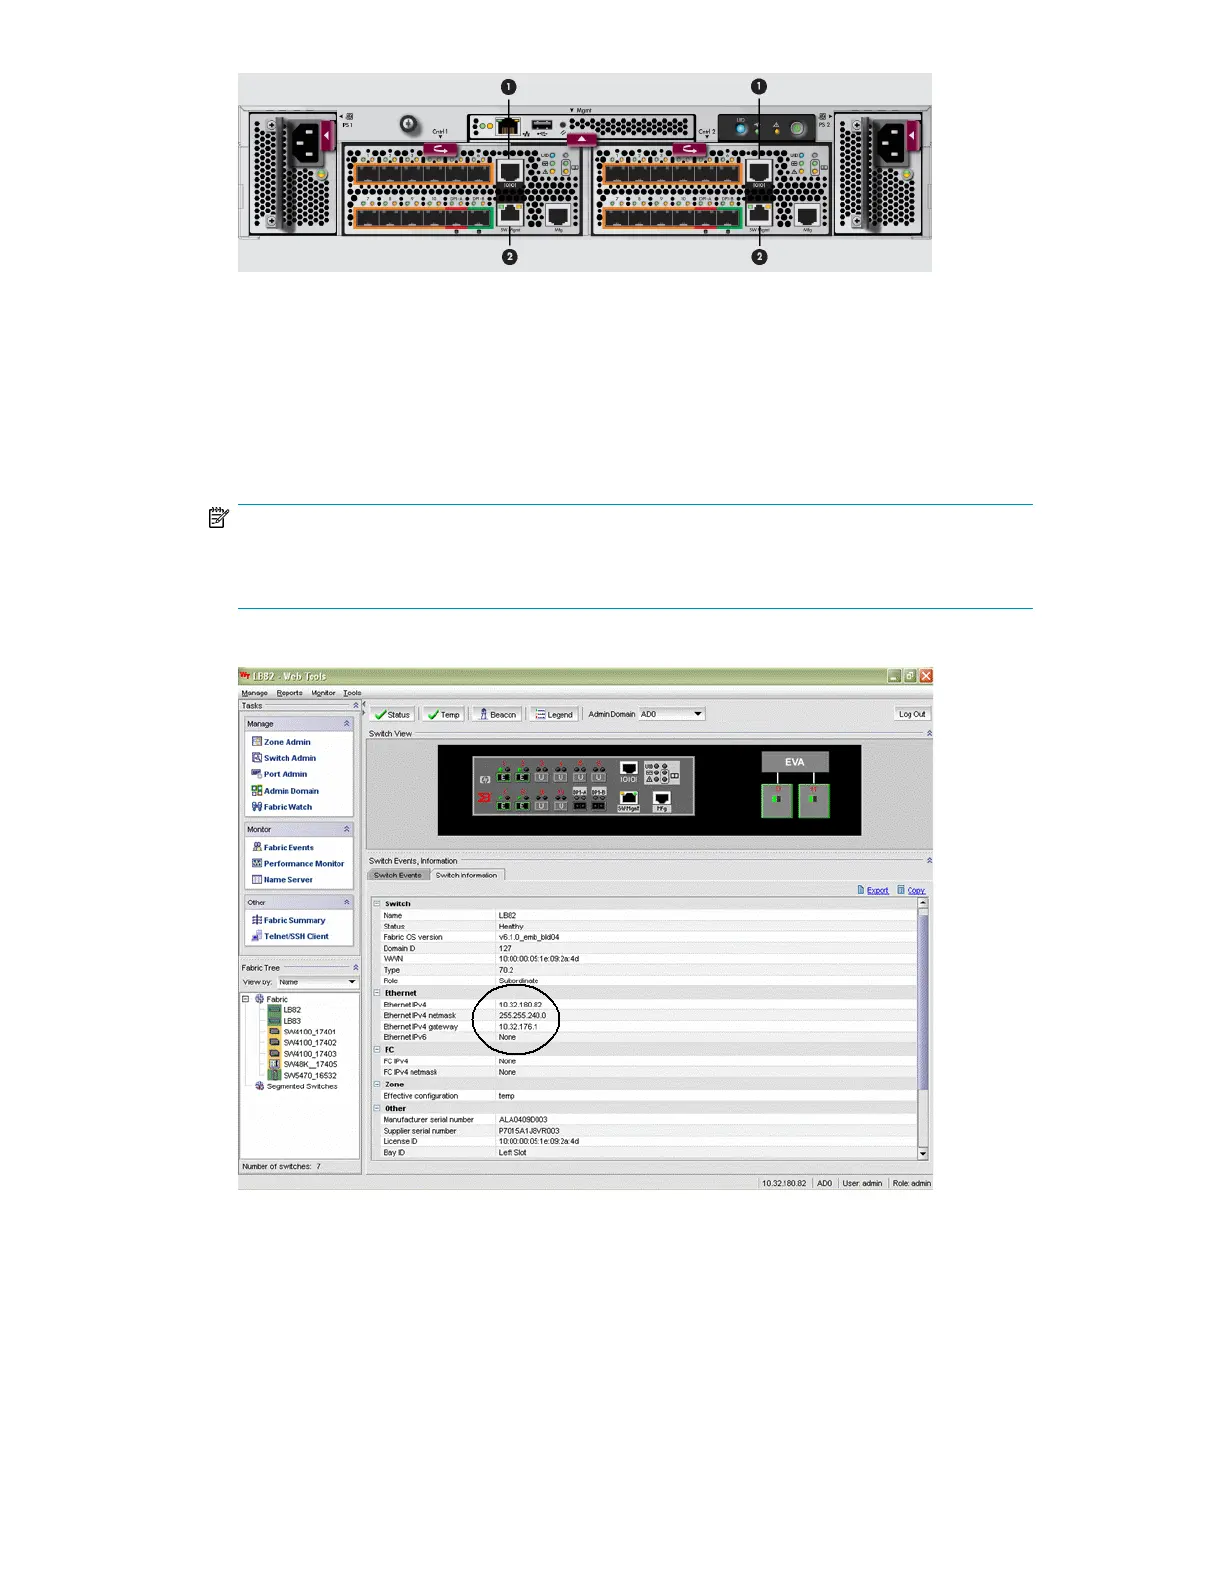
The switch management GUI (Brocade Web Tools) appears (Figure 17).
Figure 17 Switch Management GUI
4. Change the IP address and other settings of the switch as appropriate for your network. You may
also rename the switch or perform other configuration activities at this time.
5. Remove the Ethernet cable from the first switch and connect the cable to the Ethernet port (2,
Figure 16) of the other embedded switch. Browse to http://10.77.77.78 for the Controller 2
switch and repeat step 4.
HP StorageWorks 4400 Enterprise Virtual Array installation guide 41
 Loading...