Setup mode
OPERATION MANUAL Chapter 4
CC® Liability for errors and misprints excluded. V1.3.0en/06.07.15//14.06
4.2.14 Setting the setpoint
PROCEDURE
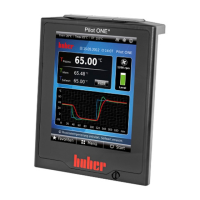
Go to the “Home” screen.
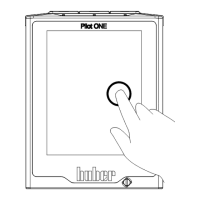
Tap on the keypad symbol next to “T
Setpoint
”.
Enter a new setpoint using the number keypad that appears.
The following must apply:
[Minimum setpoint limit] ≤ [Setpoint] ≤ [Maximum setpoint limit].
If these conditions are not met, a message will appear on the >Touchscreen< [88] and the entry
will be ignored. In this case, delete the value just entered either with the “Arrow” key or with the
“clear” key. Enter the setpoint again.
Confirm your entry by tapping on “OK”.
In the display that follows, confirm your entry again by tapping on “OK”.
The correct selection will be displayed graphically and the setpoint will be changed immediately.
If tapping on “OK” is not correct, this is displayed graphically for 2 seconds. After this, the display
will return to the “Home” screen again. Try changing the setpoint again.
4.3 Filling, venting, degassing and draining
The illustration “Wiring diagram” can be found on page 83 in section »Annex«.
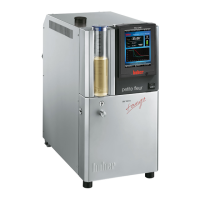
4.3.1 Filling, venting, degassing and draining the bath thermostat
Non-compliance with the safety data sheet for the thermal fluid to be used
INJURIES
Risk of injury to the eyes, skin, respiratory tract.
The safety data sheet for the thermal fluid to be used must be read prior to use and its con-
tents respected.
Observe the local regulations/work instructions.
Wear your personnel protective equipment (e.g. temperature-resistant safety gloves, safety
goggles, safety footwear).
Danger of slipping through contamination of floor and work area.
4.3.1.1 Filling and venting the bath thermostat and the externally closed application
PROCEDURE
Lift the >bath cover< [93] from the temperature control unit.
Carefully pour suitable thermal fluid (see page 35 in section »Information on the thermal flu-
ids«) using the filling accessories (funnel and/or beaker). During the fill process, ensure any nec-
essary measures, such as earthing the tanks, funnels and other aids, have been taken. The ther-
mal fluid can flow via the hose connection to the external application.
Switch on the temperature control unit using the >mains switch< [37].
Go to the “Categories Menu”.
Tap on the category “Temperature Control”.
Tap on the category “Start/Stop”.
Tap on the Dialog entry “Start air-purge”.
Confirm your choice by tapping on “OK”.
Using the numeric keypad that appears, enter the time interval for venting. The default is 0.5
minutes.
Confirm your entry by tapping on “OK” to start the filling process. The filling process is complete
when the bath vessel is filled sufficiently. For temperature control units with heater, each heat-
ing coil of the heater must be below the thermal fluid level. This corresponds to the minimum
level in the bath/minimal filling. There must be no air bubbles left in the external application (e.g.
double jacket). The control electronics monitors the fill quantity and displays the level on the
graphic display.
Run the "venting program” for a few minutes. This ensures that trapped air bubbles can escape.
These bubbles would result in a safety shutdown during an actual thermoregulation.
Stop venting. To do this, go to the category “Temperature Control”.
Tap on the category “Start/Stop”.