5-11: Machine Maintenance Machine Maintenance: 5-10
10. Remove the fasteners retaining the manifold
11. Separate manifold from crankcase (see Figure 5-6).
It may be necessary to rotate crankshaft or tap manifold with rawhide or plastic
mallet to loosen.
When sliding manifold from crankcase, use caution not to damage ceramic
plungers.
12. The seal assemblies may come off with the manifold (see Figure 5-7)
13. Examine the ceramic plungers. The surface should be
smooth and free from scoring, pitting or cracks (see
Figure 5-8); if not, replace.
14. Loosen the stainless steel plunger bolt.
Figure 5-8. Examine
Ceramic Plungers
Figure 5-6. Separate Manifold from Crankcase
Figure 5-7. Seal Assemblies May Come Off with Manifold
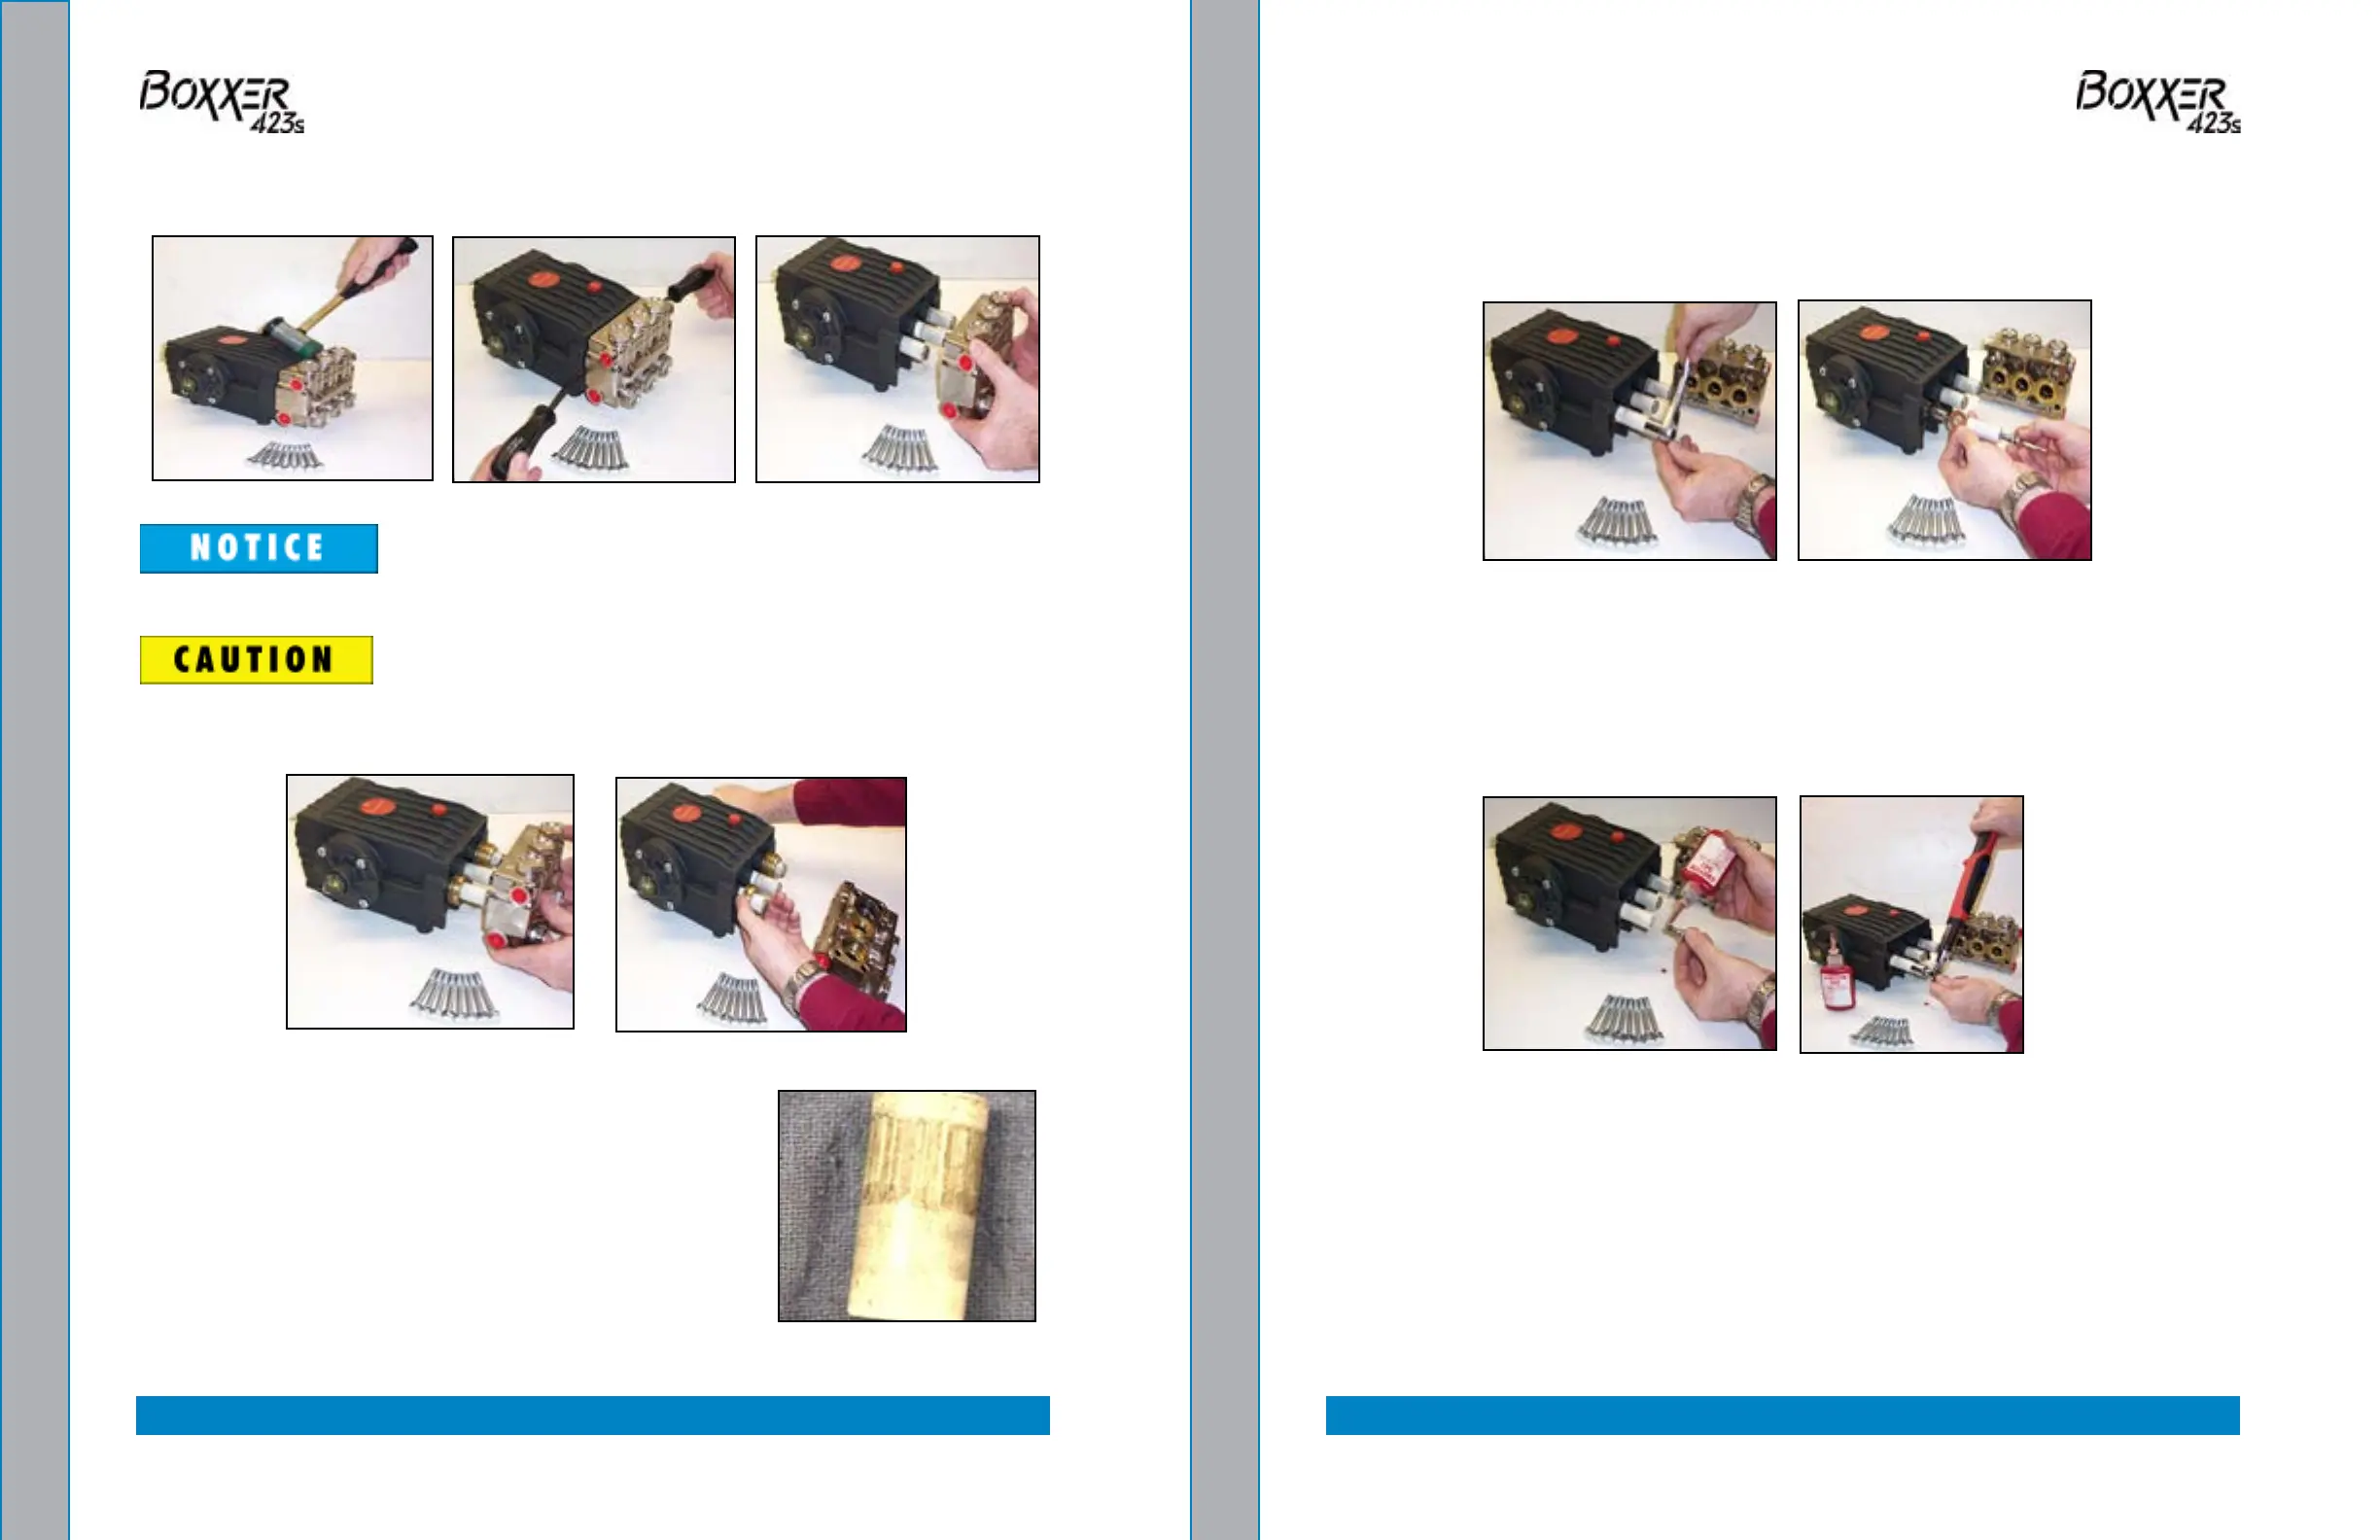
15. Remove the stainless steel plunger bolt and ceramic plunger from the plunger guide
(see Figure 5-9).
16. If the slinger washer is removed, be certain it is re-installed or replaced.
17. Separate plunger bolt from ceramic plunger (see Figure 5-9).
18. Install new Teon
® back-up ring and O-ring on the plunger bolt. Apply a lm of O-ring
grease on the outside of the O-ring (see Figure 5-10).
19. Apply removable anaerobic thread sealant (Loctite
®
542) to the threads of the plunger
bolt, carefully pressing the plunger bolt into ceramic plunger (see Figure 5-10).
20. Slide new ceramic plunger over the plunger guide (see Figure 5-10).
21. Torque plunger to 14.5 ft lbs
Figure 5-9. Remove Stainless Steel Plunger Bolt and Ceramic Plunger
Figure 5-10. Install O-ring, Apply Sealant and Slide Plunger over Plunger Guide