Replacing a RAID cache card
Note: For additional information and notes about installing adapters, see
“Installing an adapter” on page 66.
To replace an RAID cache card, complete the following steps:
1. Read the safety information that begins on page “Safety” on page vii and
“Installation guidelines” on page 33.
2. Touch the static-protective package that contains the new RAID cache card to
any unpainted surface on the outside of the server; then, grasp the card by the
top edge or upper corners of the card and remove it from the package.
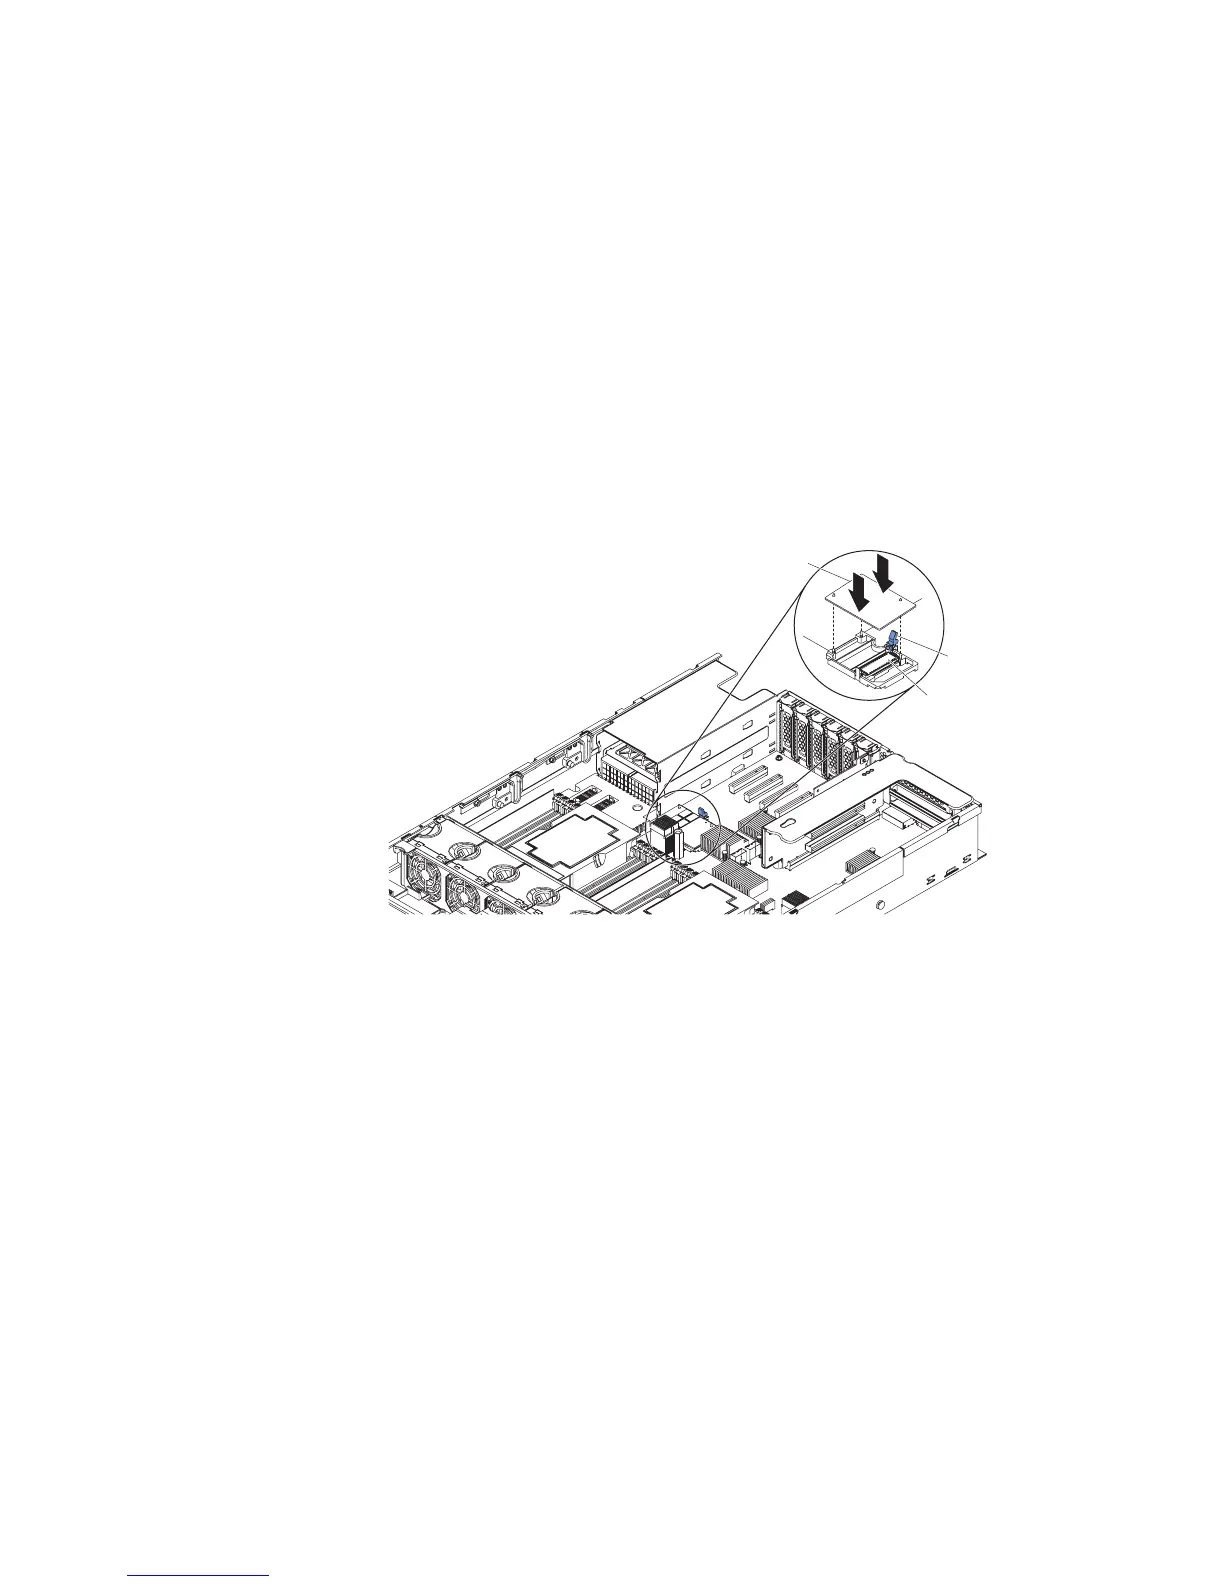
3. If you are replacing a cache card that is installed on the system board,
complete the following steps.
a. Connect the battery cable or flash power module cable to the cache card.
b. Align the cache card with the RAID cache card slot on the system board
and lower it onto the connector.
RAID cache card
RAID cache
card connector
Release
tab
c. Gently press down on the center of the cache card until it is firmly seated
into the connector.
d. Reconnect the cache card cable to the battery or flash power module in the
battery/flash power module tray.
e. Continue to step 5 on page 253.
4. If you are replacing a cache card on the RAID adapter, complete the following
steps:
a. Align the cache card with the RAID cache card slot on the RAID adapter
and lower it onto the connector.
252 System x3750 M4 Types 8722 and 8733: Installation and Service Guide

 Loading...


