2. Next, remove the electronic board from the bottom of the Cartridge Stall in the
printhead:
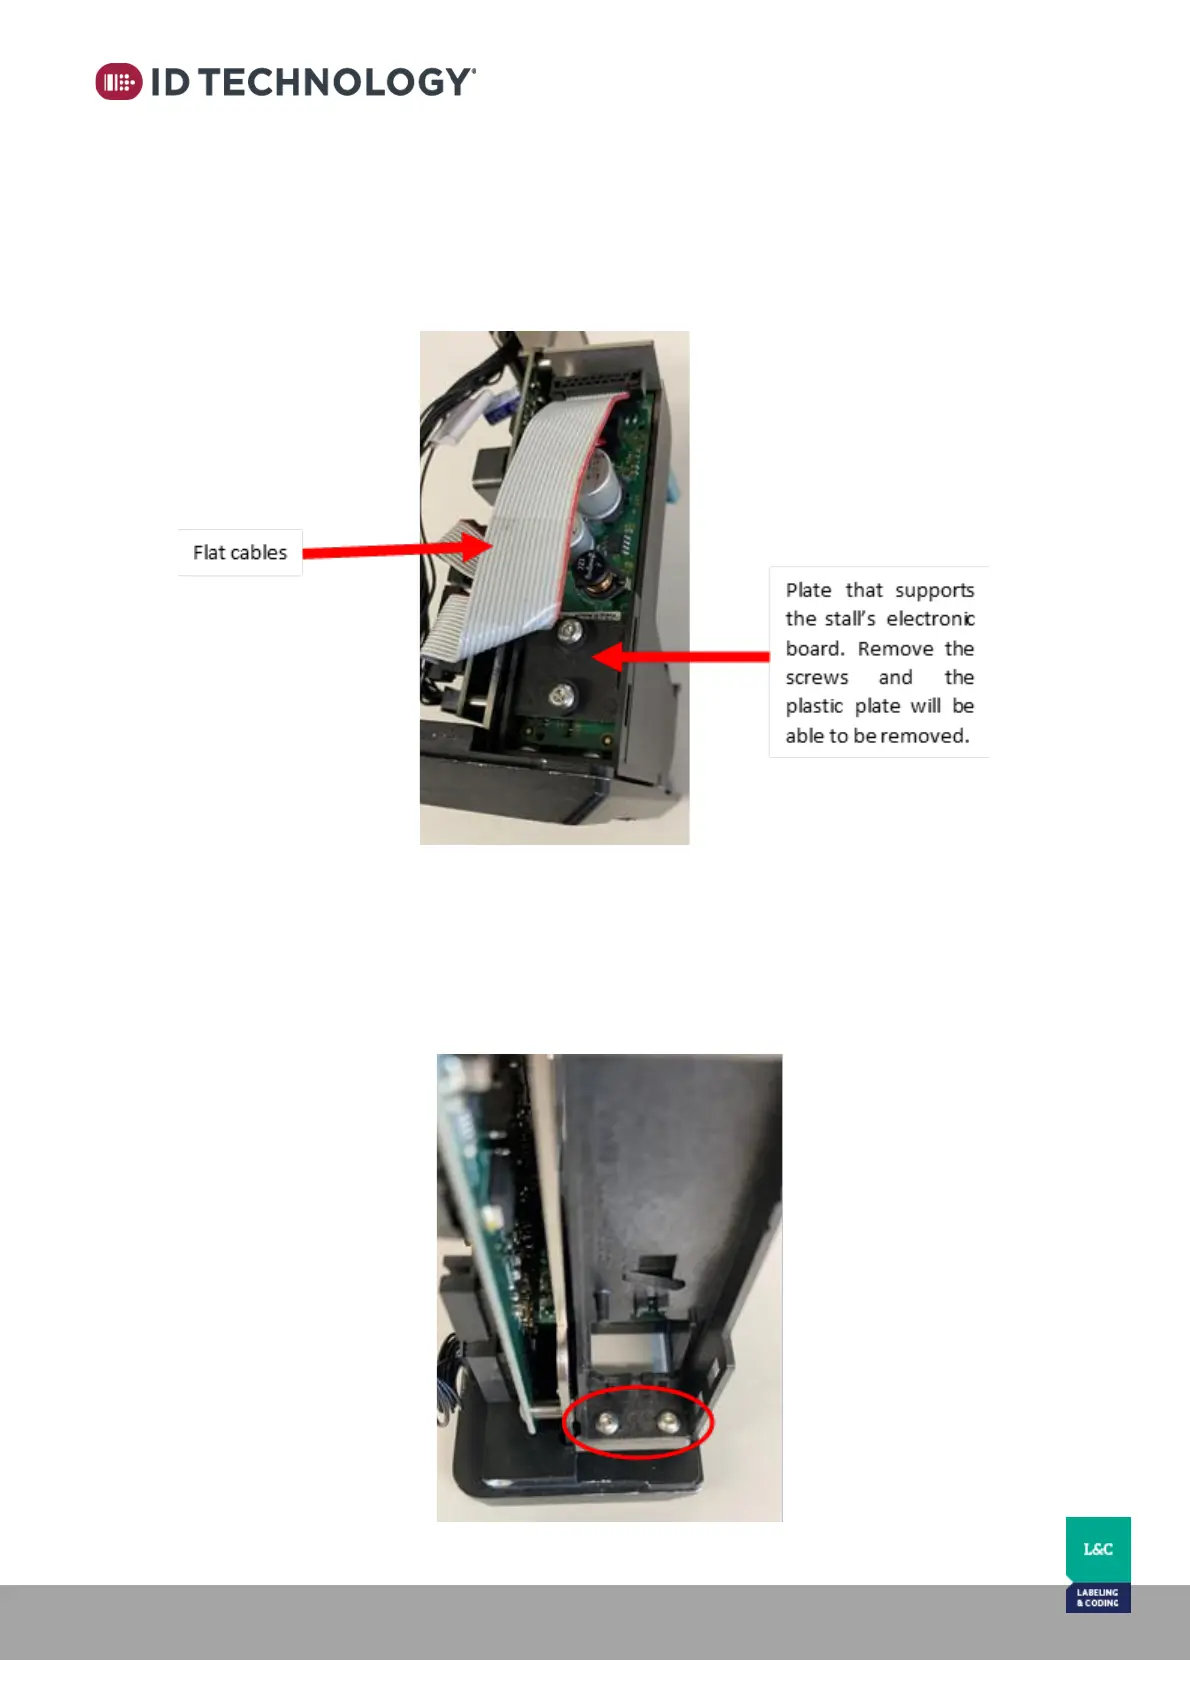
a. Remove the flat cables.
b. Remove the plate that supports the board (2 x Torx10). Pop the plate out with
a small flat head screwdriver.
3. Loosen but do not remove the two lower screws (2mm Allen wrench) holding the
bottom of the cartridge stall to the printhead face plate.