1 - 26
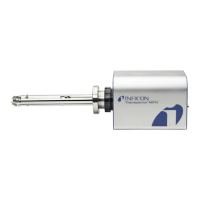
Transpector XPR 3+ Operating Manual
1.17.1 Two Digital Inputs
Logic Inputs 1 and 2 are by default set to remotely control emission status.
Connecting Pin 14 (Logic Input 1) to Pin 15 (Ground) will turn on the emission.
Connecting Pin 13 (Logic Input 2) to Pin 15 will turn off the emission. See Table 1-2.
Controlling emission through the digital inputs bypasses
all software or hardware interlocks. When using digital
inputs for controlling Transpector XPR 3+ emission,
develop an interlock that will not allow the emission to
turn on if the pressure is too high for operation of
Transpector XPR 3+.
1.17.2 One Status Relay Output
One status relay output is active (closed) when the emission is on.
See Table 1-3.
Table 1-2 Digital inputs
Emission ON PIN 14
Emission OFF PIN 13
GND PIN 15
Table 1-3 Status relay output
EMISSION ON Relay closed. PIN 2 and PIN 1connected
EMISSION OFF Relay open
CONTACT RATING 24 V(dc) at 0.5 A