16
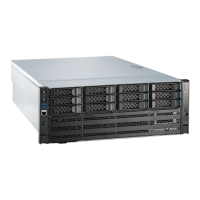
Press <->, <+> or the space key in the RAID Disk column to mark whether the
drive needs to be added to the existing RAID array. It will be prompted that the
data in the drive to be added to the RAID array will be lost, if any. Press <C> to
continue adding the drive to the RAID array. RAID Disk will be set to Yes or No,
indicating whether the drive is added to the existing RAID array or not. The
drive added first is the primary drive, and the drives added later are secondary
drives. Secondary drives will synchronize the contents of the primary drive.
Figure 4-18 Drive Selection Screen
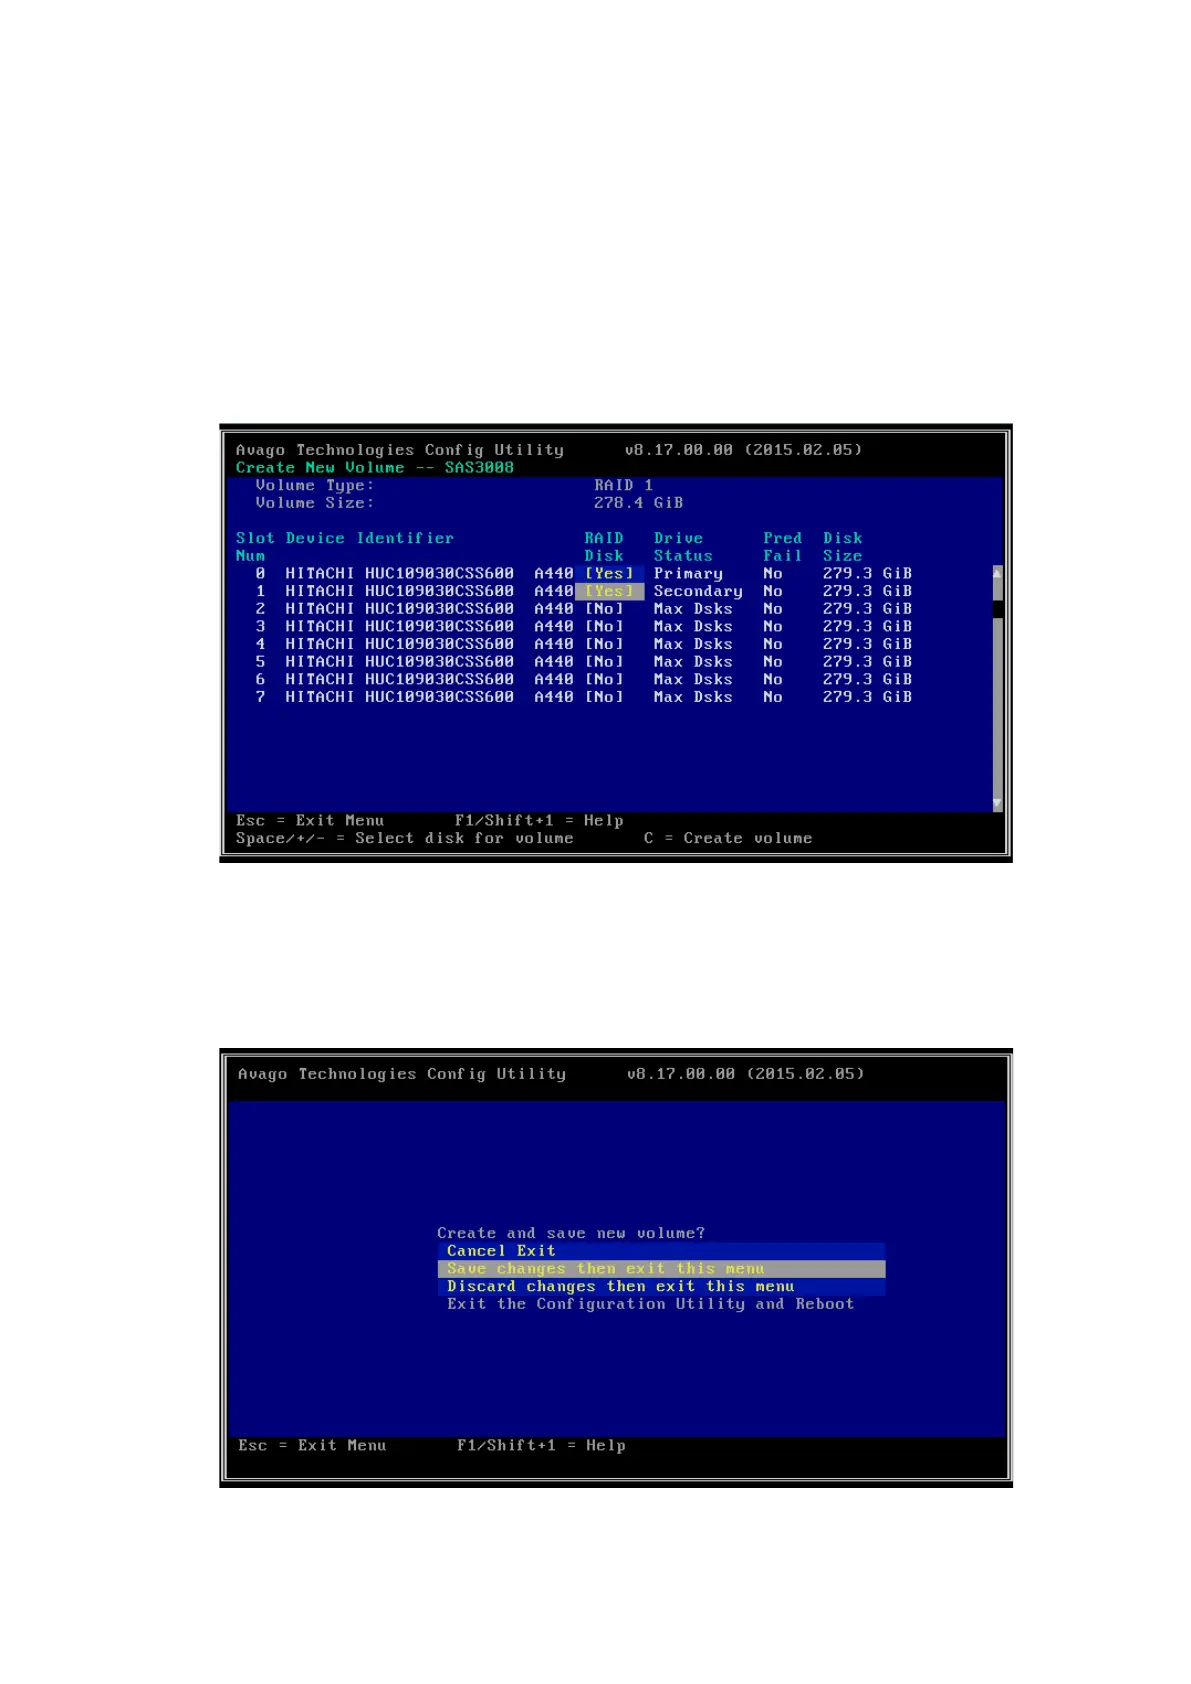
5. Press <C> to enter the creation confirmation screen. Select Save changes then
exit this menu and press <Enter> to save the configuration.
Figure 4-19 Save Changes Then Exit This Menu Screen
 Loading...