During the primary pulldown, keep a careful watch on the wet bulb indicator temperature, and do
not let it fall below 35°F (1.6°C). If the temperature is allowed to fall to 32°F (0°C), the water in the
test tube will freeze, and the result will be a faulty temperature reading.
Conduct pressure test
About this task:
If a pressure test indicates all joints are not leaking, proceed to test with appropriate refrigerant as
follows:
1. With no pressure in the system, charge refrigerant vapor into the chiller until pressure is at
least 29 psig (200 kPa) so pressure is above the saturation temperature for water to freeze.
2. Add refrigerant until the saturation pressure for the prevailing ambient temperature of the
chiller is achieved, leak checking repaired joints with a refrigerant leak detector as pressure is
increased.
3. Test around each joint and factory weld carefully and thoroughly.
4. To check for tube or tube joint leaks:
a. Isolate and drain the condenser and evaporator waterboxes
b. Purge the waterboxes and tubes with dry nitrogen through the vents or drains until the
detector does not indicate
c. Close the vents and drains and wait an hour
d. Open a vent or drain and insert the leak detector. If a leak is detected, the heads must
be removed and the source of the leak determined as outlined in Condensers and
evaporators.
Refrigerant charging
To avoid the possibility of freezing liquid within the evaporator tubes when charging an evacuated
system, only refrigerant vapor from the top of the drum or cylinder must be admitted to the system
until the system pressure is raised above the point corresponding to the freezing point of the
evaporator liquid.
While charging, every precaution must be taken to prevent moisture laden air from entering the
system. Make up a suitable charging connection from new copper tubing to fit between the system
charging valve and the fitting on the charging drum. This connection should be as short as possible
but long enough to permit sufficient flexibility for changing drums. The charging connection should
be purged each time a full container of refrigerant is connected and changing containers should be
done as quickly as possible to minimize the loss of refrigerant.
Refrigerant may be furnished in cylinders containing either 30 lb, 50 lb, 125 lb, 1,025 lb or 1750 lb.
(13.6 kg, 22.6 kg, 56.6 kg, 464 or 794 kg) of refrigerant.
Checking the refrigerant charge
The refrigerant charge is specified for each chiller model in Table 95. Charge the correct amount of
refrigerant.
Charge the refrigerant in accordance with the method shown in this section. The weight of the
refrigerant charged should be recorded after initial charging.
During operation, the refrigerant charge level is correct when the condenser level is about 1
inch above the subcooler, and the measured Evaporator Approach and Discharge Refrigerant
Gas Superheat are at the design values for the condition. Design values would be provided upon
request from the chillers sales engineer from the chiller rating program. These depend on tube
selection, chilled fluid type, operating head, and operating condition. The equations (below) define
163
YMC
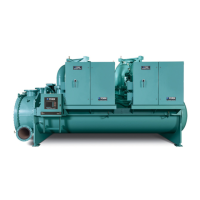
2
Mod B with OptiView
™
Control Center