– 133 –
WARNING :
Turn OFF the power before starting the work so as to prevent accidents caused by abrupt start of the sewing machine.
Trouble Cause (1) Cause (2) Check and corrective measures
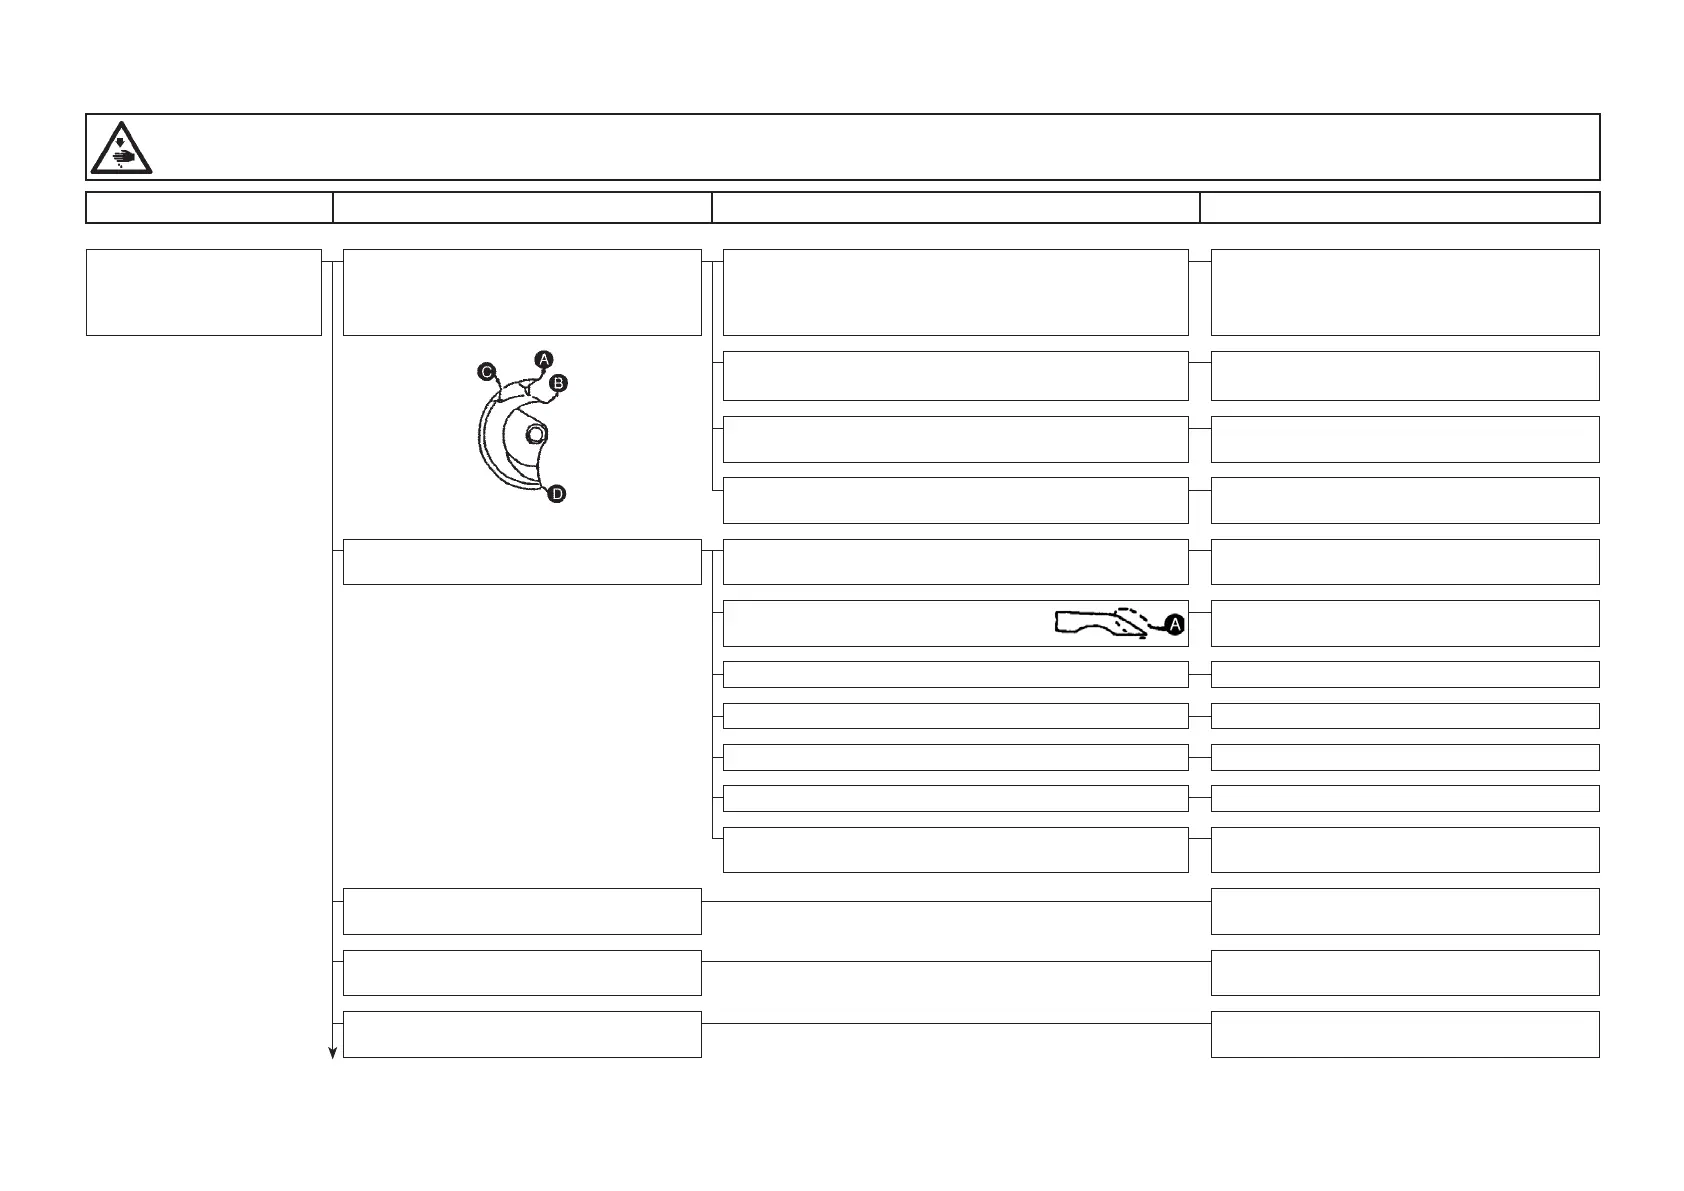
4. Thread breakage 4-1) Scratches on the inner hook 1-A) Scratches on section
A
(Contact of the inner hook
with the needle)
After polishing the blade point of the inner hook
with oil stone, polish it with polishing powder.
Properly adjust the clearance between the nee-
dle and the inner hook.
1-B) Scratches on section
B
(Scratches occur when the
needle is bent or broken.)
After polishing the blade point of the inner hook,
polish it with polishing powder.
1-C) Scratches on section
C
(Needle scratches the inner
hook when removing the inner hook.)
After polishing the blade point of the inner hook,
polish it with polishing powder.
1-D) Scratches on section
D
After polishing the blade point of the inner hook,
polish it with polishing powder.
4-2) Thread enters into the shuttle. 2-A) Position of the shuttle upper spring is wrong. Properly adjust the position of the shuttle upper
spring.
2-B) Blade point section
A
of the shut-
tle is round.
Replace the inner hook.
2-C) Position of the shuttle is wrong. Properly adjust the position of the shuttle.
2-D) Needle thread tension is too low. Properly adjust the needle thread tension.
2-E) Thread take-up spring tension is too low. Adjust the thread take-up spring.
2-F)
Length of the remaining needle thread is too long.
Properly adjust the thread tension No. 1 (asm.).
2-G) The specied inner hook and shuttle driver are not
used.
Use the specied parts.
4-3) Scratches on the shuttle driver. Remove the scratches and polish with buff, or
replace the shuttle driver.
4-4) Clearance between the shuttle driver
and the inner hook is too small.
Properly adjust the clearance between the shut-
tle driver and the inner hook.
4-5) Scratches on the needle hole guide. Remove the scratches and polish with buff, or
replace the needle hole guide.
To the next page

 Loading...