– 32 –
(20) AT unit connection/disconnection
WARNING :
Turn OFF the power before starting the work so as to prevent accidents caused by abrupt start of the
sewing machine.
Procedures of disassembling/assembling
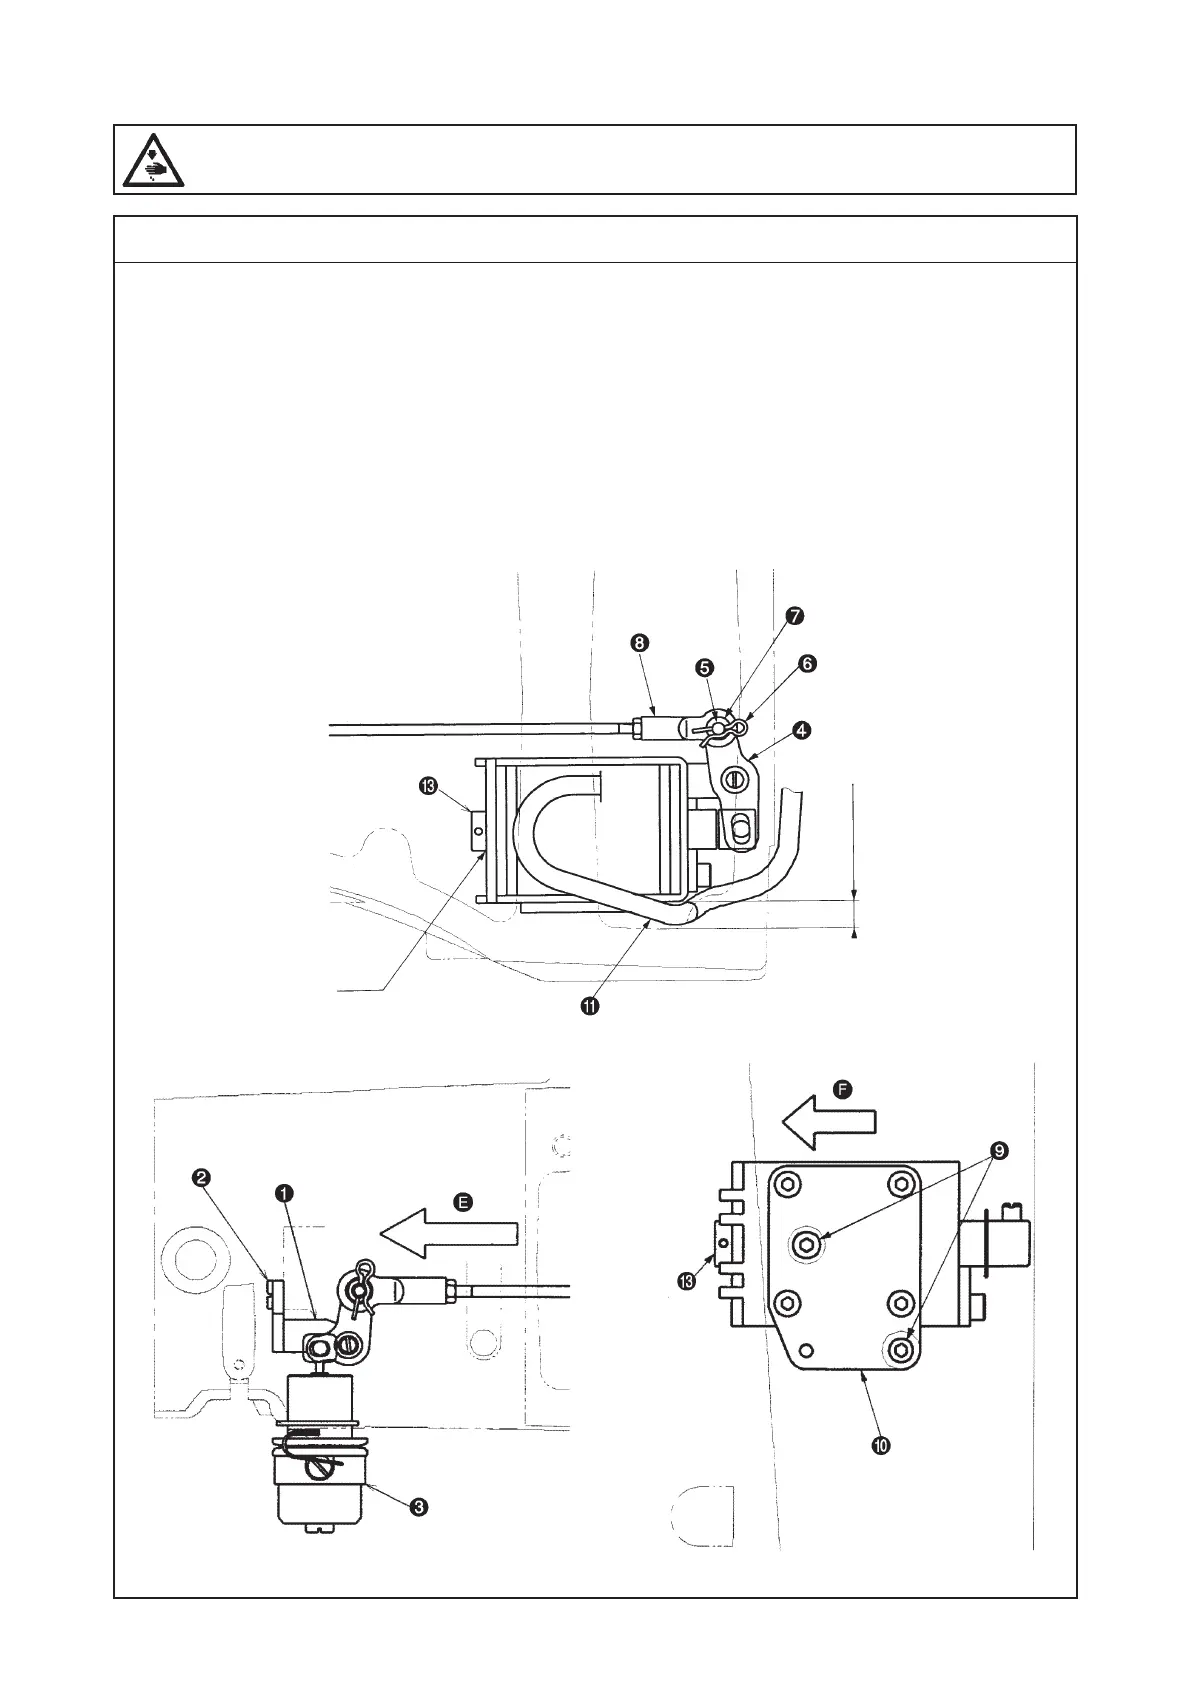
1. Remove the setscrew
❷
oftheATlinkunit(front)
❶
and take out the second thread tension
❸
. (Refer
to "3.-(19) Second thread tension connection/disconnection".)
2. Draw out the cotter pin
❻
from the pin block
❺
oftheATlinkunit(rear)
❹
. Be careful not to drop the
washer
❼
at that time.
* Work becomes easier if the main shaft motor is removed.
3.Liftthejointblock
❽
oftheATunitupwardsandtakeitoffthepinblock
❺
oftheATlinkunit(rear)
❹
.
4.DrawouttheATlinkunit(front)
❶
from the plane side (in the direction of the arrow
E
) and remove it.
5. Remove the two setscrews
❾
andtakeouttheATsolenoidunit
.
6.Forreassembly,followthestepsof5.to1.above.
Solenoid side
Close contact

 Loading...