– 12 –
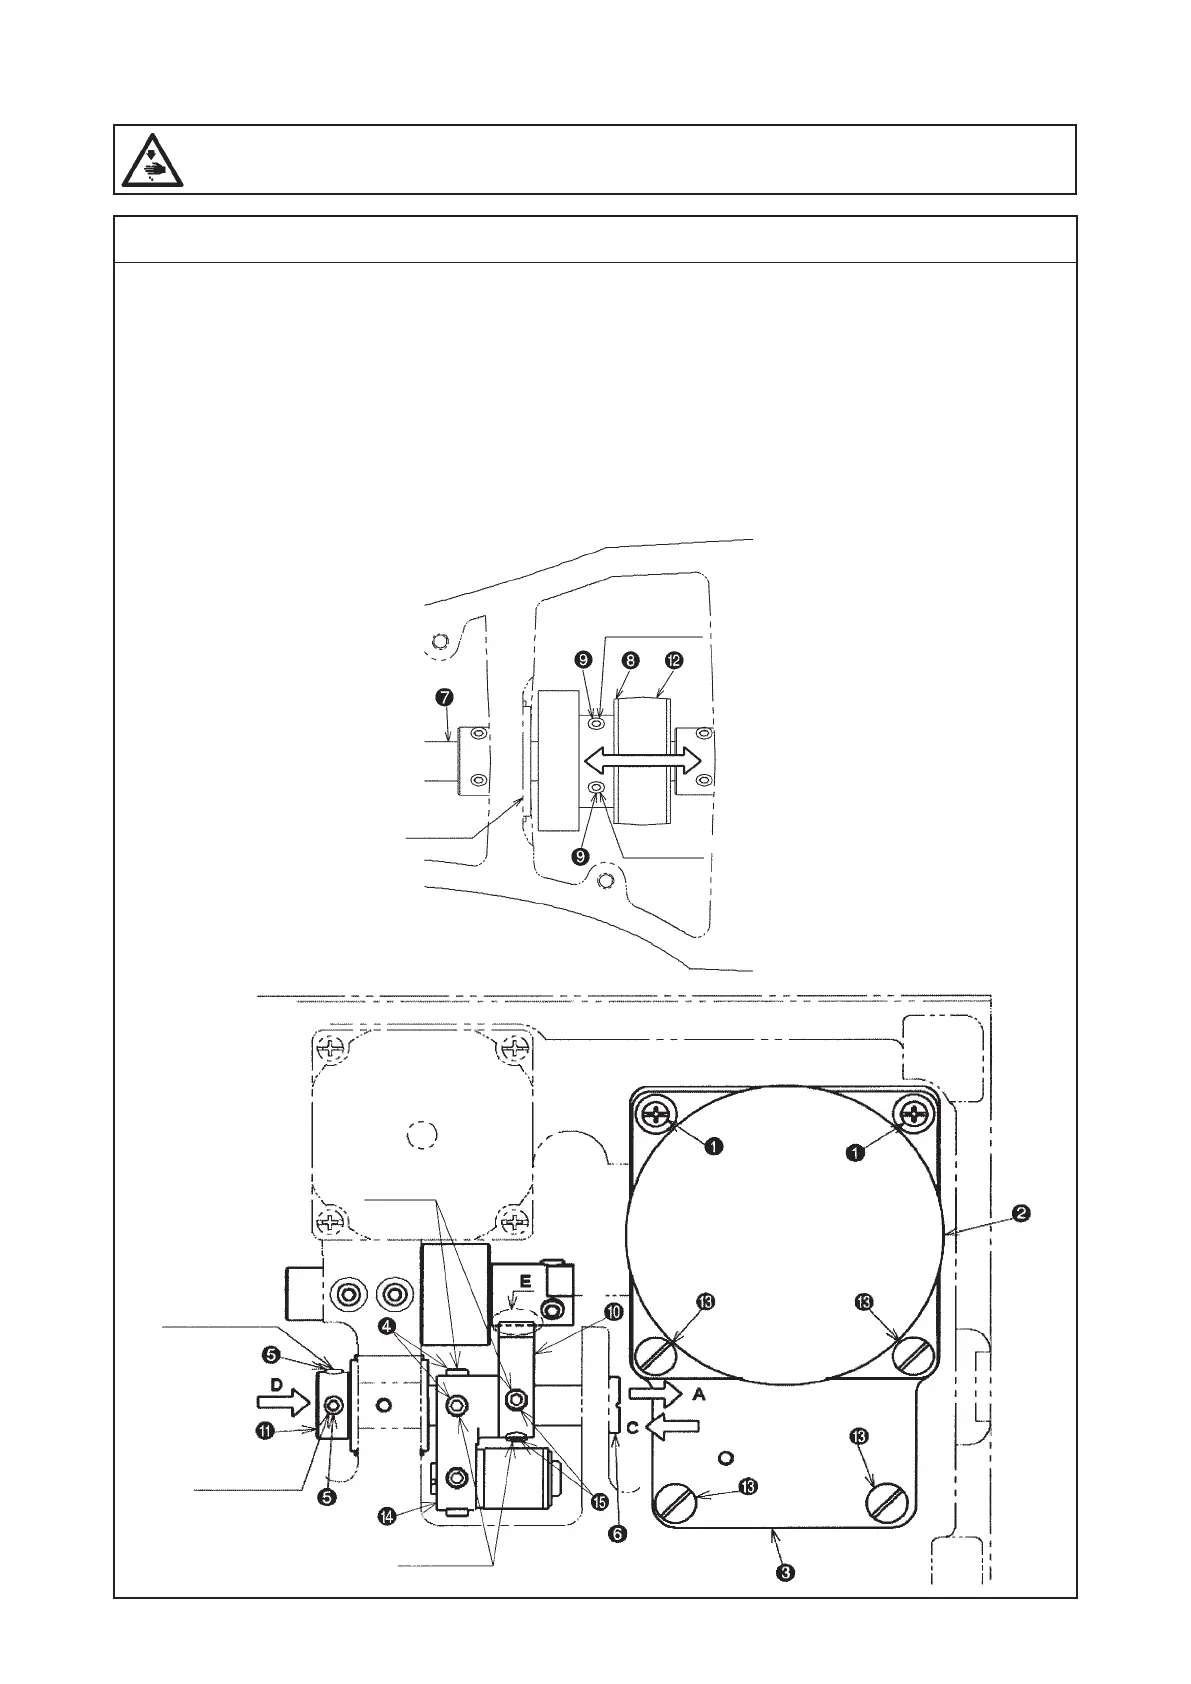
(3) Crank connecting rod connection/disconnection
WARNING :
Turn OFF the power before starting the work so as to prevent accidents caused by abrupt start of the
sewing machine.
Procedures of disassembling
1. Remove the two setscrews
❶
and four setscrews
.Thentakeoutthelengthwisefeedmotor
❷
and
the crosswise feed motor mounting plate
❸
.
2. Loosen the two setscrews
❹
, two setscrews
and the two setscrews
❺
. At that time, the second
screwsshouldbeloosenedrstforthesetscrews
❹
,
❺
and
.Therstscrewsofthesetscrews
❹
,
❺
and
shouldbearrangedsothattheycancomecompletelyofftheatsectionoftheoscillatorshaft
❻
.
3. Pull out the oscillator shaft
❻
in the direction of the arrow A.
4. Remove the main shaft
❼
accordingto"3.-(1)Mainshaftconnection/disconnection."Then,takeoutthe
crank rod unit
.
No. 1 screw
No. 2 screw
No. 2 screw
No. 1 screw
No. 1 screw
No. 2 screw
Face B

 Loading...