Chapter 1. Setting Up the RF ValProbe
RF ValProbe® User’s Manual 15
1.3.2 Connecting an External Sensor and Auxiliary Inputs (cont.)
Note: For a 2 or 5-channel Logger, the sensors are prewired to terminal blocks inside
the Logger. To replace or reattach a sensor, you must remove the cover and
retaining bar, remove the terminal block for the existing sensor, attach the
terminal block of the new sensor, and replace the retaining bar and cover.
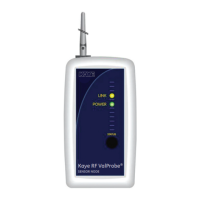
1.3.3 Setting Up the Loggers
When you are setting up the Loggers, you must first be sure that they are switched on, and
that they have the same network ID (from 0 to 9 or A to F) as the Base Station. (For
instance, all Loggers must have the network ID “5” if the Base Station has the ID “5”.)
IMPORTANT: If you have more than one Base Station, each one must
be configured with a
unique network ID.
To switch on the Logger, see the back of the Logger above the battery panel, as shown in
Figure 4 on page 7. Slide the switch below the network ID wheel to the right to turn on the
logger.
Note: All Base Stations and Loggers are shipped with an initial Network ID of 0. To
change the Base Station Network ID, install the RF ValProbe software and refer to
“Selecting a Communications Option and Establishing Preferences” on page 36.
If you need to adjust the Logger’s network ID, use a small screwdriver to turn the arrow in
the middle of the network ID wheel in Figure 4 on page 7. Be sure the arrow points to the
appropriate ID number. (You can choose from numbers 0 through 9, and letters A through
F.)
Note: You must change the Logger network ID before you switch on the Logger. If you
have already switched the Logger on, switch it off and then turn it back on so the
Logger can read the correct ID.