SECTION 3 - PARTS, ASSEMBLIES & HARDWARE
1-3-7
3-7
© 2018 Konami Gaming Inc. P/N 810352
CONCERTO CRESCENT
(Original Instructions)
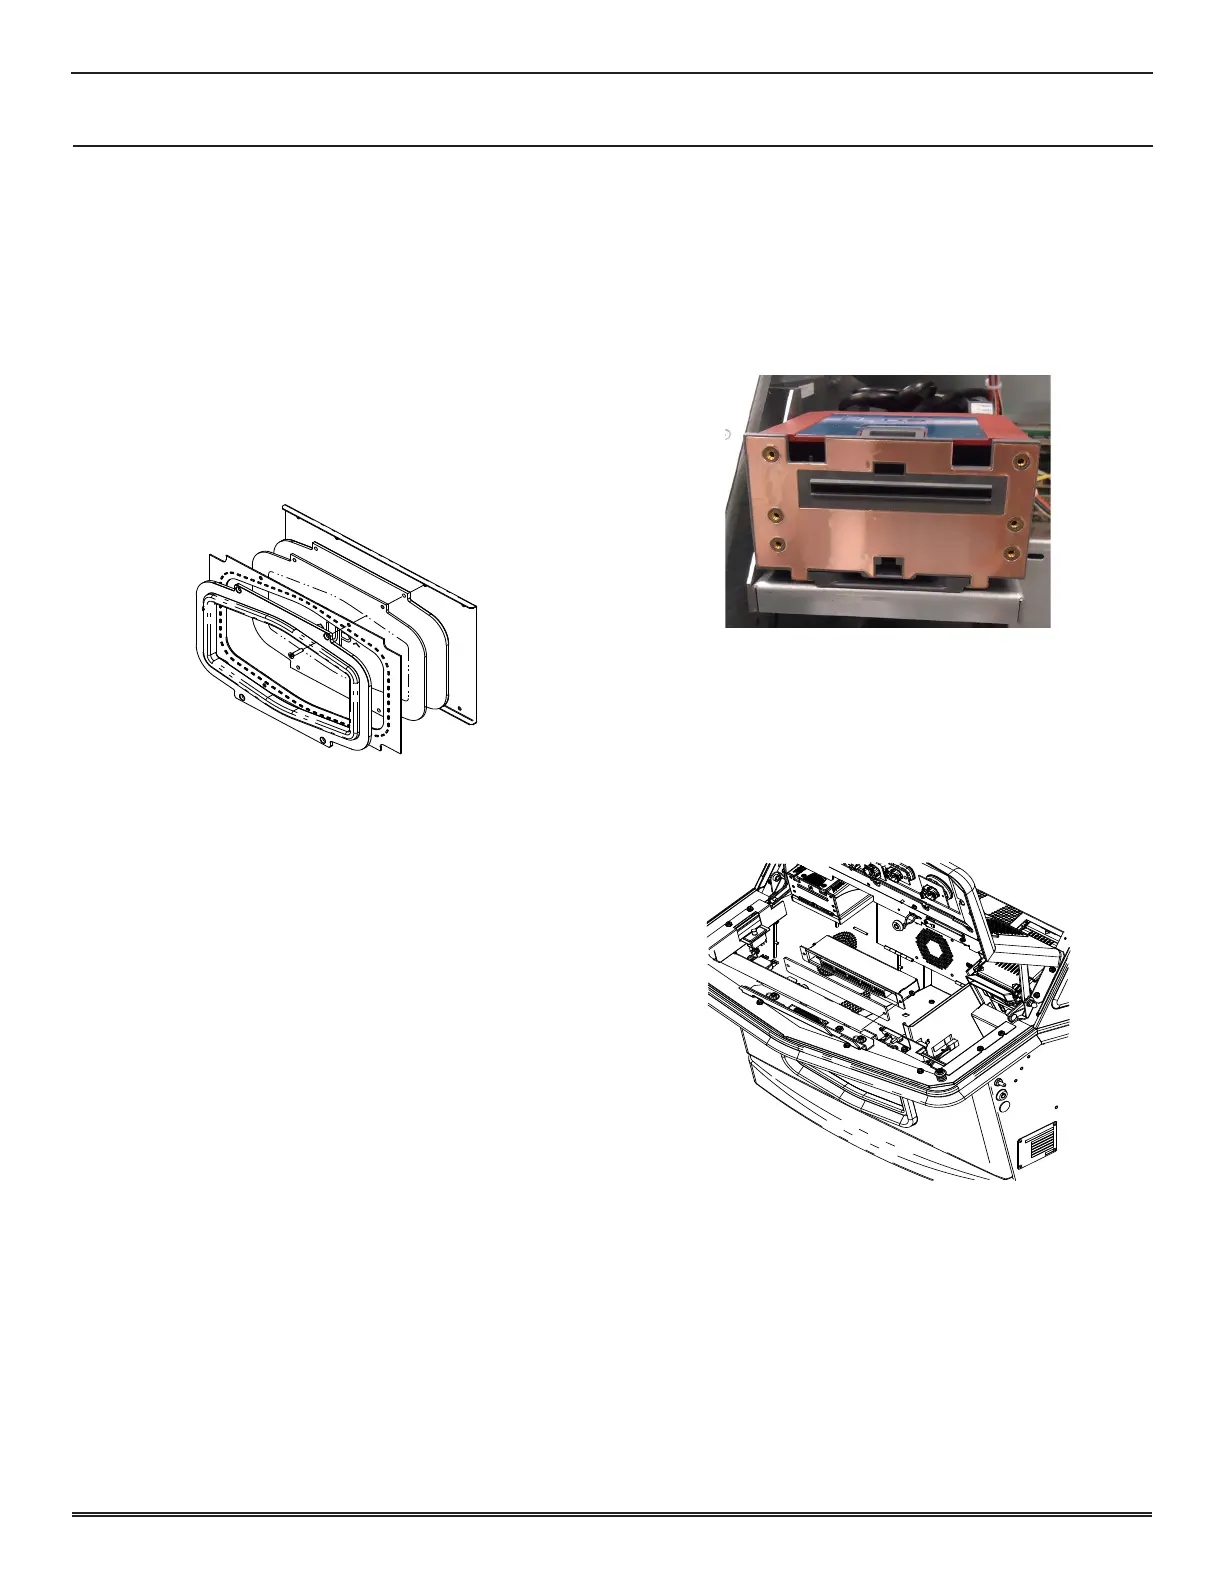
BELLY PLEX
reMoval
1� Unlock and open Sub Door�
2� Turn off machine power�
3� Disconnect harness from Logo Assembly�
4� Remove the four 8-32 self-tapping screws securing the
Logo Assembly�
5� Remove Logo Assembly�
6� Remove the four 8-32 at head screws.
7� Remove Belly Plex�
installation
1� Install Belly Plex and secure with the four 8-32 at head
screws�
2� Install Logo Assembly to Sub Door�
3� Secure with the four 8-32 self-tapping screws�
4� Connect harness to Logo Assembly�
5� Turn on machine power�
6� Close and lock Sub Door�
PRINTER ASSEMBLY
reMoval
1� Unlock and open Main Deck Door and turn off machine
power�
2� Disconnect harnesses from Printer Assembly�
3� Remove four screws securing Printer to mounting bracket�
4� Remove Printer�
installation
1� Install Printer onto mounting bracket and secure with
four screws�
2� Connect harnesses to Printer Assembly�
3� Turn on main power�
4� Close and lock Main Deck Door�
METER ASSEMBLY
reMoval
1� Unlock and open Deck Door�
2� Turn off machine power�
3� Remove the two 8-32 nuts securing the Meter Assembly�
4� Remove Meter Assembly and disconnect harness�
installation
1� Connect harness to Meter Assembly�
2� Install Meter Assembly to mounting studs and secure with
the two 8-32 nuts�
3� Turn on machine power�
4� Close and lock Deck Door�